This product is warranted to be free from defects in
material and workmanship for a period of (1) year
from the date of purchase, except as noted below.
BabySense LLC will repair or replace this product, at
our option, at no cost. This warranty does not apply to
product that has been damaged as a result of
improper maintenance or other misuse. This warranty
is also void if the owner repairs or modifies the
product in any way. BabySense LLC is not liable for any
incidental or consequential damage with regard to this
product. Warranty also excludes any liability other than
above. No other warranties are given. If you have a
claim under this warranty, do not return to the store.
Please contact BabySense customer service at:
customerservice@babysensellc.com
Distributed by:
BabySense LLC
3910 Adler Place
Suite 115
Bethlehem, PA 18017
For additional information, please visit our website or
call the toll free number:
Website: www.babysensellc.com
Toll free number: 1-877-780-3033
Made by Hisense Ltd.
ISO 9001:2008 and ISO 13485:2003 certified
23, Becker St. Rishon le Zion 7535929, Israel
www.hisense.co.il
Limited 1 Year warranty
Since 1991
User Guide
English
4
V.BS5S.3.EN.4.15
• Baeries are not inserted
correctly or may be flat.
• Check baeries are inserted in the Control Unit observing the
correct polarity.
• Control Unit requires 4 X AA 1.5V Alkaline baeries (not supplied).
• Baeries low. • If red low-baery warning light flashes, replace all baeries as
soon as possible. If in addion clicking is heard, all baeries must
be replaced immediately.
• Sensor pad is out of order.
• Cable is connected to
monitor’s blocked socket.
• Connect one sensor pad lay the baby on the bed for 1 minute.
If the alarm does not acvate, the sensor pad is in order. If the alarm
acvates, disconnect and place the sensor pad aside.
• Connect the other sensor pad and repeat steps above.
• Do not connect any cables to the blocked socket (only to “SENSOR” socket).
• The maress is not
touching the sensor pads.
• Make sure that the maress and the sensor pads
are touching.
• The maress is raised (there is
an object near the sensor pads).
• Make sure that there are no objects next to the sensor pads
• Placing two sensors next to each
other or using one sensor when the
baby is of crawling age, or using two
sensor pads far apart from
each other when baby is young and
is not crawling yet.
• Connect according to instrucons.
• It is important to use only one sensor pad when the baby is young and is
not crawling yet.
• It is important to make sure that two sensor pads are used when the baby is
moving around.
• Make sure the sensors are placed directly underneath the baby's posion in
the bed/crib.
• The maress does not enable
transfer of baby movements. (a rigid
maress, a maress with springs or
a maress with air pockets).
• Place extra plywood under the sensor pad so that the sensor pad and
the maress will be ghtly pressed together (see page 2, secon 4).
• Performance test is not correct. • Do not conduct performance test by picking up the baby out of bed
and waing for the alarm to sound.
Kindly conduct performance test according to guidance in page 3.
• Environmental influences
detected by the sensor
pads, such as wind, fan, air
condioner, baby mobile toy,
vibraons.
• Perform a test which will detect the source of the movement that the
device detects. For example, sources of wind such as: air condioner, an
open window or a fan; movements of a baby mobile (which can vibrate
even if it's not turned on) walking around the bed area. Soluons:
Eliminate sources of wind, remove the baby mobile etc. Aer neutralizing
all environmental influences, perform the test again. If even aer
neutralizing all of the environmental influences, the alarm does not go
off within 20 seconds, perform the following:
1. Test the control unit:
- Disconnect all cables from the control unit.
- Turn control unit on (with no cables aached).
- Alarm acvaon within 20 seconds indicates that the unit is OK –
proceed to the next steps.
- If the alarm does not sound within 20 seconds, stop using the device
and contact your local distributor.
2. Test each sensor pad separately:
- Connect one sensor pad to either “SENSOR” socket on control unit.
- Turn control unit on and take two steps back from the bed.
- Alarm acvaon within 20 seconds indicates that the sensor is OK –
perform the above procedures with the second sensor pad.
- If the alarm does not sound within 20 seconds, place the sensor pad aside.
Note: If one of the sensor pads is NOT OK, connue using the product
with only the one correctly funconing sensor. If one or both sensors
are NOT OK, contact your local distributor for further guidance.
3. Test two sensor pads together:
- If both sensors were OK in Step 2, connect both sensors to “SENSOR”
sockets on the control unit.
- Turn control unit on and take two steps back from the bed.
- Alarm acvaon within 20 seconds indicates that the sensors are OK –
connue using the product.
- If the alarm does not sound within 20 seconds, connect one sensor only and
continue using the product. Contact your local distributor for further guidance.
Solution
Possible Cause
Symptom
Lights on Control Unit
don’t illuminate when
turned ON
Low baery warning
(red light) on the
Control Unit
False alarm up to 1/2
minute from acvang
False alarm aer 1/2
minute from acvang
Delayed alarms
while taking the baby
out of the bed
The alarm does
not go off within
20 seconds when
performing the
correct
performance test
Troubleshooting Guide
5
Other phenomena, symptoms, malfunctions – if you cannot find and solve the
problem, please contact us at www.babysensellc.com
Powered by 4 size AA, 1.5 volt batteries.
Power consumption approx. 1mA.
Battery life approx. 6 months using alkaline batteries.
Alarm volume typically 85dB SPL at distance of
3.5 feet.
Size of sensor pad is 216 mm.
Technical Specifications
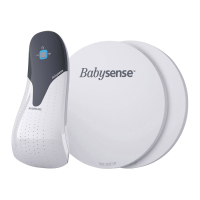
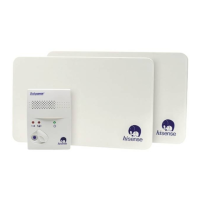
Contents
• Control Unit
• Control Unit Holder
• Optional hanging hook
• 2 Sensor pads
• 2 Cable Ties
• User guide
Please note that the batteries are not supplied.
Babysense requires no special treatment beyond
replacing batteries when the battery indicator light
goes on. The sensor pads and control unit may be
wiped with a damp cloth.
Batteries should be removed and the device stored in
a dry shaded place when not in use.
Caring for your Babysense
It is recommended to replace sensors
every two years
Infant Movement Monitor
5S
 Loading...