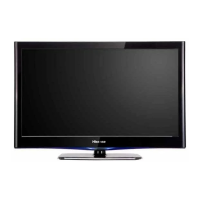
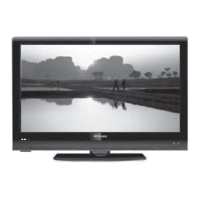
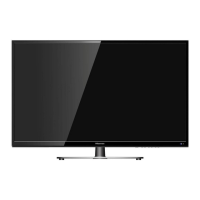
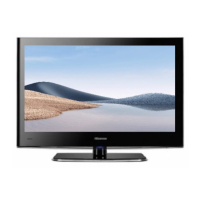
This document is a service manual for Hisense LCD Televisions, specifically models LCD42P69P and LCD47P69P, with chassis MTK8222. It provides comprehensive information for servicing and maintaining these devices, including technical specifications, operational features, and troubleshooting guidelines.
Function Description
The Hisense LCD Televisions are designed for displaying video content. They incorporate a Liquid Crystal Display (LCD) panel as the primary display technology. The televisions support various input sources, including RF (antenna), AV (composite video), VGA (PC input), HDMI, YPbPr (component video), and S-Video. They feature an On-Screen Display (OSD) menu for user adjustments and a factory/service OSD menu for advanced settings and calibration. The devices are equipped with an internal audio system, providing sound output. Software upgrading is supported via USB or through a serial port connection using the MtkTool software.
Important Technical Specifications
Model LCD42P69P:
- Dimension (WxHxD) (mm): 1033x113.5x681 (without stand), 1033x302x738 (with stand)
- Weight (kg): 21 (without stand), 24 (with stand)
- LCD Panel Minimum Size (diagonal): 107 cm (42 inches)
- Screen Resolution: 1920x1080
- Power Consumption: 250W
- Audio Power: 8W+8W
- Receiving Systems: PAL (D/K, I, B/G, L, L'), SECAM
- Channel Range: Z1-C57, Z1-Z38
- Environmental Conditions: Temperature 5°C-35°C, Humidity 20%-80% RH, Atmospheric pressure 86kPa-106kPa
- Component Input: 480I, 480P, 576I, 576P, 720P/60Hz, 1080I/50Hz, 1080I/60Hz, 1080P/50Hz, 1080P/60Hz
- VGA Input: VGA (640x480 60Hz), SVGA (800x600 60Hz), XGA (1024x768 60Hz)
- HDMI Input: RGB/60Hz (640x480, 800x600, 1024x768), YUV/50Hz (576P, 720P, 1080I, 1080P), YUV/60Hz (480I, 480P, 720P, 1080I, 1080P)
Model LCD47P69P:
- Dimension (WxHxD) (mm): 1140x747x112 (without stand), 1140x806x346 (with stand)
- Weight (kg): 25.5 (without stand), 31 (with stand)
- LCD Panel Minimum Size (diagonal): 119 cm (47 inches)
- Screen Resolution: 1920x1080
- Power Consumption: 280W
- Audio Power: 8W+8W
- Receiving Systems: PAL (D/K, I, B/G, L, L'), SECAM
- Channel Range: Z1-C57, Z1-Z38
- Environmental Conditions: Temperature 5°C-35°C, Humidity 20%-80% RH, Atmospheric pressure 86kPa-106kPa
- Component Input: 480I, 480P, 576I, 576P, 720P/60Hz, 1080I/50Hz, 1080I/60Hz, 1080P/50Hz, 1080P/60Hz
- VGA Input: VGA (640x480 60Hz), SVGA (800x600 60Hz), XGA (1024x768 60Hz)
- HDMI Input: RGB/60Hz (640x480, 800x600, 1024x768), YUV/50Hz (576P, 720P, 1080I, 1080P), YUV/60Hz (480I, 480P, 720P, 1080I, 1080P)
Both models feature a Color Active Matrix Liquid Crystal Display with an External Electrode Fluorescent Lamp (EEFL) backlight system. They employ a-Si Thin Film Transistor as the active element. The display type is normally black mode, with a 42.02 inch (LCD42P69P) or 46.96 inch (LCD47P69P) diagonally measured active display area. The WUXGA resolution (1080 vertical by 1920 horizontal pixel array) ensures high-definition display. Each pixel is divided into Red, Green, and Blue sub-pixels or dots, which are arranged in a vertical stripe. The gray scale and luminance of the sub-pixel color are determined with a 10-bit gray scale signal for each dot, thus presenting a palette of more than 1.06 Billion (FRC) colors. The interface is designed to apply the 10-bit smart LVDS interface. The TV is intended to support LCD TV, SVGA, WUXGA, high brightness, super wide viewing angle, high color gamut, high color depth, and fast moving picture response time.
Usage Features
The front cabinet of the TV includes a power indicator (Red: Standby, Blue: On), a main power switch, and a remote sensing window. Control buttons for Menu, Source Select, Volume Up/Down, and Channel Up/Down are also located on the front.
The back cabinet provides a comprehensive set of input/output ports:
- HDMI: Multiple HDMI ports (HDMI1, HDMI2, HDMI3) for digital audio/video input.
- AV: Composite video (AV1, AV2) with corresponding left and right audio inputs.
- YPbPr (Component): Two sets of component video inputs (COMP1, COMP2) with left and right audio inputs.
- VGA: D-sub 15-pin connector for PC input.
- PC Audio: 3.5mm audio input for PC.
- USB: USB1 and USB2 ports for multimedia playback and software upgrades.
- Headphone: 3.5mm audio output.
- S-Video: S-video input.
- Antenna: RF input for terrestrial broadcast.
- Coaxial: Digital audio output.
- AV Out: Composite video output with left and right audio outputs.
The OSD menu allows users to adjust various picture and sound settings. The factory/service OSD menu offers advanced calibration options, including white balance, color temperature, video curve, and factory option settings. It also provides information on software version and allows for clearing EEPROM data.
Maintenance Features
The service manual emphasizes several precautions and notes for safe handling and servicing:
- Safety First: Always prioritize safety. Before servicing, read the safety precautions in the manual. Replacement parts must be specified by the manufacturer.
- Working Space: Secure a sufficient working space.
- Power Disconnection: Always turn off the POWER Button and disconnect the power cable from the TV's power source before any work, except for adjustments and checks.
- Discharge Time: To prevent electric shock and PC board breakage, wait at least 30 seconds after turning off the main power before starting service work. For the power board, wait at least 2 minutes.
- ESD Precautions: All ICs and many other semiconductors are susceptible to electrostatic discharges (ESD). Handle with care during repair to reduce life drastically. When repairing, make sure to connect the same potential as the mass of the set by a wristband with resistance. Keep components and tools at the same potential.
- Cable Management: Never replace modules or other components while the unit is switched on. When making settings, use plastic rather than metal tools. This will prevent any short circuits and the danger of a circuit becoming unstable.
- Electrical Shock Prevention: To prevent electrical shock, do not use a polarized AC plug with an extension cord, receptacle, or outlet unless the blades can be fully inserted to prevent blade exposure. To prevent electrical shock, match wide blade or plug to wide slot, fully insert.
- Replacement Parts: When replacement parts are required, ensure they meet the same characteristics as the original part. Unauthorized substitutions may result in fire, electric shock, or other hazards.
- Safety Regulations: Safety regulations require that after a repair, the set must be returned to its original condition. In particular, attention should be paid to the following points:
- The wire trees should be routed correctly and fixed with the mounted cable clamps.
- The insulation of the mains lead should be checked for external damage.
- Do not touch Signal and Power Connector while the product operates.
- Do not touch EMI ground part and Heat Sink of Film Filter.
- Do not supply a voltage higher than that specified to this product. This may damage the product and may cause a fire.
- Do not use this product in locations where the humidity is extremely high, where it may be splashed with water, or where flammable materials surround it. Do not install or use the product in a location that does not satisfy the specified environmental conditions. This may damage the product and may cause a fire.
- If a foreign substance (such as water, metal, or liquid) gets inside the panel module, immediately turn off the power. Continuing to use the product may cause fire or electric shock.
- If the product emits smoke, and abnormal smell, or makes an abnormal sound, immediately turn off the power. Continuing to use the product, it may cause fire or electric shock.
- Do not disconnect or connect the connector while power to the product is on. It takes some time for the voltage to drop to a sufficiently low level after the power has been turned off. Confirm that the voltage has dropped to a safe level before disconnecting or connecting the connector.
- Do not pull out or insert the power cable from/to an outlet with wet hands. It may cause electric shock.
- Do not damage or modify the power cable. It may cause fire or electric shock.
- If the power cable is damaged, or if the connector is loose, do not use the product; otherwise, this can lead to fire or electric shock.
- If the power connector or the connector of the power cable becomes dirty or dusty, wipe it with a dry cloth. Otherwise, this can lead to fire.
- Use only with the cart, stand, tripod, bracket, or table specified by the manufacturer, or sold with the apparatus. When a cart is used, use caution when moving the cart/apparatus combination to avoid injury from tip-over.
- LCD Panel Handling:
- When installing the LCD module in, and removing it from the packing carton, ensure at least two persons perform the work.
- When the surface of the panel comes into contact with cushioning materials, ensure no foreign matter is on top of the cushioning materials before the surface of the panel comes into contact. Failure to observe this precaution may result in the surface of the panel being scratched by foreign matter.
- When handling the circuit board, ensure to remove static electricity from your body before handling the circuit board.
- Be sure to handle the circuit board by holding the large parts such as the heat sink or transformer. Failure to observe this precaution may result in the occurrence of an abnormality in the soldered areas.
- Do not stack the circuit boards. Failure to observe this precaution may result in problems resulting from scratches on the parts, the deformation of parts, and short-circuits due to residual electric charge.
- Routing of wires and fixing them in position must be done in accordance with the original routing and fixing configuration when servicing is completed. All the wires are routed far away from the areas that become hot (such as the heat sink). These wires are fixed in position with wire clamps so that the wires do not move, thereby ensuring they are not damaged and their materials do not deteriorate over long periods of time. Therefore, route the cables and fix the cables to the original position and states using the wire clamps.
- Perform a safety check when servicing is completed. Verify that the peripherals of the serviced points have not undergone any deterioration during servicing. Also verify that the screws, parts and cables removed for servicing purposes have all been returned to their proper locations in accordance with the original setup.
Software Upgrading:
- MtkTool: The software can be upgraded using MtkTool, which requires a USB-to-serial port cable connected to the TV's RS232 port. The process involves installing the Prolific USB-to-Serial Comm Port driver, selecting the correct COM port, setting the baud rate to 115200, and loading the firmware file (*.bin).
- USB Direct Upgrade: For MTK8222 Series, software can be updated directly via USB. The update file (HISENSE.bin) should be placed in the root directory of a USB drive. The TV will automatically detect the upgrade file and prompt the user to start the upgrade. After upgrading, it is necessary to confirm the software in the Factory Menu and select "CLEAR UNPROTECTLLY".
Troubleshooting:
The manual provides flowcharts for troubleshooting common issues:
- Remote Control: Checks for battery, remote control unit, IR receiver, LED & IR board, and LED & IR cable.
- Function Key: Checks for button switches, key board, and key board cable.
- TV Won't Power On: Checks for LED light, power inlet, power cord, signal source, OSD, main board, panel, and power board.
- Audio Issues: Checks for connector, speaker wire, speaker set, main board, and PSU.
- No Picture (TV/VGA/HDMI Input): Checks for signal source, connection, and cable.
- No Picture (YPbPr Input): Checks for source work, connection, and wires.
- No Picture (Video/S-Video Input): Checks for source work, connection, and cable/wires.
The document also includes an exploded view of the television and schematic circuit diagrams for various components, such as the main board, power distribution, MT8222 chip, DDR1, E2PROM, serial flash, HDMI ports, AV/S-Video/VGA inputs, SCART ports, RF tuner, audio mux, and LVDS power. These diagrams are crucial for detailed component-level troubleshooting and repair.