2.12 Digital convergence adjustment
Note: 1. If replacing a PRT, DY, etc. perform auto-
digital convergence first. (Press front panel
MAGIC FOCUS switch). This can eliminate
the need for a complete digital convergence
alignment.
2. To enter digital convergence adjustment
mode without removing the front speaker
grill, please do the following:
1) Press and hold [TV] key on the R/C then
press [ASPECT]+[9] keys in sequence.
2) At this moment the R/C is in LINE Adjust
MODE.
3) Press [STOP] key to enter Dynamic Adj.
MODE , to adjust Digital Conv. change the
R/C to DCU mode as explain in page 45.
4) Proceed with convergence adjustment
and save the data.
5) Do MAGIC FOCUS sensor initialization.
6) To exit, press [PLAY]+[EXIT] keys on the
R/C in order to exit Dynamic Adj Mode.
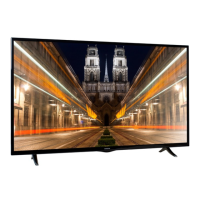
Adjustment preparation
(1) Receive an RF or video signal.
(2) Set controls to factory preset.
(3) Install jig screen on the set.
(4) Note the center of the video pattern displayed.
This is necessary to match dotted lines
(adjustment point viewed) and actual point that
is adjusted and displayed by the video signal.
(5) Press the service only switch (on SIGNAL
PWB). The pattern displayed is now the digital
convergence mode.
(6) When performing a complete digital
convergence adjustment CLEAR DATA in RAM.
(With the TV set off, press and hold the service
switch located on the SIGNAL P.W.B. and
then press the POWER button).
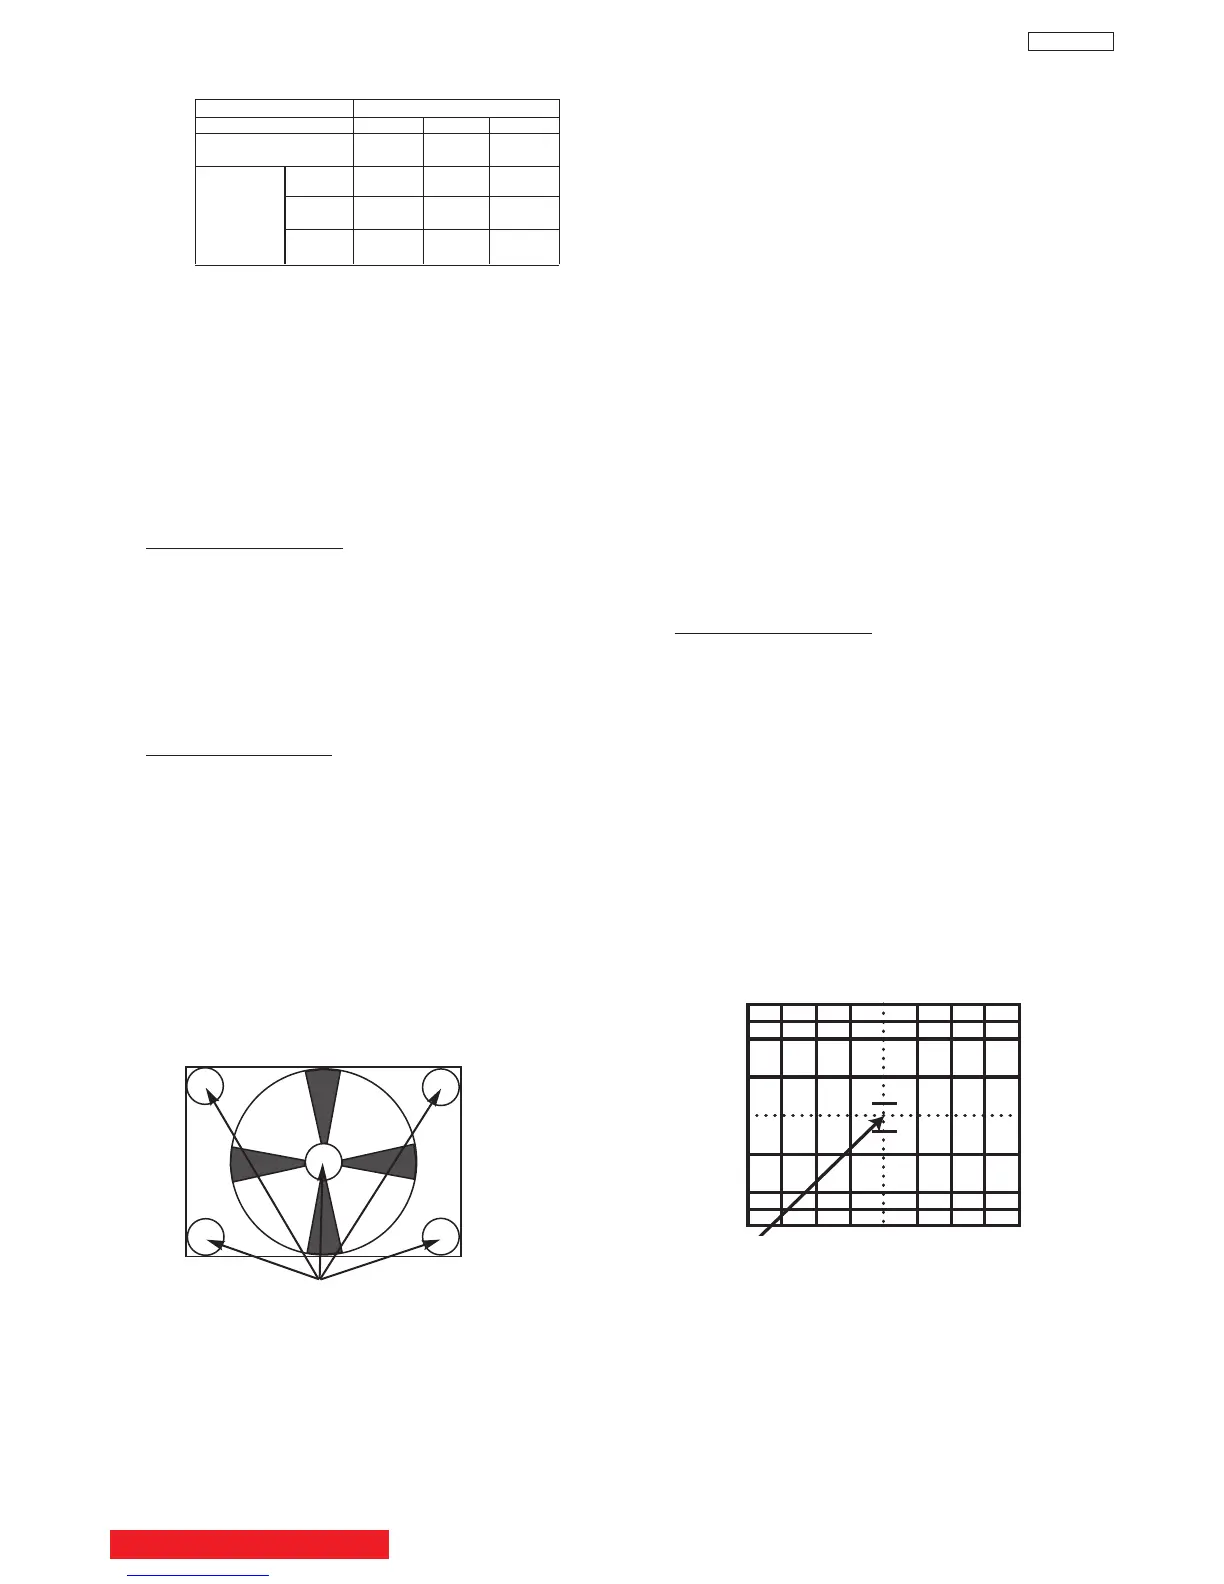
Adjustment Point
Adjustment procedure
(1) Red and blue static focus adjustment. Adjust
the static focus VR on Focus pack (UFPK) so
that the center of circle pattern is the most clear.
Check that the focus does not get conspicuously
worse at the edges of the circle pattern signal or
cross-hatch signal.
(2) Green static focus adjustment. Adjust the static
focus VR on Focus pack (UFPK) (for green) so
that the center of circle pattern is the most clear.
Check that the focus does not get conspicuously
worse at the checking point, the periphery of
circle pattern cross-hatch signal.
NOTE: Checking point for the periphery of picture.
Checking point
(7) After all colors have been adjusted, display all
colors with the cross-hatch pattern signal and
check the focus performance.
(8) Then, select the circle pattern signal and check
the focus performance of each color and all
colors together.
(9) If the focus performance is not acceptable re-
adjust step (1) to (6).
2.11 STATIC FOCUS ADJUSTMENT
Adjustment preparation
(1) LENS FOCUS adjustment should be finished.
(2) Contrast : MAX
Brightness : Center.
(3) Receive the 480i/480p circle pattern signal &
1080i circle pattern.
(4) Apply covers to the lens of the colors you are
not adjusting and project only one color on the
screen.
OPTICAL FOCUSING ADJUSTMENT BLUE
BACK TO ADJUSTMENTS
CHASSIS DP65/DP65G
SCREEN SIZE 51”(D250) 57”(D250)
L1 and L2
(PITCHES from CENTER) 5.0 5.0
BETWEEN
L1&L2 * **
COLOR ** **
ABERRATION I 3.5mm MAX 4.0mm MAX
* *
O 3.5mm MAX 4.0mm MAX
(NOTE) * Slightly purplish or no color
** Slightly greenish or no color
65”(D260)
4.0
*
*
3.0mm MAX
*
3.0mm MAX
38
DP65