21
After entering the Passcode (17), you are required to enter the network
configuration manually if you use a Subnet mask other than Class A, B or C. (
15)
If you use the wired LAN, go to (
22).
(3) Configuring manually
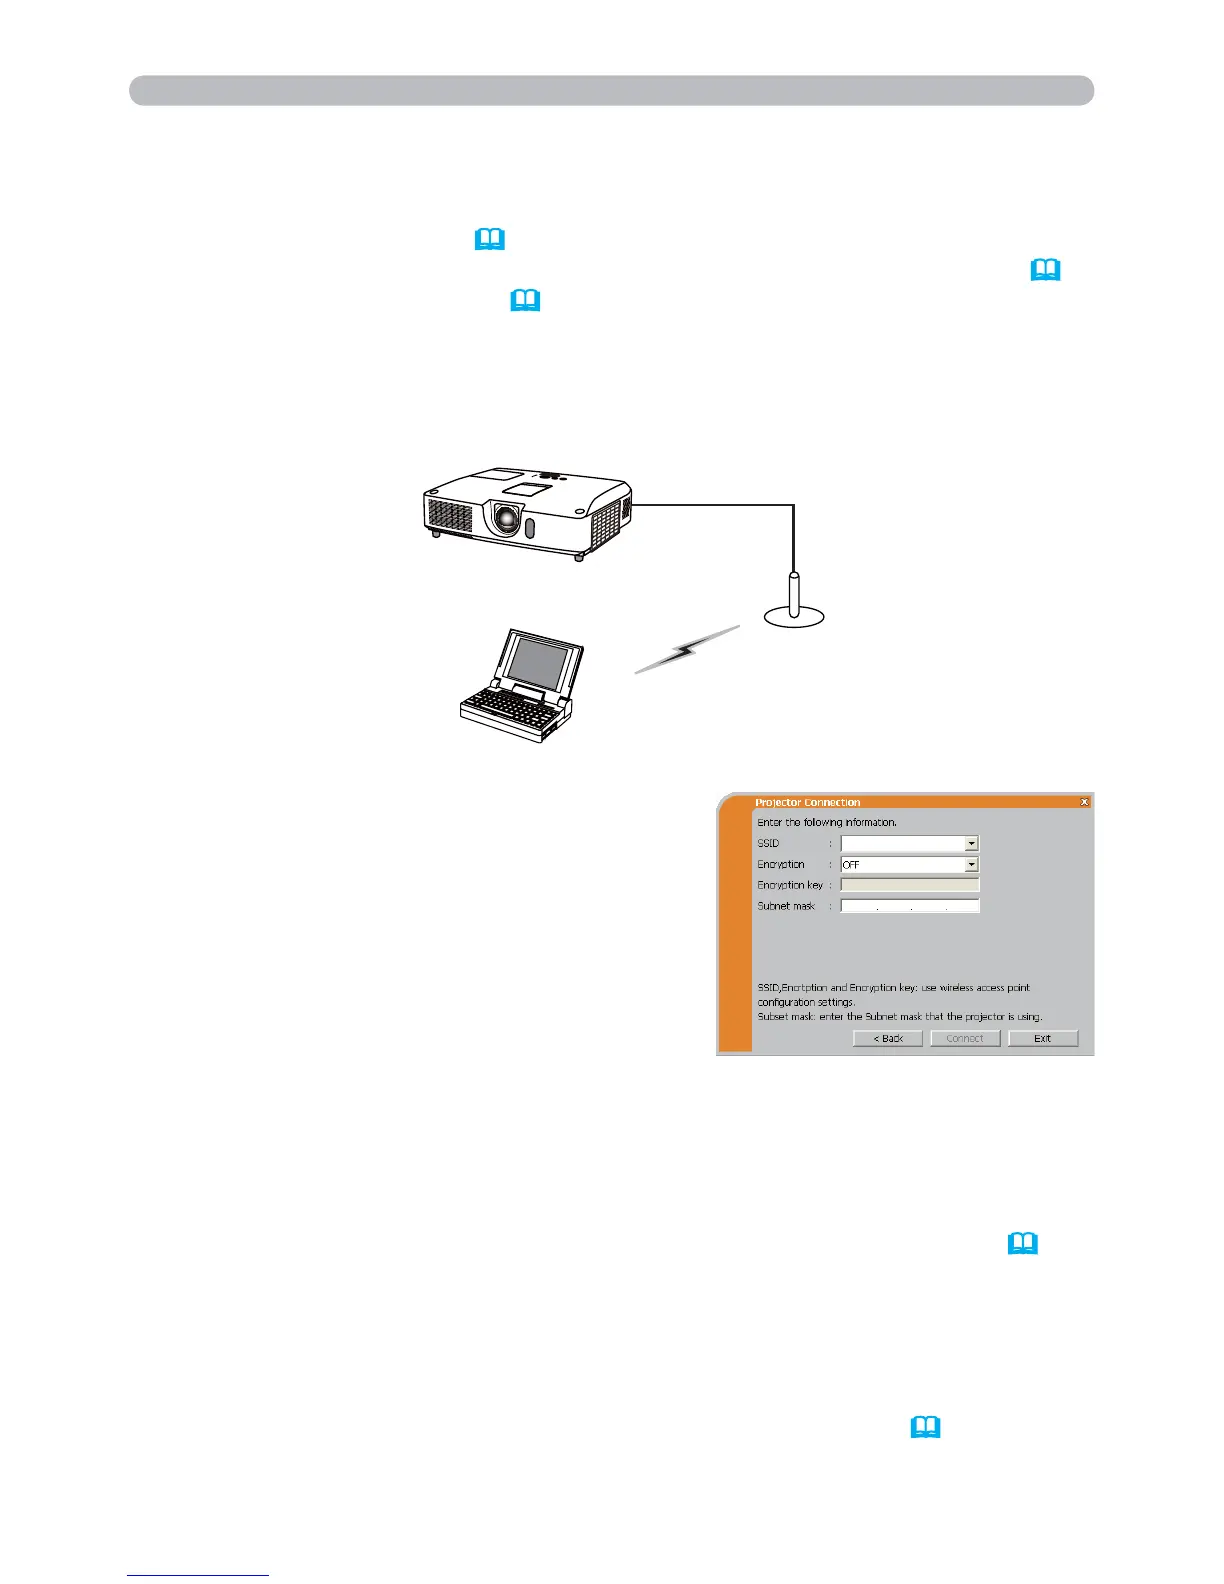
Wireless LAN
The projector is required to be connected to an access point by a LAN cable.
1. Connection to the network
1.5 Selecting the network connection method (continued)
SSID : WirelessAccessPoint (example)
Encryption: WEP64bit (example)
Encryption key *2:
**********
(example)
2) The setting on the projector. *3
Enter the following information.
1) The setting on the access point. *1
Enter the following information.
3) Click the [Connect].
4) The wireless connection will be established.
Proceed to item 1.8 Confirming the connection to your destination. (
30)
*1 Contact the network administrator to find out the setting on the access point.
*2 If you use an encryption, you need to set it. Contact the network administrator
to check the encryption key that is set in the projector.
The encryption key is always shown as “
**********
”.
*3 To find the network setting on the projector, refer to the NOTE. (
22)
*4 If you use Subnet mask except Class A/B/C, please set it.
Subnet mask *4: 255.255.255.128
(example)

 Loading...