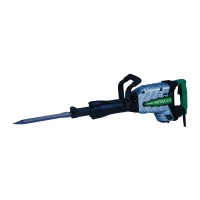
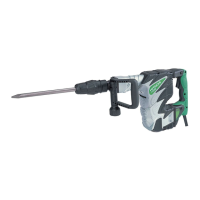
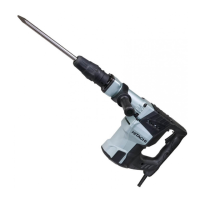
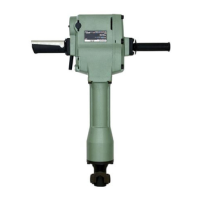
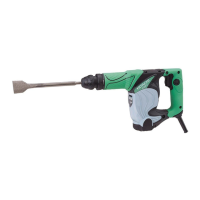
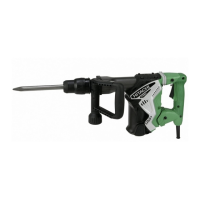
This document is an instruction manual for the HITACHI Demolition Hammer, Model H 65. It provides essential information for safe and efficient operation, including safety rules, technical specifications, usage instructions, and maintenance guidelines.
Function Description
The HITACHI Demolition Hammer, Model H 65, is a power tool designed for heavy-duty demolition tasks. Its primary applications include:
- Breaking concrete
- Chipping off concrete
- Grooving
- Bar cutting
- Driving piles in various installations, such as:
- Piping and wiring
- Sanitary facilities
- Machinery
- Water supply and drainage work
- Interior jobs
- Harbor facilities
- Other civil engineering work
The tool is designed to deliver powerful impacts for efficient material removal, making it suitable for a wide range of construction and renovation projects.
Important Technical Specifications
The HITACHI Demolition Hammer, Model H 65, features the following technical specifications:
- Motor: Single-Phase, Series Commutator Motor
- Power Source: Single-Phase, 115V AC, 60 Hz
- Current: 11.4A
- Full-Load Impact Rate: 1,400 impacts per minute
- Weight: 39.7 lbs (18 kg)
Standard Accessories:
The demolition hammer comes with a set of standard accessories to facilitate various tasks:
- Steel Case (1)
- Bull Point (Code No. 985230) (1) – Overall length: 20-1/2″ (520 mm)
- Oil Feeder (Code No. 931848) (1)
- Hexagon Bar Wrench for M8 (Code No. 872422) (1)
- Wrench (Code No. 971109) (1)
Optional Accessories (sold separately):
Additional accessories can be purchased to expand the tool's versatility:
- Bull point (Code No. 985230) – Overall length: 20-1/2″ (520 mm)
- Cold chisel (Code No. 985231) – Overall length: 20-1/2″ (520 mm)
- Scoop (Code No. 985233) – Overall length: 21-1/2″ (546 mm)
- Cutter (Code No. 985232) – Overall length: 20-1/2″ (520 mm), Width: 3″ (75 mm)
- Electric Hammer Oil (Code No. 955009) – Capacity: 1 liter
Usage Features
The manual emphasizes several key usage features and safety precautions:
General Safety Rules:
- Work Area: Keep the work area clean, well-lit, and free from flammable liquids or gases. Avoid using the tool in damp or wet locations.
- Electrical Safety: Guard against electric shock by preventing body contact with grounded surfaces. Ensure the power tool is grounded using a three-conductor cord and three-prong plug. The grounding adapter (sketch C) is prohibited in Canada.
- Extension Cords: Use only three-wire extension cords with proper grounding. Ensure the cord is in good condition and of sufficient thickness for the tool's current draw. Refer to the "MINIMUM GAGE FOR CORD SETS" table for appropriate cord length and AWG rating.
- Personal Safety: Wear safety glasses, protective shoes, and earplugs. Avoid loose clothing or accessories that can get caught in moving parts. Wear protective hair covering for long hair. Use face or dust masks if the operation is dusty.
- Tool Handling: Always hold the body handle and side handle firmly. Do not force the power tool; let it do the job at its intended rate. Do not overreach; maintain proper footing and balance.
- Operation: Pull the trigger switch after applying the tip of the bit to the crushing position. The tool may require a forcible punch to initiate the striking stroke, which indicates the no-load striking safeguard mechanism is working. Operate the hammer by utilizing its own weight; avoid pressing or thrusting forcibly.
- Pre-Operation Checks:
- Confirm the power source matches the tool's requirements.
- Ensure the power switch is in the OFF position before plugging in.
- Check the power receptacle for a secure fit.
- Confirm the work site is clean and safe.
- Feed oil into the oil tank as described in the maintenance section.
- Mount accessories securely by inserting the shank into the front cover hole and swinging the retainer back into place.
- Environmental Considerations: Be aware that dust created by power sanding, sawing, grinding, and drilling can contain chemicals known to cause cancer, birth defects, or other reproductive harm (e.g., lead, crystalline silica, arsenic, chromium). Work in well-ventilated areas and use approved dust masks.
- Tool Condition: Before each use, check for damaged parts, proper alignment of moving parts, and secure mounting. Do not use the tool if the switch does not turn it on and off.
- Storage: Store idle power tools in a dry, high, or locked-up place, out of reach of children.
- Alertness: Stay alert and use common sense. Do not operate the tool when tired.
- Voltage: Operate the power tool at the rated voltage specified on its nameplate.
- Moving Parts: Never touch moving parts such as blades, bits, or cutters.
- Abnormalities: Stop operation immediately if any abnormality is detected.
- Unattended Operation: Never leave the power tool running unattended. Turn power off and wait for it to come to a complete stop.
- Elevated Work: When working at elevated locations, pay attention to articles and persons below.
Maintenance Features
Proper maintenance is crucial for the longevity and safe operation of the HITACHI Demolition Hammer.
General Maintenance:
- Power Disconnection: Always switch power OFF and disconnect the plug before and during maintenance and inspection.
- Accessory Condition: Regularly inspect accessories like bull points and cutters. Whet or replace them without delay when abrasion is noted, as dull accessories can degrade motor efficiency.
- Mounting Screws: Regularly inspect and retighten all mounting screws. Loose screws can lead to serious hazards.
- Retainer: Check the retainer for proper functioning and wear. If wear and tear are found, bring the tool to an authorized service center.
- Cleaning: Keep handles dry, clean, and free from oil and grease. Keep the motor air vent fully opened and clear of dust to ensure proper cooling.
- Plastic Parts: Do not wipe plastic parts with solvents (gasoline, thinner, benzine, carbon tetrachloride, alcohol) as they can cause damage. Use a soft cloth lightly dampened with soapy water.
- Cord Inspection: Inspect tool cords periodically and have them repaired by an authorized service center if damaged.
- Component Replacement: When replacing a component part, always use the same type of new part. Do not attempt to repair the power tool yourself; bring it to an authorized service center.
Oil Feeding:
- Frequency: The demolition hammer has a built-in oil chamber and can be used for approximately 20 days (3-4 hours/day continuous use) without refilling. However, always feed oil before no oil is visible in the oil gauge window when the hammer is held upright. Check the oil level once a day.
- Procedure:
- Disconnect the plug from the power supply receptacle.
- Remove the oil gauge using the provided wrench. Be careful not to lose the rubber packing under the oil gauge.
- Fill the oil tank with the provided Electric Hammer Oil (Code No. 955009) until the oil level is above approximately 7/64″ (2.8 mm) when the tool is held upright.
- Securely clamp the oil gauge after feeding oil.
- Warm-up: If the tool is used at low temperatures or after a long idle time, the oil may become thick, preventing the striking stroke. Run the tool for about five minutes to warm it up.
Carbon Brushes:
- Inspection: The motor uses consumable carbon brushes. Inspect them regularly.
- Replacement: Replace carbon brushes with new ones of the same carbon brush number when they are worn to or near the "wear limit" (0.28″ or 7 mm remaining length from an original length of 0.67″ or 17 mm).
- Cleaning: Keep carbon brushes clean and ensure they slide freely within the brush holders.
- Removal: Carbon brushes can be removed by taking off the cap cover, cap rubber, and brush cap in that order.
Note: HITACHI's continuous research and development program means specifications are subject to change without prior notice.