This document provides a comprehensive service manual for the HITACHI HB-C103 Automatic Home Bakery, also identified as NH No. 097E. It covers the device's function, technical specifications, usage, and maintenance procedures.
Function Description
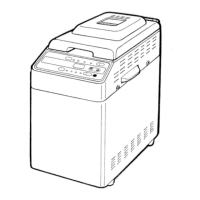
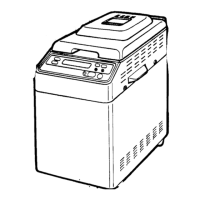
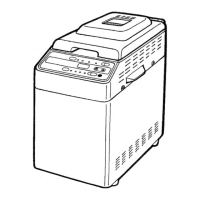
The HITACHI HB-C103 is an automatic home bakery designed to simplify the bread-making process. It features a sophisticated control system that manages various stages of bread production, from mixing and kneading to rising and baking. The device is capable of producing different types of bread, including basic bread, rapid bread, whole wheat bread, and dough, as well as two types of pound cakes (CAKE1 and CAKE2).
The core of the bakery's operation involves a detachable bread pan mounted in the center of the unit. A mixing blade, located at the bottom of the bread pan, is driven by a motor to mix and knead ingredients. A heating assembly, positioned underneath the bread pan, provides the necessary heat for rising and baking. A heater extends from the bottom to the top of the bread pan, ensuring even heat distribution. Temperature sensors monitor the internal temperature, and a microcomputer controls the entire process based on preset programs. The device also includes a timer function, allowing users to set a baking reservation for up to 13 hours.
Key features of the HB-C103 include:
- One-touch operation: Simplifies the bread-making process.
- Even heating: Ensures consistent baking results.
- Color setting: Allows users to select the desired crust color (light, medium, dark).
- Timer function: Enables delayed baking for up to 13 hours.
- Quick baking function: Reduces baking time to approximately 2 hours and 30 minutes.
- Power failure protection: Retains the baking condition for about 30 seconds in case of power failure.
- Viewing window: Allows users to monitor the baking process.
Important Technical Specifications
The HB-C103 operates on an A.C. 120V-60Hz power supply.
- Rating: A.C. 120V
- Heater: 600W
- Mixing Motor: 80W
- Capacitor: 8µF (220V AC)
- Dimensions: 21.5 cm (W) x 31 cm (D) x 35.5 cm (H)
- Weight: Approx. 5.9 kg
- Timer: 4 hours to 13 hours digital timer for baking reservation
- Cord: P.V.C cord
- Thermal Fuse: 378°F (192°C)
- Accessories: Measuring Cup, Measuring Spoon
- Lot No.: Indicated on the bottom with permanent ink
Usage Features
The manual details various control courses and their respective process timings, heater, and mixing motor operations:
1. BREAD Course:
- Process: Pre-knead, Mix, Rest, Knead, First rise, Gas squeezes out 1, Second rise, Gas squeezes out 2, Third rise, Bake, Warm.
- Timings: Pre-knead (1 min), Mix (1 min), Rest (5 min), Knead (16-24 min), First rise (60-70 min), Gas squeezes out 1 (20 sec), Second rise (55-65 min), Gas squeezes out 2 (20 sec), Third rise (48 min), Bake (45 min), Warm (60 min).
- Heater: ON/OFF during Pre-knead, ON during First rise, ON during Second rise, ON during Third rise, ON during Bake, ON/OFF during Warm.
- Mixing Motor: ON/OFF during Pre-knead, ON during Mix, ON/OFF during Rest, ON during Knead, ON/OFF during First rise, ON/OFF during Second rise, ON/OFF during Third rise, ON/OFF during Bake, ON/OFF during Warm.
2. BREAD RAPID Course:
This course is similar to the BREAD course but with a shorter fermentation process due to increased yeast volume, reducing total baking time.
3. DOUGH Course:
This course operates until the first rise in the BREAD course, then beeps to signal completion.
4. Whole Wheat Bread Course:
- Process: Mix, Pre-knead, Rest, Knead, First rise, Gas squeezes out 1, Second rise, Gas squeezes out 2, Third rise, Bake, Warm.
- Timings: Mix (30 sec), Pre-knead (10 min), Rest (100 min), Knead (14 min), First rise (56 min), Gas squeezes out 1 (20 sec), Second rise (25 min), Gas squeezes out 2 (20 sec), Third rise (48 min), Bake (45 min), Warm (60 min).
- Heater: OFF throughout, except during Bake and Warm.
- Mixing Motor: ON/OFF during Mix, ON during Pre-knead, ON/OFF during Rest, ON during Knead, ON/OFF during First rise, ON/OFF during Second rise, ON/OFF during Third rise, ON/OFF during Bake, ON/OFF during Warm.
5. CAKE1 (Pound Cake) Course:
- Process: Pre-heating, Bake.
- Timings: Pre-heating (7 min), Bake (48 min).
- Heater: ON/OFF during Pre-heating, ON/OFF during Bake.
- Mixing Motor: OFF throughout.
6. CAKE2 (Pound Cake) Course:
- Process: Pre-heating, Bake.
- Timings: Pre-heating (7 min), Bake (58 min).
- Heater: ON/OFF during Pre-heating, ON/OFF during Bake.
- Mixing Motor: OFF throughout.
The device also features a simplified test method for the motor and heater, accessible via specific button combinations during power-on. This "OUTPUT CHECK PROGRAM" allows technicians to verify the functionality of the mixing motor and heaters.
Maintenance Features
The manual provides extensive troubleshooting guidelines and repair procedures for various issues:
1. Troubleshooting List:
- No power: Check power plug, thermal fuse, control board, and power supply board.
- Mixing motor does not turn over: Inspect lead wires, mixing motor, control board, and power supply board.
- Heater does not generate heat: Inspect lead wires, heater assembly, control board, and power supply board.
- Poorly-made bread (under-baked, floured top, sticky/raw bottom): Address issues like insufficient water, power interruptions, unpressed START button, pressed STOP button, improperly seated bread pan, or unset mixing blade.
- Product failure (mixing blade does not turn over): Diagnose mixing motor hum, capacitor defects, belt slips, breaks, or dislodgement.
- Dough does not rise: Check for power interruptions, pressed STOP button, missing or old yeast, wrong yeast type, or missing sugar.
- Bread burns: Verify bread pan temperature sensor, control board, and power supply board.
- Bread is not baked: Check for missing ingredients (flour, sugar), incorrect water temperature, or defective bread pan temperature sensor.
- Lii-shaped bread: Address insufficient flour or other unspecified issues.
- Slices unevenly and sticky: Indicates bread was sliced immediately after baking.
- Smoke emitted from openings: Clean spilled ingredients or crumbs from the heater/oven area.
- Heater heated or thermal fuse blown after baking: Indicates a circuit board failure.
- Plug overheated: Check for poor contact of the connector plug.
- Electric shock: Inspect damaged insulation cover of cord and lead wires, or defective insulation.
- "18:88" display: Indicates circuit board failure or bread pan temperature sensor failure.
2. Diagnosis of Circuit Board:
Detailed steps are provided to diagnose issues with the control board, including checking voltage at various test points (TPs), LED/LCD functionality, and microcomputer operation.
3. Repair Procedures:
The manual outlines procedures for disassembling and reassembling the unit, including:
- General precautions: Emphasizes safety, proper handling of components, and reassembly to original positions.
- Replacement of outer case: Involves removing screws, the hold spring, and the inner case assembly.
- Replacement of inner case: Requires removing screws, the inner case assembly, and the bread pan.
- Replacement of outer case (mixing motor, capacitor, thermal fuse assembly, power supply board assembly): Involves removing screws, the hold spring, the inner case assembly, the mixing motor, the capacitor, the thermal fuse assembly, and the power supply board assembly.
- Replacement of inner case (mixing motor, condenser, thermal fuse assembly, power supply board assembly): Involves removing screws, the inner case assembly, the mixing motor, the condenser, the thermal fuse assembly, and the power supply board assembly.
- Replacement of heater assembly: Involves removing screws, the inner case assembly, and the heater assembly.
- Replacement of control board assembly: Involves removing screws, the inner case assembly, and the control board assembly.
4. Parts List:
A comprehensive list of parts is provided with their respective part numbers, quantities, and remarks, facilitating easy identification and ordering of replacement components. This includes items such as the measuring cup, mixing blade, handle, bread pan assembly, control board assembly, heater, mixing motor, and various screws and fuses.
5. Structural Development Diagram:
An exploded view diagram illustrates the assembly of the HB-C103, showing the relative positions of all components, which is crucial for correct disassembly and reassembly.