EasyManua.ls Logo

Hitachi TRK-3D70 - Page 5

Hitachi TRK-3D70
Print Icon
To Next Page IconTo Next Page
To Previous Page IconTo Previous Page
Loading...
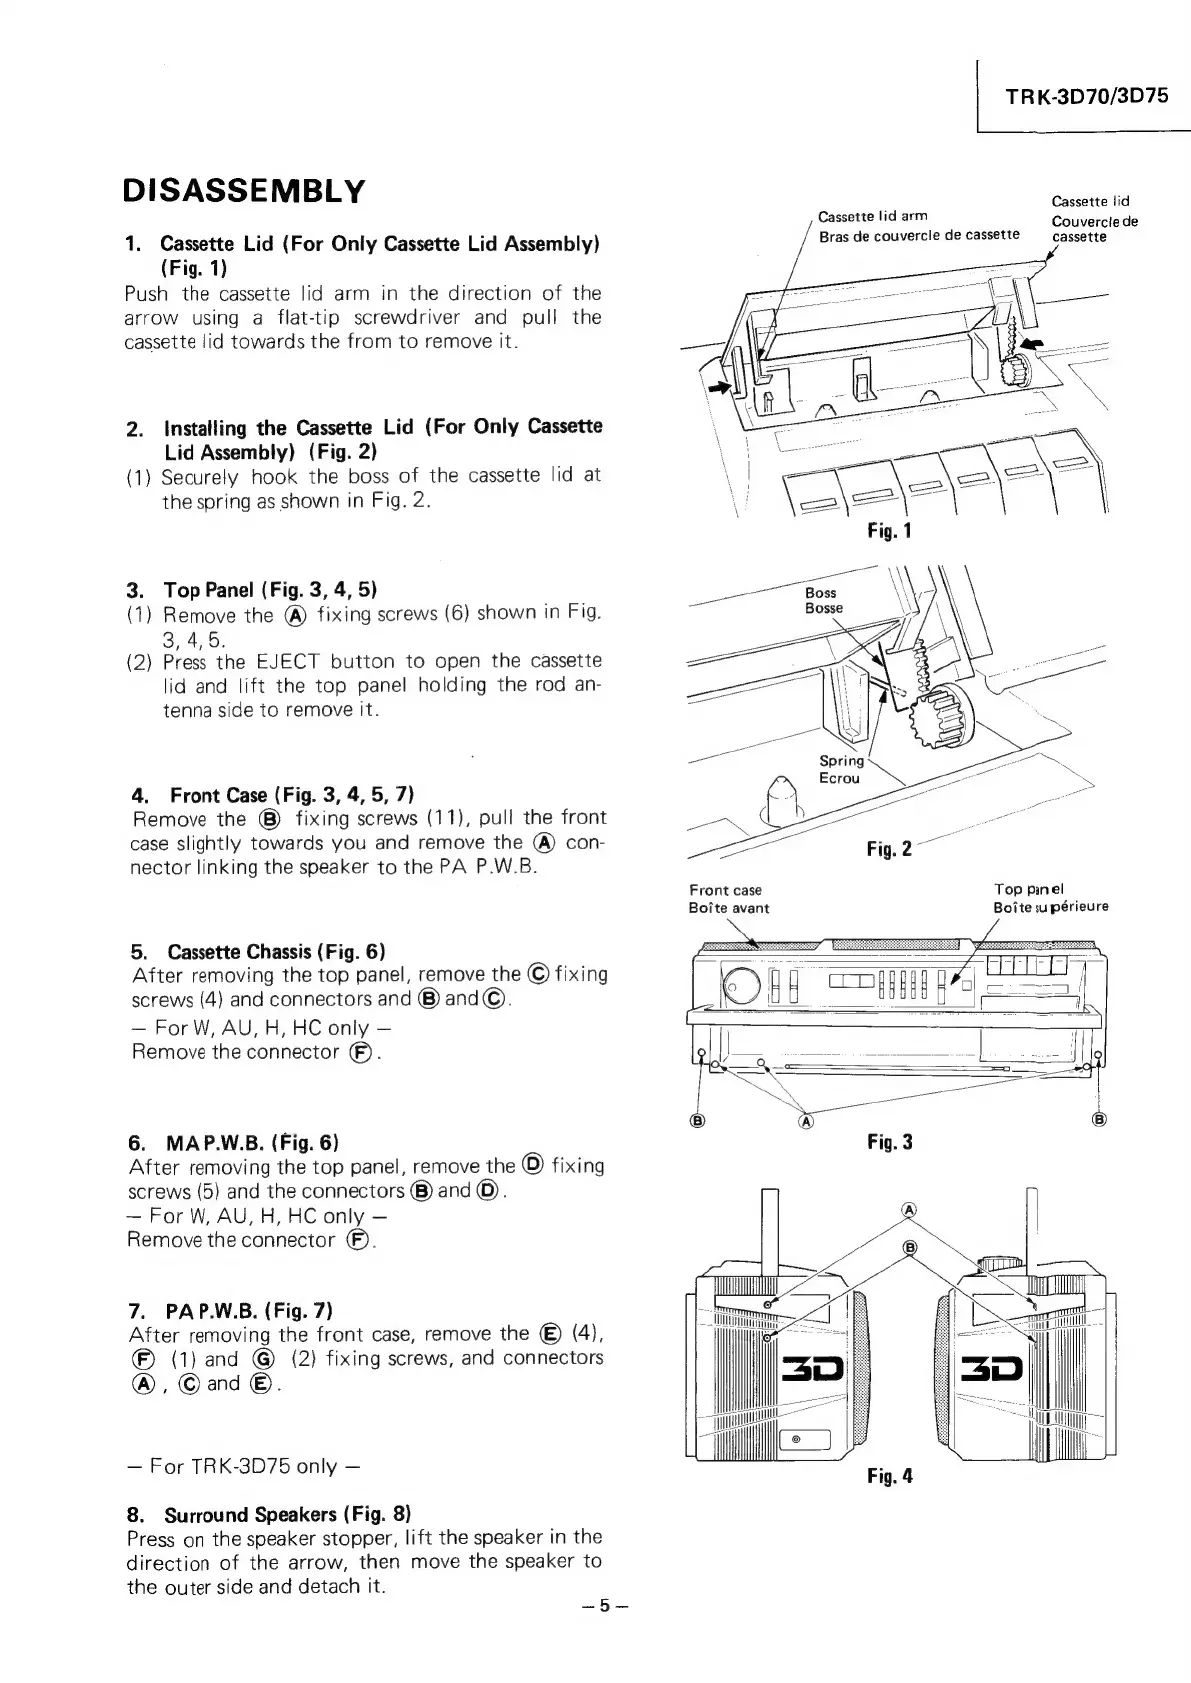
DISASSEMBLY
1.
Cassette
Lid
(For
Only
Cassette
Lid
Assembly)
(Fig.
1)
Push
the
cassette
lid
arm
in
the
direction
of
the
arrow
using
a
flat-tip
screwdriver
and
pull
the
cassette
lid
towards
the
from
to
remove
it.
2.
Installing
the
Cassette
Lid
(For
Only
Cassette
Lid
Assembly)
(Fig.
2)
(1)
Securely
hook
the
boss
of
the
cassette
lid
at
the
spring
as
shown
in
Fig.
2.
3.
Top
Panel
(Fig.
3,
4,
5)
(1)
Remove
the
@)
fixing
screws
(6)
shown
in
Fig.
3,
4,5.
(2)
Press
the
EJECT
button
to
open
the
cassette
lid
and
lift
the
top
panel
holding
the
rod
an-
tenna
side
to
remove
it.
4.
Front
Case
(Fig.
3,
4,
5,
7)
Remove
the
fixing
screws
(11),
pull
the
front
case
slightly
towards
you
and
remove
the
(@)
con-
nector
linking
the
speaker
to
the
PA
P.W.B.
5.
Cassette
Chassis
(Fig.
6)
After
removing
the
top
panel,
remove
the
©
fixing
screws
(4)
and
connectors
and
®)
and@©.
For
W,
AU,
H,
HC
only
Remove
the
connector
©).
6.
MAP.W.B.
(Fig.
6)
After
removing
the
top
panel,
remove
the
O
fixing
screws
(5)
and
the
connectors
®)
and
©).
For
W,
AU,
H,
HC
only
Remove
the
connector
©.
7.
PAP.W.B.
(Fig.
7)
After
removing
the
front
case,
remove
the
©
(4),
©
(1)
and
@
(2)
fixing
screws,
and
connectors
@,
©and
©.
For
TRK-3D75
only
8.
Surround
Speakers
(Fig.
8)
Press
on
the
speaker
stopper,
lift
the
speaker
in
the
direction
of
the
arrow,
then
move
the
speaker
to
the
outer
side
and
detach
it.
a5
TRK-3D70/3D75
Cassette
lid
Cassette
lid
arm
Couvercle
de
/
Bras
de
couvercle
de
cassette cassette
Front
case
Top
pinel
Boite
avant
Boite
supérieure
Fig.
4