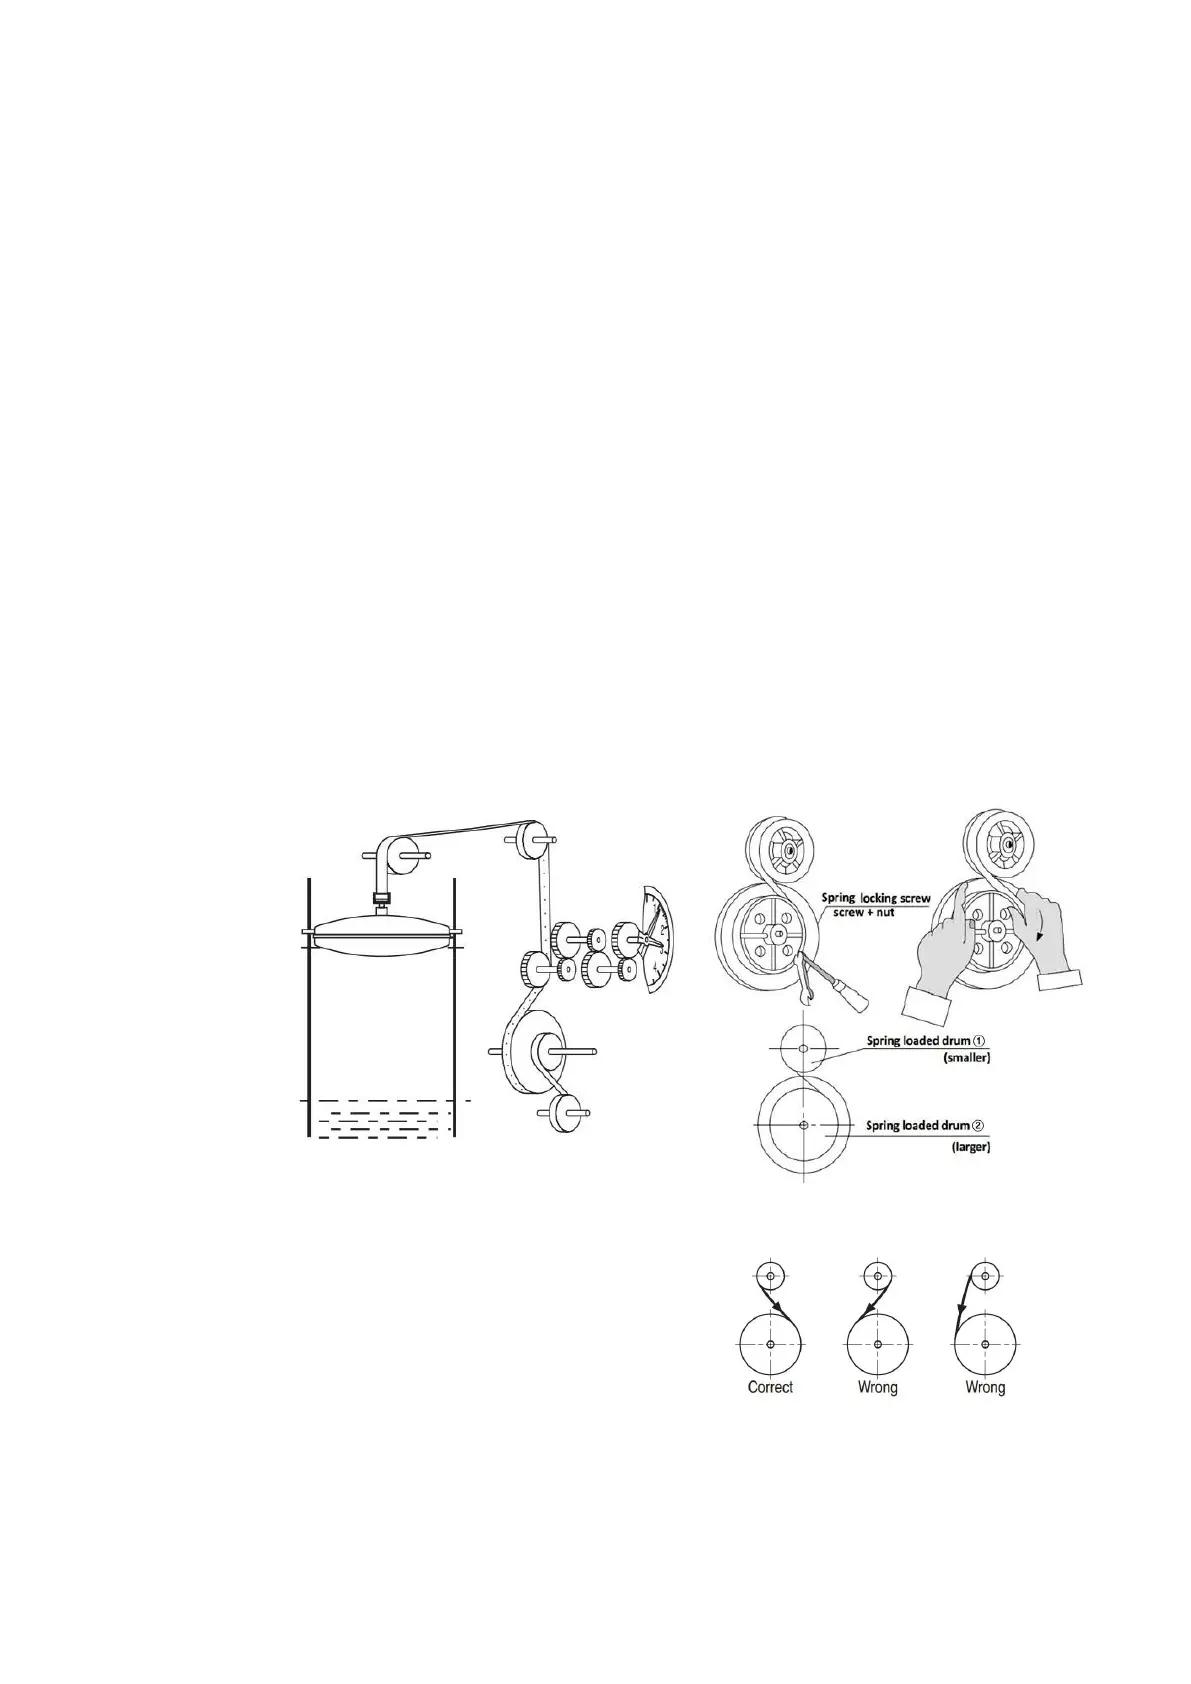
2.3 Spring Installation
1) Secure the measuring tape to the tape drum using a tape locking screw, then turn the tape drum counter-
clockwise to wind the measuring tape so that the float is placed on the top of the tank. [Refer to Figure.7]
2) Bolt the spring on the spring loaded drum① onto the spring locking screw on the spring loaded drum②.
[Refer to Figure.8-1]
▶ At this point, you should place the spring locking screw to the right side of you because the spring
will be wound in a clockwise. [Refer to Figure.8-2]
3) Wind about 2~3 turns clockwise to prevent the fixed spring from escaping.
4) After wind the spring, bolt the spring loaded drum② into the tape locking screw on the tape drum.
5) After that, fasten the spring loaded drum with the stop ring at the top of the axis to finish.
▶ Fix both spring loaded drum① and ②.
※ To Inspect Assembly
▶ If both the measuring tape and the spring are installed, move the float which outside the head
to make sure that the measuring tape is not jammed or dislodged.
▶ At this point, when the spring is wound, the tape is untangled.
▶ In addition, if the tape is pulled and there is a jam or break, fine-tune it with the screw on the tape guide.
[Refer to Figure.4]
 Loading...