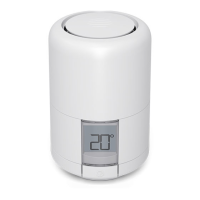
The Hive Radiator Valve is a smart thermostatic radiator valve (TRV) designed to provide room-by-room heating control, allowing users to manage their heating more efficiently. It can be adjusted remotely via a smartphone or tablet using the Hive app, regardless of whether a Hive Active Heating thermostat is already installed.
Function Description
The Hive Radiator Valve controls the flow of hot water into an individual radiator, enabling precise temperature management for specific rooms. This smart functionality allows users to set schedules, adjust temperatures, and even connect the valves to other Hive devices through "Actions" in the app. If a Hive thermostat is also present, the "Heat On Demand" feature can be enabled, which automatically boosts the heating system when a radiator requires heat to reach its target temperature. This ensures that only the necessary rooms are heated, optimizing energy consumption. The valve measures the temperature in the middle of the room using a clever algorithm, and its effectiveness is enhanced when air can flow freely around it.
Usage Features
Installation:
For radiators already equipped with TRVs (identifiable by a numeric dial, e.g., 1-5), installing a Hive Radiator Valve is straightforward. It involves unscrewing the existing TRV and replacing it with the Hive valve. The process typically doesn't require draining the radiator if a compatible valve is already attached. The Hive app guides users through the step-by-step installation, including selecting the correct adaptor.
Adaptor Identification:
The Hive Radiator Valve comes with a couple of adaptors (M30, RA, M28, Giacomini, Caleffi, depending on the region) and an adaptor guide to help identify the right fit for existing valve bodies.
- Valve bodies with screw threads: If the valve has a screw thread, the adaptor guide is used. If the guide sits on top of the screw thread, an M30 adaptor is needed. If it slips over and slides down, an M28 adaptor is required.
- Valve bodies with no screw thread: For valves without screw threads, users match their valve type to provided pictures. Danfoss valves require an RA adaptor, valves with two wings need a Giacomini adaptor, and those with a hexagonal top and no screw thread require a Caleffi adaptor.
- Adaptor Fitting: M30 adaptors are slipped over the radiator valve and screwed clockwise until securely fastened. RA adaptors, which have a screw, are slipped over the valve and fastened with the provided hex key, ensuring the thread faces upwards. M28 adaptors are slipped over the valve and screwed clockwise until securely fastened. Giacomini adaptors are pushed firmly onto the radiator valve until they click, then the M30 adaptor is screwed over it. Caleffi adaptors are slipped over the radiator valve with the hexagonal side facing forward, pushed until they click, and then the M30 adaptor is screwed over it.
Battery Insertion:
To insert batteries, the 'tab' is pressed, and the casing is slid off. Two AA batteries are inserted, and the casing is slid back on, aligning the window with the screen until a click is heard. The screen will then display an "M" symbol, indicating install mode.
Mounting on Radiator:
The Hive Radiator Valve is screwed onto the adaptor clockwise until a click is felt, then the casing is rotated back to reveal the screen. If not using the app, pressing the button below the screen for 3 seconds exits install mode, and the valve will show the target temperature.
App Connectivity:
After installing the Hive Hub (if not already done), the Hive app guides the setup of the Radiator Valve, allowing users to assign a friendly name. For existing Hive users, "Radiator Valve" can be selected from the Install menu.
Controlling with the App:
The Hive app offers comprehensive control:
- Setting specific temperatures for each radiator.
- Creating schedules to heat rooms only when needed, saving energy.
- Connecting Hive Radiator Valves to other Hive devices using "Actions."
- Enabling "Heat On Demand" with a Hive thermostat to automatically boost heating when a radiator needs heat.
Manual Control:
Users can also rotate the dial on the Hive Radiator Valve to set the temperature directly. The screen will display the currently set temperature.
Important Considerations:
- Thermostat Placement: Avoid installing a Hive Radiator Valve in the same room as the main thermostat, as this can lead to continuous heating if the thermostat is set higher than the radiator valve.
- Obstruction: For accurate temperature measurement, avoid obscuring the valves with curtains or furniture.
- Flow Side Installation: When replacing valve bodies, install the Hive Radiator Valve on the flow side of the radiator for optimal temperature control. While possible on the return side, accuracy may decrease for radiators longer than 1.6m.
- Manual Radiator Valves: If radiators have manual ("on/off" or "+/-") valves instead of TRVs, the valve bodies must be replaced with thermostatic valve bodies before installing Hive Radiator Valves. This typically requires a heating professional.
- Electric Heating Systems: Hive Radiator Valves are not compatible with electric heating systems or electric radiators (including electrically powered heated towel rails).
Maintenance Features
Cleaning:
To clean the Hive Radiator Valve, a soft dry cloth is recommended. Avoid using water, solvents, or abrasive cleaners.
Battery Replacement:
The Hive app will notify users when the batteries need replacing. A blank screen or a battery symbol in the corner also indicates low battery. Batteries can be replaced without removing the valve from the radiator:
- Rotate the valve anti-clockwise until the screen faces away and the tab is visible, then depress the tab.
- While keeping the tab depressed, slide the casing off.
- Rotate the valve anti-clockwise to access and replace the two AA batteries.
- Rotate the valve anti-clockwise to see the screen again. Tapping the button will show the chosen temperature.
- Slide the cover back on, aligning the window with the screen.
Alkaline AA batteries are recommended; rechargeable batteries are not advised due to reduced battery life. If batteries are not replaced when critically low, the valve will set itself partly open to ensure some warmth when heating is on.
Removing the Valve:
To remove the Hive Radiator Valve from the radiator:
- Press the button under the screen for 3 seconds; the valve will vibrate and show an "M" to enter install/remove mode.
- Hold the valve on either side of the screen and rotate it anti-clockwise until the tab is visible.
- Depress the tab and slide the casing off.
- Depress the button next to the battery compartment. While keeping the button depressed, rotate the valve anti-clockwise to unscrew it from the valve body.
Re-attaching the Valve:
- Re-attach the adaptor to the valve body.
- Tap the button below the screen to wake it up. If a temperature is shown, press the button for 3 seconds to enter install mode ("M" will appear).
- Screw the Hive Radiator Valve onto the adaptor clockwise until it clicks once, stopping to avoid damage.
- Rotate the valve anti-clockwise until the screen faces forwards.
- Press the button under the screen for 3 seconds; the valve will vibrate and show the chosen temperature.
- Always follow installation instructions in the Hive app and guide.
- Exercise caution during installation and use, as radiators and pipes can be hot.
- Keep batteries away from children as they are a health hazard.
- Do not attempt to open the Hive Radiator Valve, as it contains no user-serviceable parts.
- Thermostatic valve bodies should only be installed by competent individuals.
- Hive is not responsible for damages caused by incorrect installation or removal of old controls.
- Hive Radiator Valves must only be installed into a properly working heating system, and any pre-existing radiator or valve body issues must be resolved beforehand.