13 14
• When using the intercom, depending on the sound settings of the intercom or connected device,
surrounding sounds may be muted. When using, set the settings so that the surrounding sounds may be heard.
• If the intercom is mounted onto the helmet, please be aware to not misplace/lose the detached
base cover and screws.
• If forcefully taking apart the bracket from the helmet, there is a risk of damage to the helmet.
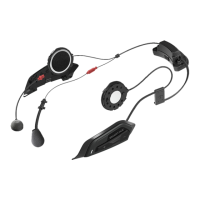
• For the intercom, only use the specially designed products that is recommended by HJC.
For information regarding the recommended products, please refer to the HJC official website.
(https://www.hjchelmets.com)
• Before using the intercom, please make sure to read the instruction manual of the intercom currently in use.
Also refer to the instruction manual of the intercom currently in use for instructions on how to handle
the intercom itself.
• When mounting the intercom, all devices (including the mic and speaker) must be tested to ensure that they
are in the best possible location. If it is determined that the mounted intercom would be a hindrance to riding,
do not mount and contact your nearest HJC Dealer.
HJC Intercom Placement Guide
Mounting the Intercom
Unscrew and remove the base cover at the back of the helmet to begin mounting process of the intercom. Please refer
to the manual of the current intercom you are using for directions on mounting and unmounting the intercom unit.
Base Cover Detachment
1. Remove the screws from the base cover. (picture1)
2. While lifting the base cover(direction A) detach it by pushing toward direction B. (Picture 2)
Bluetooth UI Cover Detachment
1. Push the Bluetooth UI cover in the direction of the arrow
while pressing down on A.
Mounting the Bluetooth UI Cover
1. After aligning the hook of the Bluetooth UI cover
with the groove of the body, and push and attach.
Mounting the Base Cover
Push the base cover underneath the gasket at the bottom of the helmet until the base cover
and the bracket screw holes match. Using the screw, fixate the base cover onto the helmet.
A
Base cover
Screw
Bracket
1
1
1 2
Opening Chin Bar
Closing Chin Bar
1. To open the chin bar, simply pull the lever forward and push the entire bar upward.
2. The chin bar is in the full open position when you hear " click" sound.
Pull the chin bar downward to completely cover your face and chin. Listen for "click" sound to ensure that the chin bar has
locked into its full closed position.
To maximize helmet's ability to protect, we highly recommend to ride with the chin bar in closed position.
In the event a rider rides with the chin bar open, there is an increased risk of injury to the frontal area.
Do not raise or lower the chin bar while riding. This may interrupt rider's ability to control the motorcycle
and may lead to an accident. Please use care when opening or closing the chin bar as it may scratch the
helmet. Damage caused by this is not subject to manufacturer's warranty.
When the visor(shield) is open and the chin bar is raised and lowered to a lock position, the visor(shield)
may not be in a latched position with the chin bar. Before riding, please make sure that the shield is latched
with the chin bar securely.(Center closure system)
1 2
 Loading...