CARE, MAINTENANCE & TECHNIQUES
The COM-100 requires very little maintenance. You may need to change the batteries or clean the unit or the
electrodes from time to time. In addition, please note these general techniques:
1. Do not store the unit in high temperature or direct sunlight.
clean immediately with alcohol or distilled water.
3. After repeated usage in high TDS water, it is advised to clean the electrodes to prevent residue build-up.
4. For best results, always stir or tap the meter in the water sample to dislodge any air bubbles or remove any
lingering electrical charges.
6. Do not keep the meter in very hot water for extended periods of time.
7. If testing two water samples in a wide range (e.g., 15 ppm and 3000 ppm), make sure to rinse the electrodes with
DI or distilled water or alcohol after each test to ensure accurate readings and prevent build-up of TDS on the
electrodes.
8. The COM-100 is waterproof. However, prior to completely submersing the meter into water, always ensure the blue
probe gasket ring and battery compartment are secured tightly. The warranty does not cover water damage due to
parts that are not secured properly.
Changing the batteries:
When the meter displays a flashing battery symbol,
your batteries are getting weak and should be replaced soon.
To change the batteries:
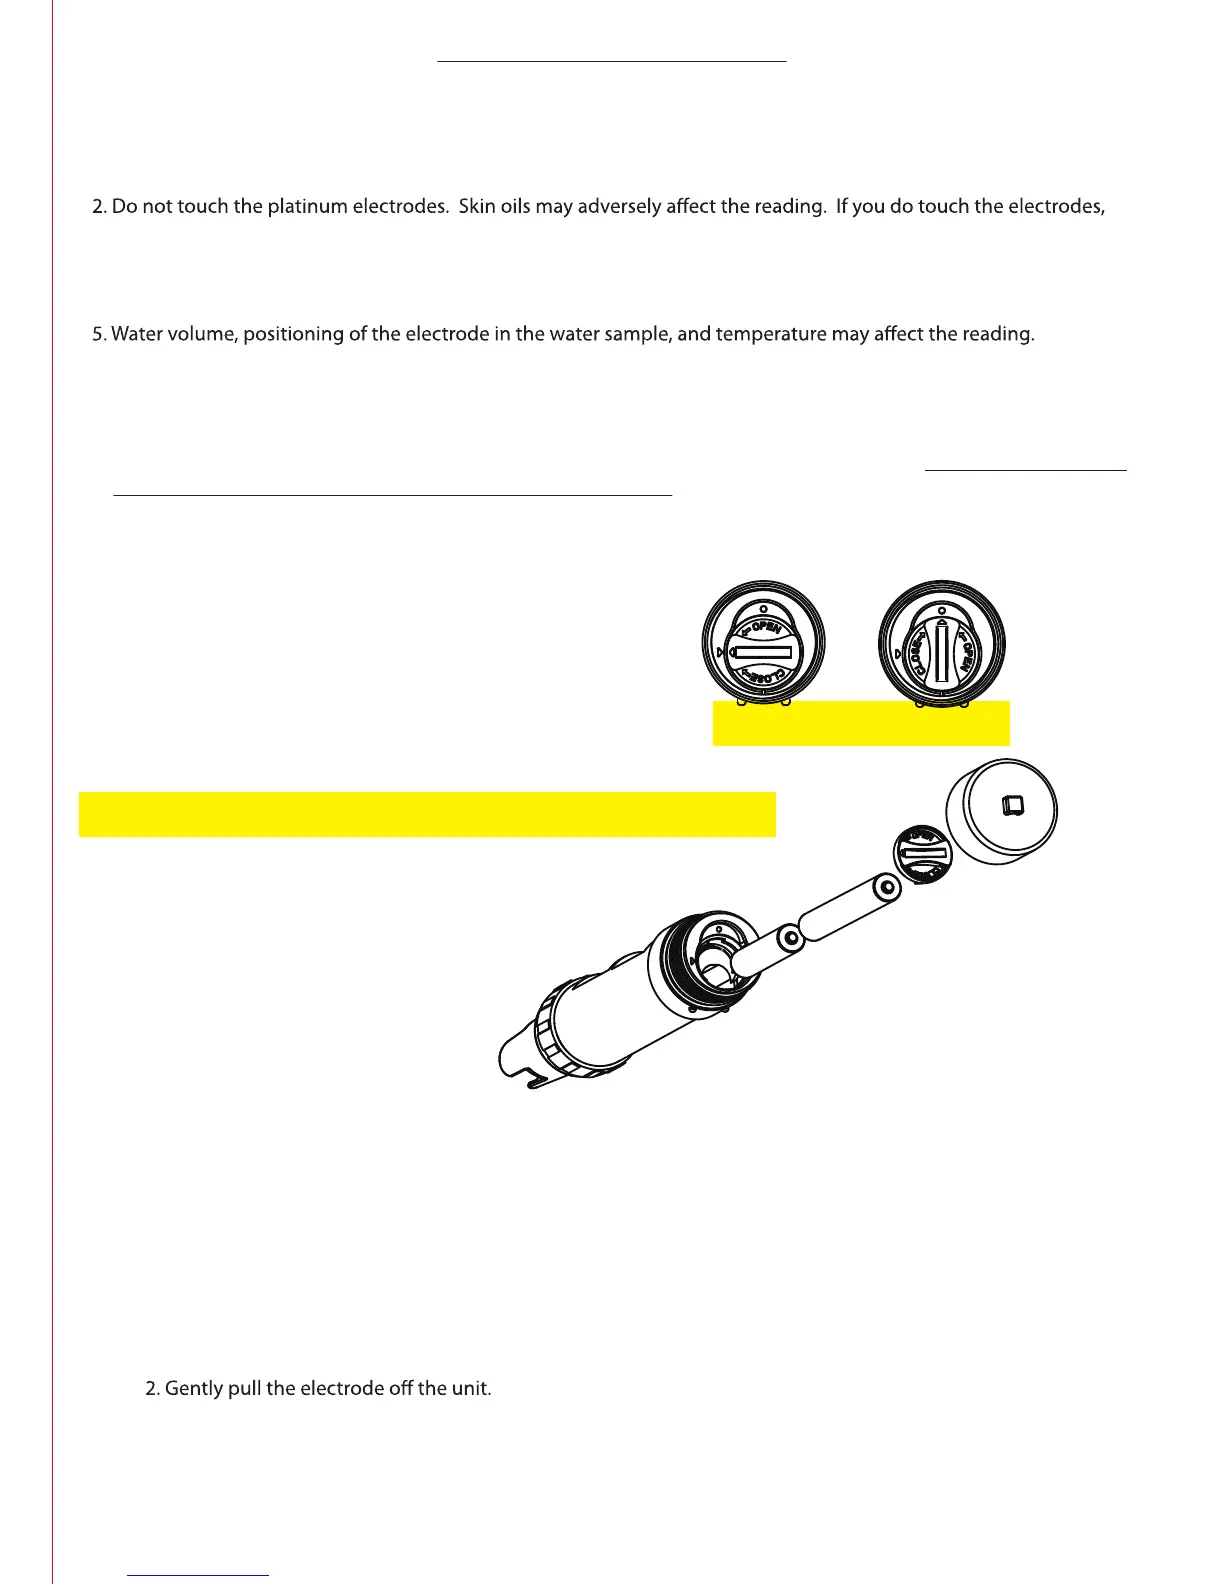
1. Twist open the end cap on the top of the meter.
2. Twist the battery cap to the open position.
3. Remove the batteries.
4. Insert new batteries with the “+” side facing up.
The meter uses 2 x AAA batteries.
5. Close the battery cap and turn to the close position.
6. Close and tighten the end cap to maintain
waterproofness.
NOTE: Do not reverse the polarity of the batteries.
This may short circuit the meter.
Cleaning:
To clean the unit, use a soft rag or towel. Wipe with water and a mild soap.
To clean the electrodes, use rubbing alcohol and a cotton swab. Lightly clean the electrodes. Rinse with DI or distilled
water. Air dry.
Electrode Replacement:
If your electrode has been damaged, you can purchase a new one without needing to purchase a new meter. To
replace the electrode:
1. Remove the blue electrode gasket ring by twisting it counter-clockwise.
3. Gently insert the new electrode into the unit. Be sure to align the grooves and six pins properly. Never force
the electrode into the unit!
4. Make sure the rubber ring is properly positioned on the electrode.
5. Screw the blue gasket ring back onto the unit by twisting it clockwise. Tighten.
6
OPEN CLOSE