Steering and Control Line
Replacement Kit Instructions for
Mirage or Tandem Mirage
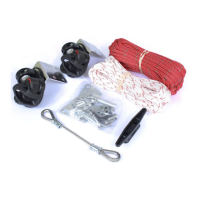
Kit Contents.
2 steering control lines and tube assemblies, (labeled)
1 up control line and tube assembly, (shortest, without swedged loop)
1 down control line and tube assembly. (Has loops swedged on both ends)
Two 3/16 inch shock cord loops for up/down line to arm.
Four Zip ties
Two linking loops
Tools Required
1/8
th
inch Allen wrench
Screw drivers
Knife or side cutters
This kit is intended…
to replace the rudder control lines when the original lines wear out. The following will help guide you
through the removal and installation of the new system.
1. Disconnect the old lines from rudder area. (total of 4) Reach inside the 5 inch inspection port to remove the
lines from the control cranks, and remove all 4 lines from the cranks. Note, while it is possible to do all this
work with only your left hand, leaving the handles on is hard, you may want to temporally remove the
handles to take the cranks out to change the lines. Cut the loops off. Note where the washers and spring go
to reassemble. This is the preferred method if the handles will come off easily; (sometimes corrosion will
make fittings difficult to separate.)
2. The control line tubes must be removed also. Use a straight blade screwdriver to pry the rivet out the back
end of the boat. These are just a press fit of the plastic parts. No glue was used to seal. Once you can get a
hand on the tube, pull it out the rest of the way.
Steering System Installation
3. The two 7/32” holes at the back and most outboard from the centerline are for the steering lines. Insert the
steering line assembly into each hole, looped end first. Press the black plastic cap that is part of the tube
assembly completely into the hole. If the cap is a little tight, a couple light taps with a hammer can get it in
completely (note: it should be a tight fit). If metal rivets were used at the stern of the boat instead of the
plastic part, the holes may need to be opened up a bit to accommodate the plastic part.
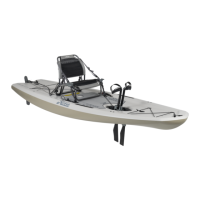
4. Feed the steering lines through the eyestrap (line separator) on the inside of the hull, about 16” back from the
steering crank. See picture 1
Picture 1
Revised 2005 1 80018