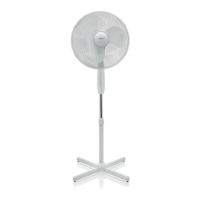
8. ASSEMBLY
1. Unscrew the L-shaped screw and remove it with the washer from the end of the base tube.
2. Loosen the height regulation ring at the top of the base tube and slide out the extendable
tube to the desired height or completely out if you desire the maximum height (you may
need to push the pipe from the bottom if it is tight or jammed). At the desired height, turn
the height regulation ring right to tighten it and secure the tube from sliding down.
3. Insert the base tube into the opening in the base and tighten it with the L-shaped screw
and washer. Tighten well, but not excessively.
4. Position the base on a at and dry surface.
5. Slightly loosen the adjusting screw and place the fan body onto the upper part of the
telescopic tube. Push the body down as far as possible and tighten the adjusting screw.
6. The blade cap and shield nut are located on the motor’s shaft. Unscrew the cap by turning
it right and the nut by turning it left.
7. Assemble the rear shield to the front of the motor’s case by aligning it with the two grooves
on the shield. Make sure that the grip is turned upwards. Clamp down on the shield until
the grooves lock with the element. Assemble the rear shield by turning the shield nut right.
8. If the motor shaft is secured with a sleeve, remove the sleeve. Slide the blade onto the
motor shaft making sure that the protrusions of the shaft are aligned with the grooves in
the blade. Tighten the blade with the cap by turning it left.
9. Check the fan by turning the blade manually and making sure that it has no contact with
the nut. The fan blade should rotate freely.
10. The front and rear shield are connected together with the shield ring, which has two
grooves on the inside, one for each shield. Loosen the large screw in the lower part of
the ring and make sure that the edge of the shield ts in the appropriate groove all the
way around the rear shield. Next, assemble the front shield to the back shield and make
sure that the edge ts in the second groove. Tighten the screw to assemble the shields
together. Your new oor fan is now assembled.
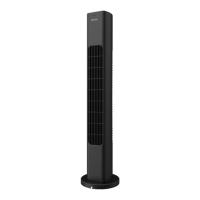
9. USE
Position the fan on a dry, stable, and even surface, connect to a 220-240 V~, 50 Hz
outlet, and connect power to the outlet. All of the available settings will start to flash on
the control panel. Make sure that there are two AAA batteries inside the remote control.
Using the remote control
The fan has three speeds, three airflow modes, a 7.5-hour timer, and remote control
for your convenience. You can also turn the fan on and off, choose the speed, set the
timer, and turn on the swing mode from the control panel).
ON/SPEED
• When you press the ON/SPEED button (on the remote control or control panel), you
will turn on the fan. When turned on for the first time, the fan will be set to average
speed. In subsequent instances, the fan will turn on in the most recent settings.
• When you press the ON/SPEED button again, you will turn on HIGH or LOW speed.
20