Do you have a question about the Hogtunes 462F-RM and is the answer not in the manual?
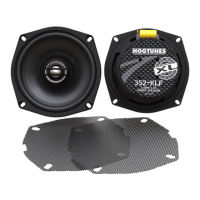
Instructions for installing front speakers in FLH (Batwing) motorcycle models.
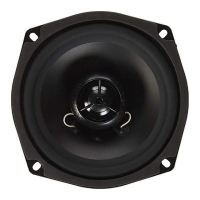
Instructions for installing Hogtunes 462R-RM rear speakers.
Specific instructions for installing front speakers on Road Glide models.
Details on Hogtunes speaker warranty coverage, claims, and exclusions.
Technical specifications including power handling, frequency response, sensitivity, and impedance.
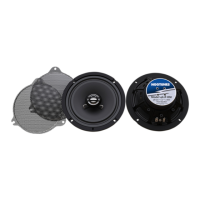
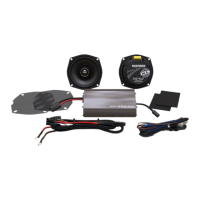
This document serves as an installation manual for Hogtunes replacement speakers, specifically models 462F-RM and 462R-RM, designed for Rushmore platform bikes. The manual provides detailed instructions for installing these speakers, which are engineered in North America and intended to enhance the audio experience for Great American Cruiser motorcycles.
The primary function of these speakers is to replace existing factory speakers, offering an upgrade in audio quality for motorcycle riders. The manual emphasizes that these speakers are specifically designed for Rushmore platform bikes and are 2 Ohms, a crucial detail for compatibility and optimal performance.
The installation process begins with a critical safety step: ensuring the ignition switch is in the "OFF" position. This prevents accidental power surges or electrical issues during the installation. The first physical step involves removing the outer fairing/headlamp assembly. The manual advises consulting a service manual if assistance is needed for this step and suggests placing a towel on the front fender to protect against scratches or dings from dropped tools or fasteners.
Next, the speaker cabinets need to be removed. For the brake side speaker cabinet, the cable connected to the power port/cigarette lighter assembly must be carefully disconnected. If the bike is equipped with a CB module (typically mounted "sideways" on the clutch side cabinet), the antenna cable and main harness need to be undone. The CB module itself will remain attached to the clutch side cabinet when removed. Finally, the speaker wire plugs (pink and pink with black stripe wires) going into each cabinet must be disconnected.
A strong recommendation from the manual is to complete the speaker swap on one side entirely before moving to the other. This approach helps maintain organization and reduces the chance of errors. Figures 1.1 and 1.2 in the manual illustrate the fastener locations for removing the cabinets, noting that these locations are common for both brake and clutch side cabinets.
Once a cabinet is removed from the bike, the installation of the new Hogtunes speaker can proceed. This involves undoing the four screws that secure the factory speaker to the cabinet. Each speaker wire must be carefully disconnected one at a time. The new Hogtunes speaker is then attached, ensuring the factory speaker wires are connected correctly as they are designed to fit only one way. The factory screws are then used to secure the Hogtunes speaker to the cabinet.
Regarding the speaker grill, riders have the option to either keep the factory speaker grill or replace it with the supplied metal mesh grill. If using the supplied grill, it is attached using the three factory screws on the inside of the fairing. The Hogtunes grill features two holes and one "keyhole" for the screws. The "keyhole" must be oriented closest to the radio on each side for proper fitment. The manual explicitly states that using the factory cloth grills will result in a reduction in volume, implying that the supplied metal mesh grills are recommended for optimal sound. After the grill is in place and the speaker is properly attached to the cabinet, the cabinet can be re-installed.
This process is then repeated for the second cabinet. After both speakers are installed, the factory speaker wires are plugged back into the cabinet's speaker wires, and the speakers are ready for testing. It's crucial to plug the power cable back into the power port/cigarette lighter assembly on the brake side. If applicable, the antenna cable and main harness for the CB module must be re-installed. Finally, the fairing and windshield are re-installed, and the new speakers are ready for use.
The installation of the 462R-RM rear speakers also begins by ensuring the ignition switch is in the "OFF" position. The factory speaker grills are removed by undoing the four screws on the front. The speakers are then carefully lifted, and the two wires are disconnected one at a time from the stock speaker before removing the speakers entirely.
Hogtunes 462R-RM rear speakers are designed as direct replacements for the original equipment (OE) speakers. The female OE "in-line" connectors on the bike mate with the male connectors on each Hogtunes speaker, and they are designed to connect in only one way. The manual highlights that loose connections at the speaker are a common reason for technical support calls, urging users to ensure a very good connection to prevent this issue.
Once confident that the factory wires are correctly attached to the new speakers, they are set in place. Users can choose to install either the supplied grills or the factory grills. The speaker is then secured by reinstalling the four screws per grill. Similar to the front speakers, using the factory grills for the rear speakers will cause a slight reduction in high-frequency volume.
A specific note is made about the factory rubber "nutserts" on the rear pod side, which can be "finicky." The manual advises starting all four grill screws first, then snugging each one, and finally gradually tightening all four screws to ensure the grill is securely held down. After installation, the radio should be turned on to verify that both speakers are playing correctly.
For Road Glide models, the front speaker installation has specific instructions. Again, the ignition must be in the "off" position. The factory speaker grill can be pried off from the front using fingers or a tool, with a caution to avoid damaging the inner fairing. After the grill is off, the four screws holding the speaker to the bike are removed. The speaker is then carefully pulled away from the fairing, and the factory wires are undone.
A new Hogtunes speaker is attached to the wires, noting that they will only go on one way. Users will need to maneuver the speaker around tabs to get it properly positioned. A critical instruction for Road Glide models is that the speaker must be oriented so the speaker wires are in the 12 o'clock (top) position. The manual explicitly warns that damage will occur if the wires are in the 6 o'clock position.
Once the wires are correctly positioned at 12 o'clock, the new speaker is secured into place using the factory screws. After both sides are complete, both speakers are verified to be working, and the grills are re-installed.
The manual includes important warranty information. Hogtunes speakers are warranted for 20 years to the original purchaser, requiring proof of purchase for all claims. For warranty claims, users are directed to fill out a form on the Hogtunes website or contact them via email or phone. A Return Authorization Number (RA#) will be generated for valid claims, which must be clearly displayed on the outside of the box when returning products to Hogtunes offices. The manual explicitly states that "Goods Arriving Without an RA# Will Be Refused!"
The complete warranty policy is available on the Hogtunes website. The warranty does not cover expenses related to speaker removal or re-installation, repairs performed by unauthorized individuals, subsequent damage to other components, products purchased from non-authorized dealers, damage from accidents or collisions, damage from incorrect installation, improper use, abuse, modifications, or damage to inbound products due to improper packing.
In summary, this manual provides comprehensive, step-by-step instructions for installing Hogtunes replacement speakers in various motorcycle models, emphasizing safety, proper technique, and specific considerations for different fairing types. It also outlines the warranty policy and procedures for claims, ensuring users are well-informed about the product's support and limitations.
| Speaker Type | Coaxial |
|---|---|
| Impedance | 2 Ohms |
| Frequency Response | 65Hz - 20kHz |
| Sensitivity | 92dB |
| Size | 4" x 6" |
| RMS Power | 50W |
| Woofer Material | Polypropylene |