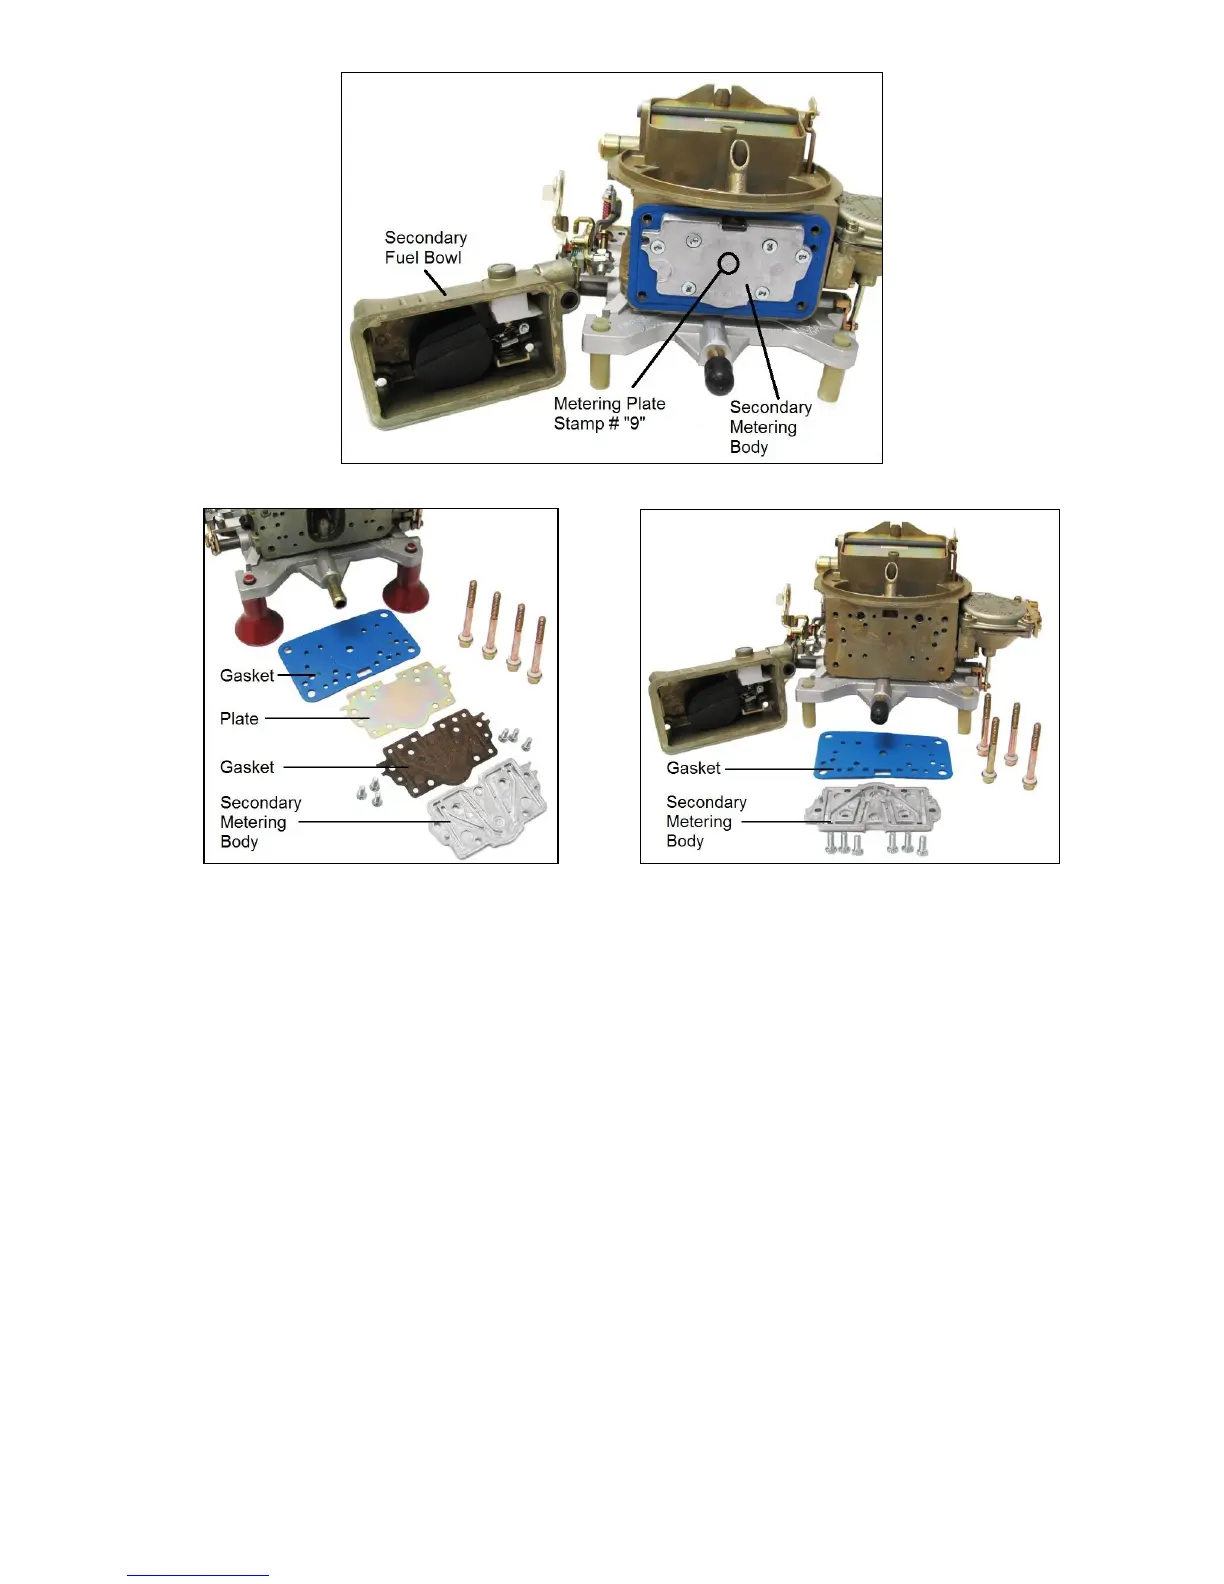
Figure 3
Figure 4 (0-8007 shown) Figure 5 (0-1850C shown)
4. Remove the short fuel transfer tube and seals. Make sure the seals do not remain in the fuel bowl openings.
5. Remove the secondary metering body, plate, and gaskets from the main body. See Fig. 4 or 5. NOTE: A clutch-head
screwdriver must be used. Do not attempt to use a regular screwdriver.
NOTE: Some older Holley Model 4160 carburetors use a balance tube. If your carburetor is so equipped, please contact Holley
Technical Service. The kit comes with lead balls and extra gaskets should you have this model.
6. Install the new Viton seals on the extreme ends of the fuel transfer tube. Apply a small amount of petroleum jelly on the Viton
seals and install the transfer tube into the opening in the primary fuel bowl. The seal will push into proper position as the tube
is installed.
7. Install the secondary metering jets, of your choice, using an appropriate screwdriver or jet wrench.
8. You may use the following table to determine the approximate size of the secondary metering jets required by your particular
model 4160.
9. First, determine the stamp number in the metering body located as shown in Fig. 3. For the secondary metering body shown,
the stamp number is 9.
10. Next, find your stamp number in the left hand column of the table and read the correct jet size in the right hand column. For
our #9 secondary metering body, two 122-67 main jets would be required to complete the conversion.
 Loading...