Step 1 – Determine Mounting Location
• Determine the desired mounting location for the tank rack to be installed and place into
position. Below list some requirements.
• At least two floor mounting locations free of wiring or critical components in the path
of the drilling operation.
• Ability to mount to side of shelf.
• Side bracket mounting accessible.
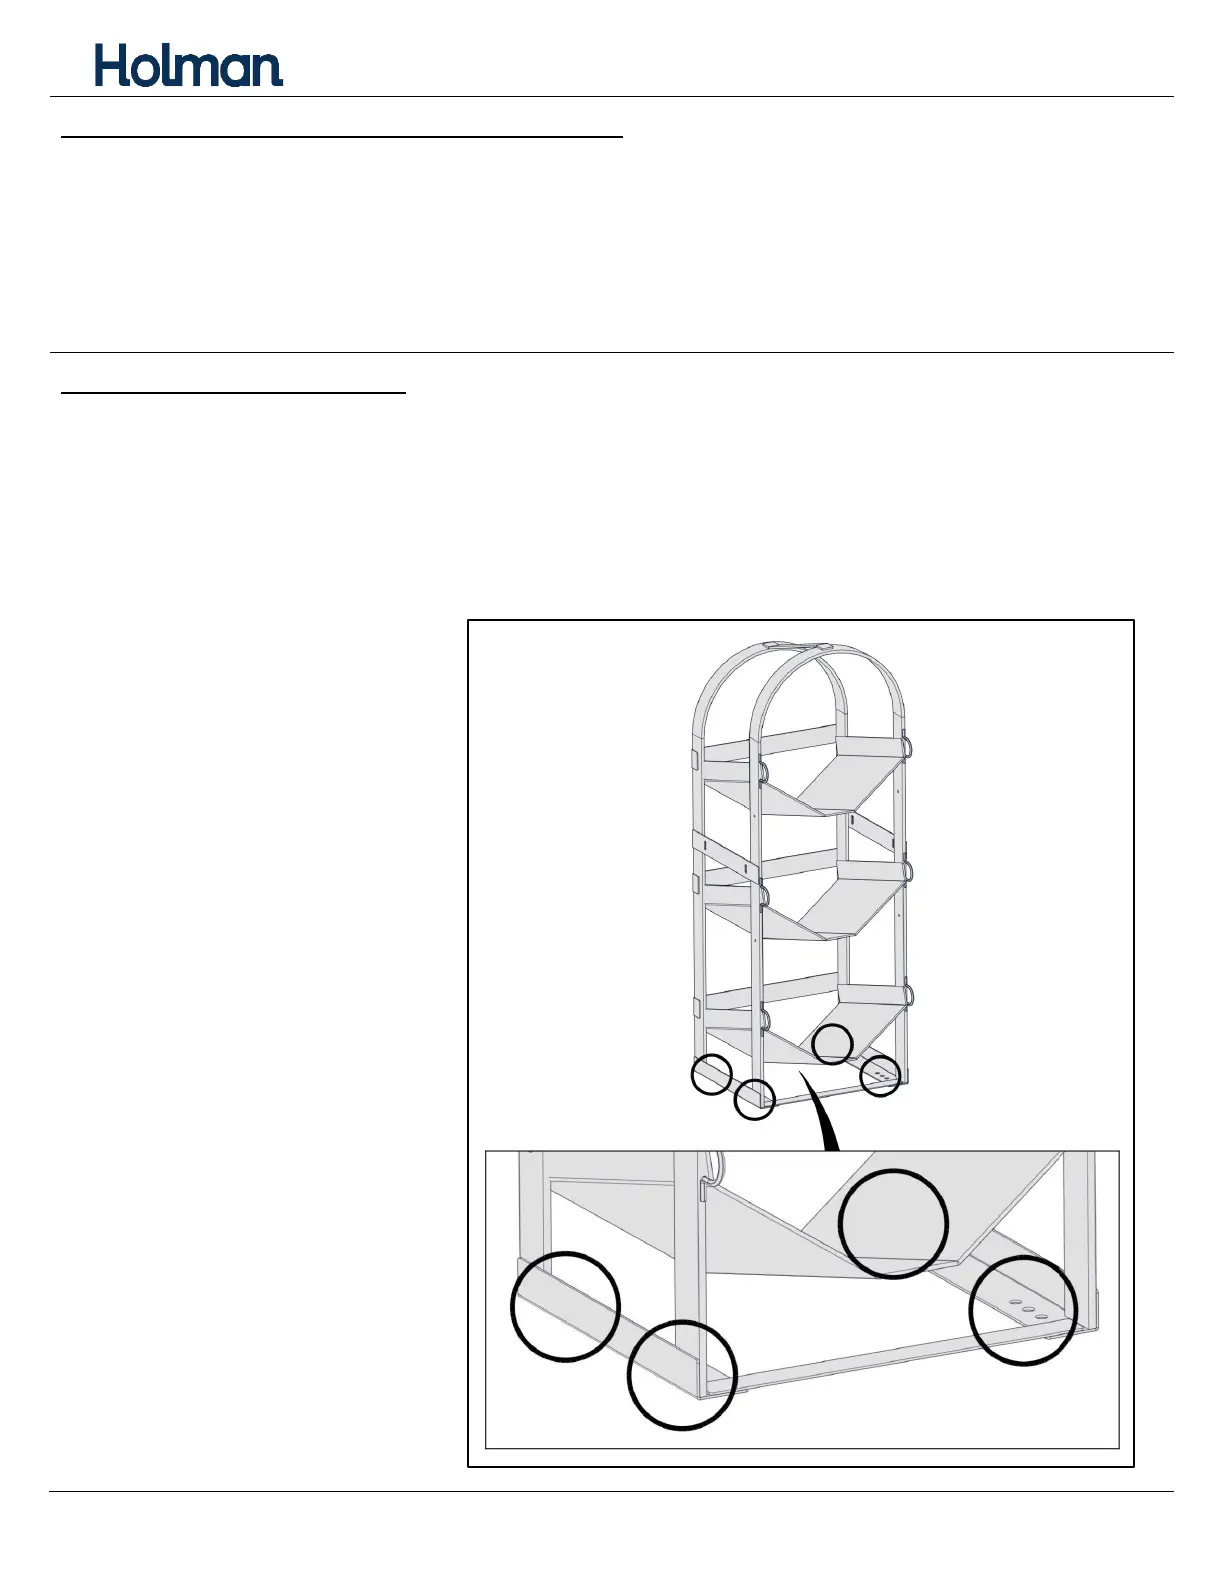
Step 2 – Mount to Floor
• Prior to mounting to the floor, be sure the rack can be mounted to a shelf as shown in step
3a or directly to the wall as shown in 3b.
• It is required to mount the tank rack to the floor of the vehicle in at least two locations. If
possible, mount in four locations.
• In the desired location of the vehicle, mark through the bottom of the tank rack onto a safe
location of the floor free of any wiring or critical components in the path of the drilling
operation.
• Remove the tank rank to
expose the markings. If a
mat is in place, remove an
area of the mat to expose
the metal floor. (A hole-saw
is recommended) Prior to
drilling check underneath
the vehicle to ensure
safety.
• Drill a 25/64” hole into the
floor. Be sure to use a drill
stop to ensure safety when
drilling.