Do you have a question about the HOMCOM A90-301 and is the answer not in the manual?
Thoroughly read manual before use and consult physician for health concerns.
Listen to body signals, keep area clear, check equipment, handle malfunctions promptly.
Use on stable surface, wear suitable clothing, avoid therapeutic use, lift carefully.
Notes on computer display, battery disposal, cleaning with mild detergent, and avoiding solvents.
Store in ventilated area, inspect before use, and follow recycling regulations.
Perform warm-up exercises followed by detailed stretching techniques for various muscle groups.
Ensure space, check components, use provided tools for assembly.
Assemble the main frame and stabilizers using specified hardware.
Attach the seat and back cushion with bolts and washers.
Install the brake handlebar using screws and the multi-tool.
Connect handlebar weld to the frame using bolts and washers.
Connect pulse wires and other cables to the main unit.
Install resistance controllers and connect down wires to the console.
Attach the display unit to the console bracket with bolts.
Securely attach the left and right pedals, noting threading direction.
Release brake handlebar to slide seat, then lock to secure position.
Tilt the bike using stabilizers for easier transportation.
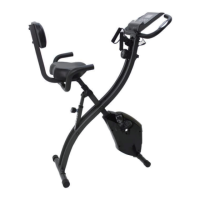
| Product Name | HOMCOM A90-301 |
|---|---|
| Category | Exercise Bike |
| Resistance | Magnetic |
| Adjustable Seat | Yes |
| Display | LCD Display |
| Color | Black |
| Maximum User Weight | 120 kg |
| Display Functions | Time, Speed, Distance, Calories, Pulse |
| Transport Wheels | Yes |
| Product Weight | 26 kg |
| Type | Upright Bike |
| Material | Steel |