10
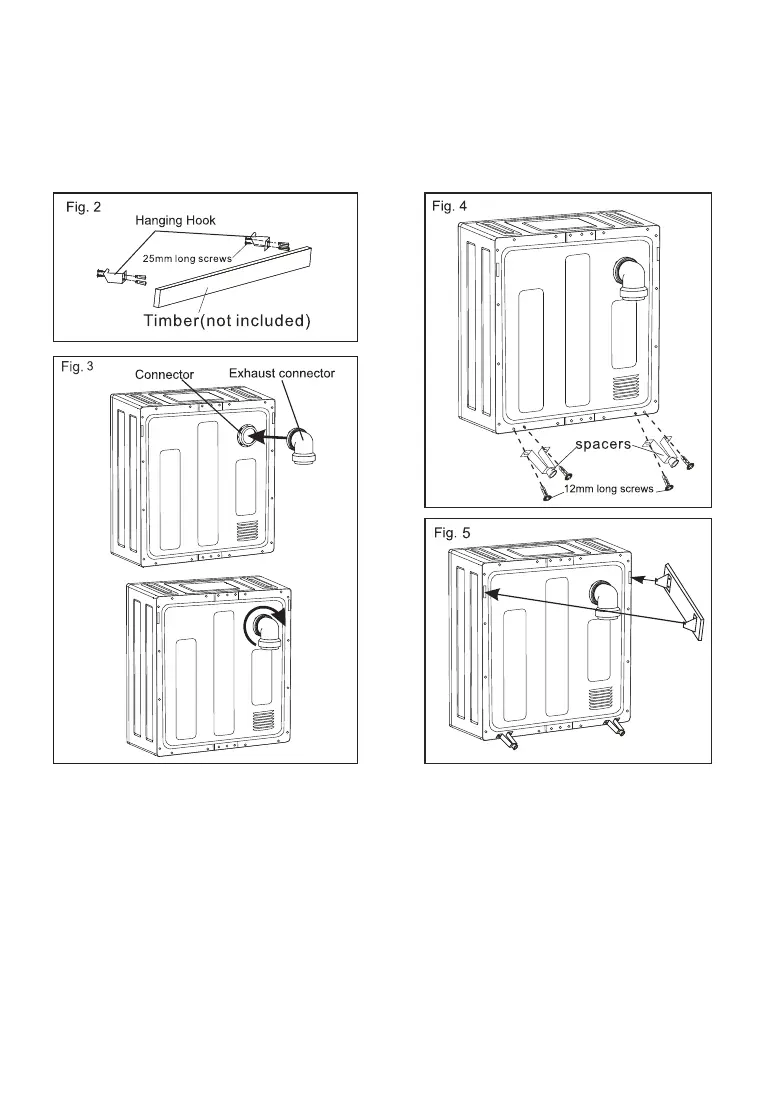
3. To install the hanging hook to timber, start at Fig. 2.
4. Align the hanging hooks and fasten the screws tightly.
5. Adjust the exhaust connector direction, then attach the exhaust connector to the connector (refer to
Fig. 3).
6. Turn the exhaust connecter clockwise, until it inserts into the connector’s groove.
7. Using 4 x 12mm screws (provided), fix the two spacers (refer to Fig. 4).
8. With the help of someone else, mount the dryer on the wall bracket (refer to Fig. 5).
This appliance should not be vented into a chimney, wall, ceiling, attic, crawl space or any
concealed space within the building.
Only rigid or flexible metal ducts are allowed for venting.
In Canada, that only those foil-type flexible ducts, if any, specifically identified for use with
the appliance by the manufacturer shall be used. In the United States, that only those foil-
type flexible ducts, if any, specifically identified for use with the appliance by the
manufacturer and that comply with the outline for Clothes Dryer Transition Duct, Subject
2158A, shall be used.
In Canada, that the exhaust duct shall be 102 mm in diameter. In the United States, the
required exhaust duct diameter.
That the total length of flexible metal duct shall not exceed 2.4 m. That the duct shall not
assembled with screws or other fastening means that extend into the duct and catch lint.
 Loading...