9
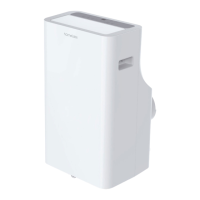
Your installation location should meet the following requirements:
• Make sure that you install your unit on an even surface for minimal noise and vibration.
• The unit must be installed near a grounded plug and the Bottom Tray Drain Outlet (on the back of the unit) must be accessible.
• The unit should be located at least 30cm (12 inches) from the nearest wall to ensure the proper air conditioning effect.
• DO NOT cover the Intakes, Outlets, or Remote Signal Receptor of the unit, as this could cause damage to the appliance.
OPERATION
INSTALLATION
WINDOW INSTALLATION KIT
Window Slider
Adapter
Exhaust Hose
Assembled Exhaust Hose
Hook
Adapter
Hole Seat
Lower Groove
30cm
(12 inches)
30cm
(12 inches)
50cm
(19.7 inches)
TOOLS NEEDED:
• Medium Philips screwdriver
• Tape measure or ruler
• Knife or scissors
• Saw (optional, to shorten Window Slider Adapter for narrow windows)
Step One: Preparing the Exhaust Hose Assembly
Keep the gray, foam tabs on each corner of the Window Slider Adapter in place as assembled. Press the Exhaust Hose into the Window
Slider Adapter and Unit Adapter. They will clamp together automatically by the elastic buckles of the adapters. You will hear all 4 corners
click once the unit is properly assembled.
Step Two: Installing the Exhaust Hose Assembly to the Unit
Insert the Unit Adapter (the Unit Adapter hook should remain right-side up) of the Exhaust Hose assembly into the lower groove of the air
outlet while the hook of the adapter is aligned with the air outlet. Slide down the Unit Adapter. The hose will slide in and lock in place.
Unit Adapter
Make sure the adapter is inserted into
the lower groove of the air outlet.

 Loading...