2
HR-REP
(Side View)
Installation
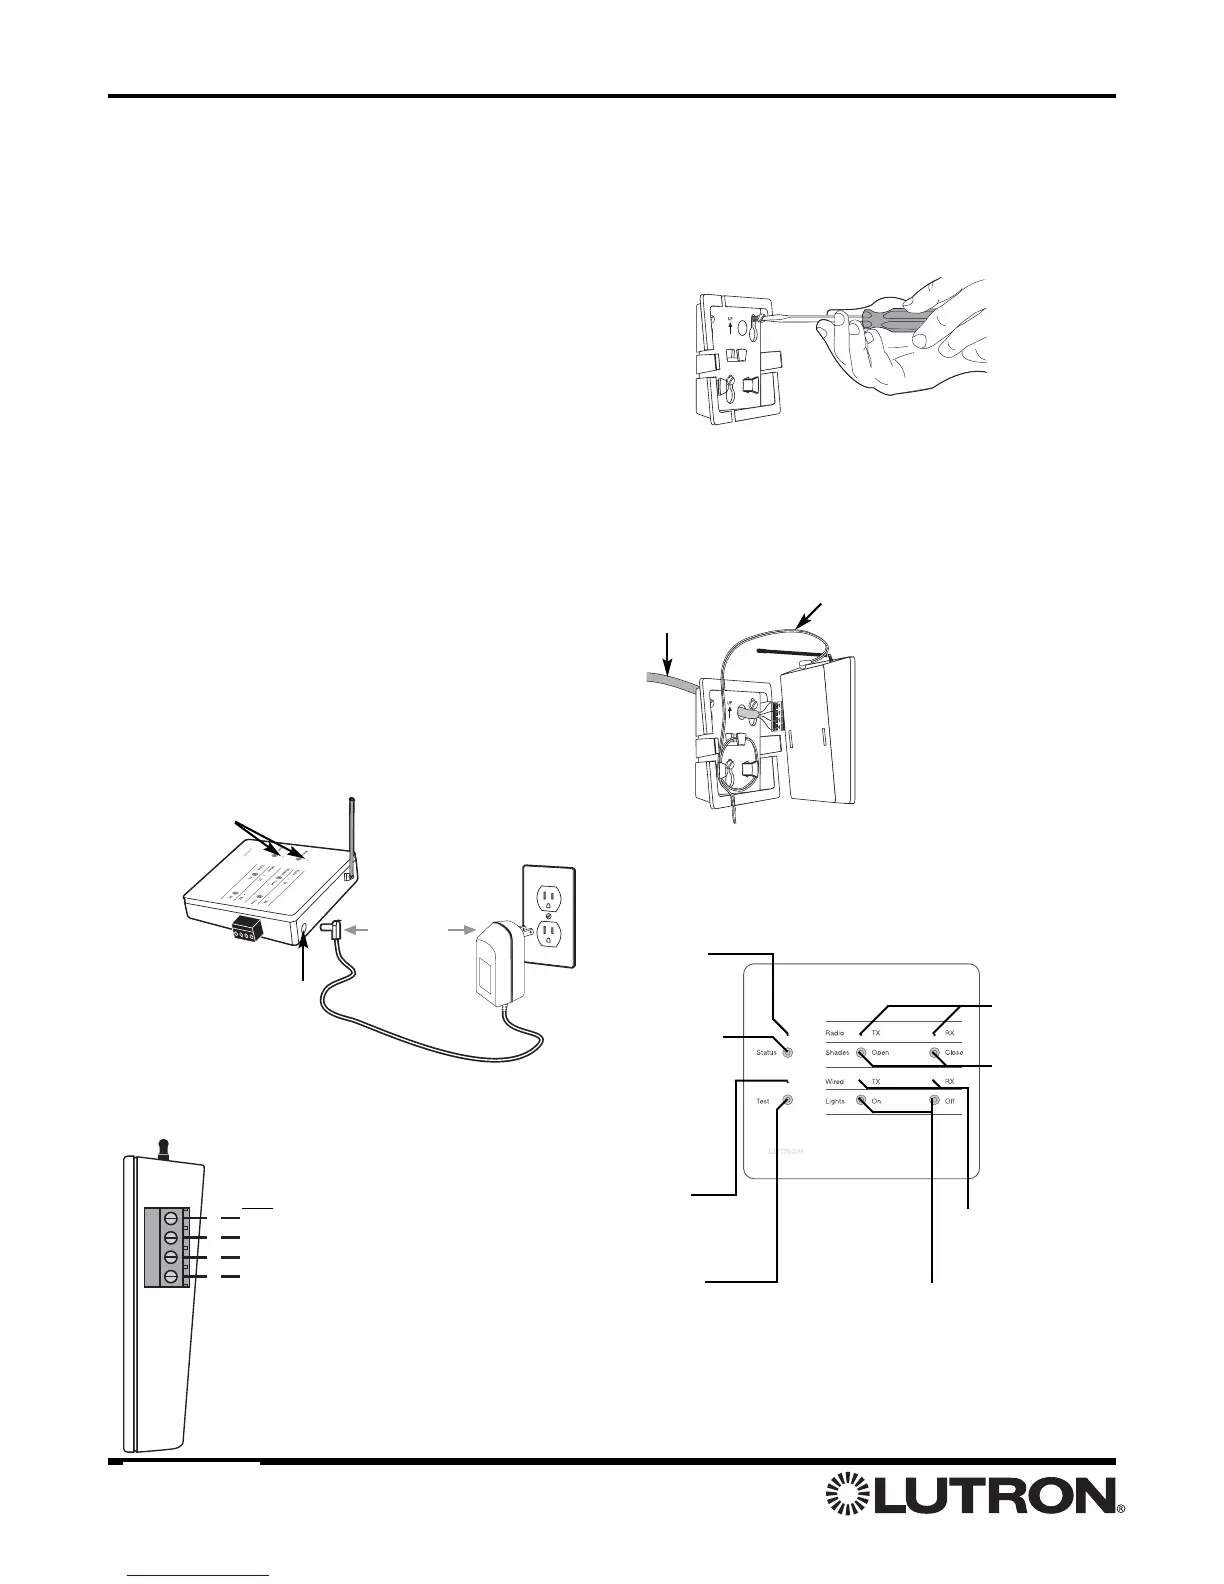
Wall Mounting
Hybrid Repeaters may be wall mounted using the
supplied wall bracket.
1. Attach wall bracket to wall using the supplied
screws and wall anchors.
2. Place power cord into notches at top and bottom of
wall bracket. Wrap excess power cord around the
cord holder. Route Hybrid Repeater Link wiring
through hole in wall bracket and out through side
cutout. Align repeater and snap onto wall bracket.
MUX
MUX
+15 V
COM
4
3
2
1
Power Cord
Hybrid
Repeater Link
Wiring
1. Find a suitable location for the Hybrid Repeater.
Place the repeater in a convenient and accessible
location. Note: Hybrid Repeaters must be within 60
feet (18 m) of an RF Processor or another repeater
when using the RF Link for repeater-to-repeater or
repeater-to-processor communication.
2. Connect Hybrid Repeater Link (if applicable).
Connect the Hybrid Repeater Link communication
wires from the HomeWorks®
Processor (or previous
Hybrid Repeater in the daisy chain) to the terminal
block on the Hybrid Repeater (see Wiring
Diagram). Each terminal will accept up to three
22-18 AWG (0.5-1.0 mm
2
) wires.
Note: If using the plug-in adapter to power the
repeater, DO NOT connect the +15 V terminal
(terminal 2).
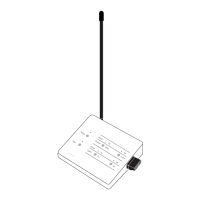
3. Apply power to the Hybrid Repeater. If the
Hybrid Repeater is to be powered by the Hybrid
Repeater Link, apply power by turning on the
HomeWorks Processor. If the Hybrid Repeater is to
be powered by the plug-in adapter, insert the
adapter cord plug into the jack on the Hybrid
Repeater, then plug the adpater into a standard
wall receptacle.
Radio TX/RX LEDs
Indicate RF Link
activity.
STATUS LED
Indicates the status
of the HomeWorks
system.
Note: When the Hybrid Repeater is powered, but has not yet been assigned an address
from the HomeWorks Illumination Software, the STATUS and TEST LEDs will be dimly
illuminated.
Operation
TEST LED
A slow flash indicates RF
communications tests are
in progress.
STATUS Button
Used when
addressing the
Hybrid Repeater
from the
HomeWorks
Illumination
TM
Software.
TEST Button
Activates RF communication tests. To activate
the tests, press and hold the TEST Button
until the TEST LED begins to flash.
Note: For communication tests, the Hybrid
Repeater, HomeWorks Processor, and other
RF devices must first be configured and
addressed using the HomeWorks Illumination
Software.
Shades Open/Close
Buttons
Opens or Closes all
RF Shades in the
HomeWorks system.
See Shades
Open/Close Button
Operation (page 4).
Lights On/Off Buttons
Turns On or Off all supported RF
Dimmers and Switches. See Lights
On/Off Button Operation (page 4).
Wired TX/RX LEDs
Indicate Wired Link
activity.
STATUS and
TEST LEDs will
be dimly lit when
first powered
Plug in
power cord
and adapter
(optional)
Plug in
adapter jack
 Loading...