© 2007 American Honda Motor Co., Inc. - All Rights Reserved. All 37152 (0706) 3 of 6
5727401Y
5412051B
VEHICLE
CONNECTORS
5 CLIPS
AUDIO PANEL
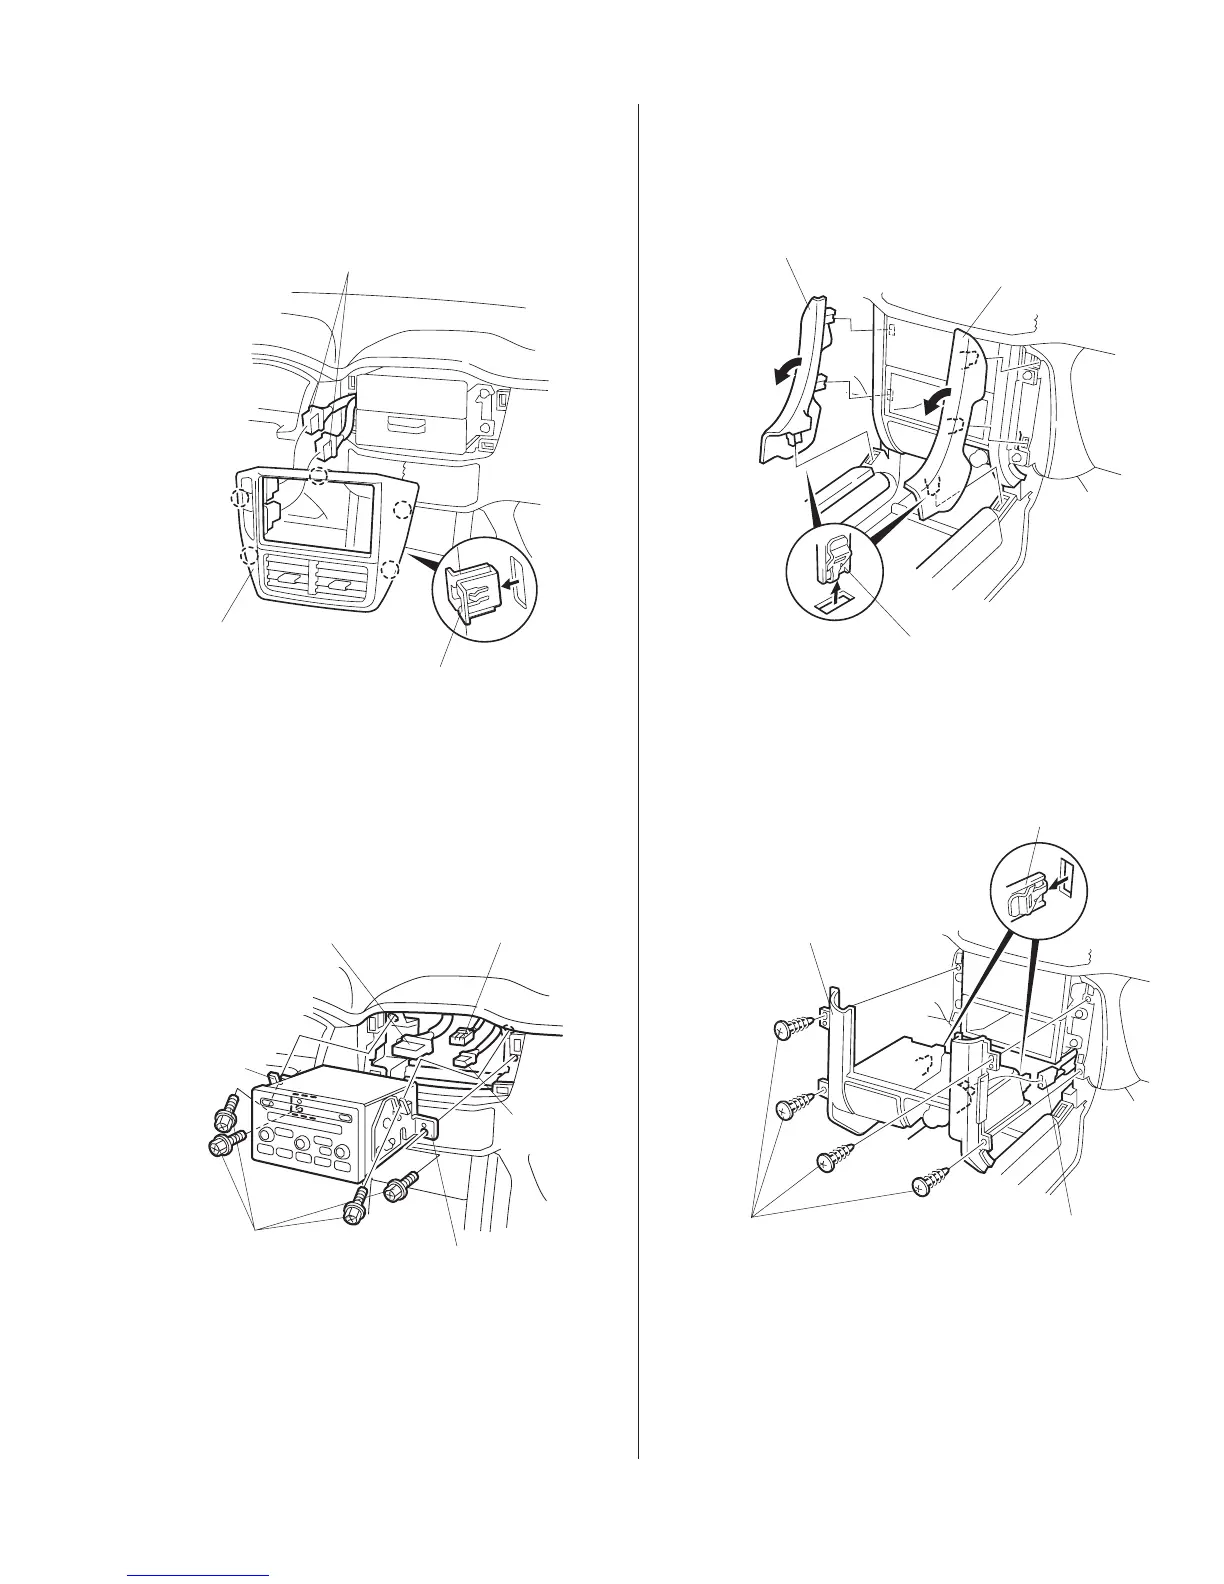
5. Gently pull out on the left side of the audio panel
to release the two clips, then pull out to release
the remaining three clips. Unplug the vehicle
connectors and remove the audio panel.
6. Remove the audio unit (four screws, pull the audio
unit out toward you, unplug the vehicle connectors
and antenna lead).
DRIVER’S CENTER
CONSOLE TRIM
PASSENGER’S CENTER
CONSOLE TRIM
3 CLIPS
7. Remove the driver’s and passenger’s center
console trim pieces (three clips each). Take care
not to damage the clips.
AUDIO
BRACKET
SCREWS
(Reuse.)
VEHICLE 14-PIN
CONNECTOR
(2WD vehicle only.)
VEHICLE 20-PIN
CONNECTOR
AUDIO
BRACKET
ANTENNA
LEAD
SELF-TAPPING
SCREWS
CENTER PANEL
2 CLIPS
VEHICLE
CONNECTOR
8. Remove four self-tapping screws that fasten the
center panel.
9. Pull the center panel out toward you to release the
two clips. Unplug the vehicle connector from the
accessory socket, and remove the center panel.
10. Remove four screws that fasten the left and right

 Loading...