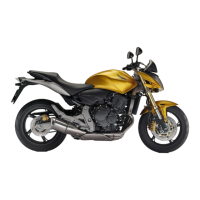
This document is the owner's manual for a Honda CB500F motorcycle, model number CB500F-32MGZA000. It was published on November 27, 2012. The manual covers various aspects of the motorcycle, including safety, operation, maintenance, troubleshooting, and specifications.
The motorcycle is a new Honda CB500F, designed for a worldwide family of satisfied customers who appreciate Honda's reputation for quality. The manual emphasizes the importance of reading it carefully, following all recommendations and procedures, and paying close attention to safety messages. The illustrations in the manual are based on the CB500FA ED type. Country codes are provided for different versions of the motorcycle, including UK (E, II E), France, Belgium (F, II F), European direct sales (ED, III ED), and Australia, New Zealand (U) for the CB500FA model. Specifications may vary by locale.
Safety is paramount, both for the rider and others. The manual stresses that operating the motorcycle safely is a significant responsibility. It provides operating procedures and safety information through labels and messages to alert users to potential hazards. Users are reminded to exercise good judgment as it's impossible to warn about all hazards. Safety information is presented in various forms: safety labels on the motorcycle and safety messages with alert symbols and signal words like DANGER, WARNING, or CAUTION.
- DANGER indicates that failure to follow instructions WILL result in death or serious injury.
- WARNING indicates that failure to follow instructions CAN result in death or serious injury.
- CAUTION indicates that failure to follow instructions CAN result in injury.
- NOTICE provides information to help avoid damage to the motorcycle, other property, or the environment.
Safety Guidelines:
To enhance safety, riders should:
- Perform all routine and regular inspections.
- Stop the engine and keep sparks/flame away when filling the fuel tank.
- Avoid running the engine in enclosed or partly enclosed areas due to toxic carbon monoxide.
- Always wear an approved motorcycle helmet and protective apparel, as they significantly reduce injuries.
- Be physically fit, mentally focused, and free of alcohol and drugs before riding.
- Instruct passengers on proper riding posture (holding grab rails/waist, leaning with rider, keeping feet on footpegs).
- Practice riding in a safe area to familiarize oneself with the motorcycle's handling, size, and weight.
- Ride defensively, paying attention to other vehicles and being prepared to stop or maneuver evasively.
- Make oneself visible by wearing bright, reflective clothing, positioning for visibility, signaling turns, and using the horn.
- Keep the motorcycle properly maintained and in safe riding condition, inspecting it before every ride and performing recommended maintenance.
- Never exceed load limits (P. 17) or install unsafe accessories (P. 16).
- In case of a crash, prioritize personal safety, assess injuries, call for emergency assistance, and follow laws. If continuing to ride, evaluate motorcycle condition, check for fluid leaks, and have it inspected by a qualified service facility.
- Be aware of Carbon Monoxide Hazard: exhaust gas is toxic and can cause unconsciousness or death. Avoid exposure.
Image Labels:
The manual describes various label meanings, some warning of potential hazards and others providing important safety information. Labels should not be removed, and replacements should be obtained from a dealer if they become unreadable.
- Symbols indicate instructions in the Owner's Manual or Shop Manual.
- Battery Label (DANGER): Warns about explosive gas, electrolyte burns, and the importance of proper handling, eye protection, and rubber gloves. Emphasizes not using a battery with electrolyte below the lower level mark.
- Radiator Cap Label (DANGER, Except U type): Warns against opening when hot due to scalding from hot coolant. Relief pressure valve opens at 1.1 kgf/cm².
- Accessories and Loading Warning Label (WARNING, Except U type): Warns that accessories and luggage can affect stability and handling. Advises reading instructions before installing. Specifies maximum weight capacity of 182 kg (401 lb) for rider, passenger, accessories, and luggage, and a maximum luggage weight of 11 kg (24 lb). Discourages large fork-mounted or handlebar-mounted fairings.
- Tyre Information Label: Provides cold tire pressure for driver only (Front: 250 kPa/2.50 kgf/cm²/36 psi, Rear: 290 kPa/2.90 kgf/cm²/42 psi) and for driver and passenger (same pressures). Tyre sizes are Front: 120/70ZR17M/C (58W) and Rear: 160/60ZR17M/C (69W). Recommended tire brands are DUNLOP (D222F Front, D222 Rear) and METZELER (ROADTEC Z8 INTERACT E Front, ROADTEC Z8 INTERACT Rear).
- Safety Reminder Label: Advises wearing a helmet and protective apparel.
- Fuel Label: Specifies unleaded petrol only.
- Drive Chain Label: Recommends keeping the chain adjusted and lubricated, with a freeplay of 35 to 45 mm (1.4 to 1.8 in).
Protective Apparel:
Riders and passengers should wear an approved motorcycle helmet, eye protection, and high-visibility protective clothing.
- Helmet: Safety-standard certified, high-visibility, correct size, comfortable, secure fit with chin strap fastened, face shield with unobstructed vision.
- Gloves: Full-finger leather gloves with high abrasion resistance.
- Boots or Riding Shoes: Sturdy boots with non-slip soles and ankle protection.
- Jacket and Trousers: Protective, highly visible, long-sleeved jacket and durable trousers (or a protective suit).
Riding Precautions:
- Running-in Period (first 500 km/300 miles): Avoid full-throttle starts, rapid acceleration, hard braking, rapid down-shifts, and ride conservatively to ensure future reliability.
- Brakes: Avoid excessively hard braking and sudden downshifting. Reduce speed before turning to prevent sliding. Exercise caution on low traction surfaces as tires slip more easily and braking distances are longer. Avoid continuous braking on long, steep slopes; use engine braking intermittently. For full effectiveness, use both front and rear brakes together.
- Anti-lock Brake System (ABS) (CB500FA only): Helps prevent brakes from locking up during hard braking. ABS does not reduce braking distance and may result in longer stopping distances in some circumstances. It does not function below 10 km/h (6 mph). Brake lever/pedal may recoil slightly, which is normal. Use recommended tires for correct ABS operation.
- Engine Braking: Helps slow the motorcycle when releasing the throttle; downshift for further slowing.
- Wet or Rainy Conditions: Road surfaces are slippery, and wet brakes reduce efficiency. Exercise extra caution. Apply brakes at low speed to dry them if they get wet.
- Parking: Park on a firm, level paved surface. If on an incline or loose surface, park to prevent movement or falling. Ensure high-temperature parts do not contact flammable materials. Allow hot parts (engine, muffler, brakes) to cool. Lock the handlebar and remove the key to prevent theft; an anti-theft device is also recommended.
- Refueling and Fuel Guidelines: Use only unleaded petrol with a recommended octane number of 91 RON or higher. Avoid fuels with high alcohol concentration (P. 108), stale/contaminated petrol, or oil/petrol mixtures. Prevent dirt/water from entering the fuel tank. Tank capacity is 15.7 liters (4.15 US gal, 3.45 Imp gal).
Accessories & Modifications:
Honda strongly advises against adding non-Honda accessories or modifying the original design, as this can make the motorcycle unsafe, void the warranty, and make it illegal. Follow all instructions regarding accessories and modifications. Do not pull a trailer or attach a sidecar, as the motorcycle is not designed for these and handling will be impaired.
Loading:
Carrying extra weight affects handling, braking, and stability. Ride at a safe speed for the load. Avoid excessive loads and stay within specified limits. Maximum weight capacity (rider, passenger, luggage, accessories) is 182 kg (401 lb). Maximum luggage weight is 11 kg (24 lb). Securely tie all luggage, ensuring it is evenly balanced and close to the motorcycle's center. Do not place objects near lights or the muffler. Overloading or improper loading can cause a crash.
Parts Location:
Diagrams illustrate the location of key components:
- Rear brake fluid reservoir (P. 70)
- Engine oil fill cap (P. 64)
- Front brake fluid reservoir (P. 70)
- Front brake lever
- Throttle grip (P. 80)
- Engine oil level inspection window (P. 64)
- Engine oil filter (P. 66)
- Fuse box (P. 102)
- Main fuse (P. 103)
- Rear brake pedal
- Battery (P. 63)
- Clutch lever (P. 77)
- Fuel fill cap (P. 38)
- Side cover (P. 60)
- Front seat (P. 59)
- Rear seat (P. 58)
- Drive chain (P. 73)
- Crankcase breather (P. 81)
- Engine oil drain bolt (P. 66)
- Rear suspension spring preload adjuster (P. 82)
- Coolant reserve tank (P. 68)
- Shift lever (P. 37)
- Side stand (P. 72)
Instruments:
The instrument panel includes:
- Speedometer
- Tachometer (red zone indicates excessive RPM, which can damage the engine)
- Fuel gauge (first segment (E) flashing indicates approximately 2.8 liters/0.74 US gal/0.62 Imp gal remaining)
- Clock (12-hour display, setting instructions on P. 26)
- Odometer [TOTAL]
- Tripmeter [A/B] (resets at 9999.9, or automatically when refueling more than reserve amount and riding 0.1 km)
- Fuel mileage meter (current and average)
- Fuel consumption meter (total)
- SEL and SET buttons for navigation and setting.
Display Check:
Upon ignition, all mode and digital segments illuminate, and the tachometer sweeps to maximum scale before disappearing. Any missing segments indicate a problem requiring dealer inspection.
Reserve Fuel Consumption Meter:
When the first fuel gauge segment flashes, the display switches to reserve fuel consumption. It flashes from "0.0" L or gal. If consumed fuel exceeds 1.0 liter (0.26 US gal, 0.22 Imp gal), the display blinks faster. It automatically returns to normal after refueling more than the reserve amount and traveling 0.1 km (0.06 mile).
Display Setting:
Allows sequential changes to:
- Clock setting (P. 27)
- Backlight brightness adjustment (five levels, P. 28)
- Activating/deactivating tripmeter A, average fuel mileage, and fuel consumption automatic reset mode (P. 29)
- Setting of HISS Indicator (P. 30)
- Changing of speed and mileage unit (km/h and km or mph and mile, P. 30)
- Changing of fuel mileage meter unit (km/L or L/100 km, or mile/L or mile/gal if mph/mile selected, P. 31)
Indicators:
- Low oil pressure indicator: Comes on with ignition, goes off when engine starts. If it stays on while running, check oil (P. 87).
- ABS (Anti-lock Brake System) indicator (CB500FA only): Comes on with ignition, goes off at approximately 10 km/h (6 mph). If it stays on while riding, there may be a brake system problem (P. 88).
- High coolant temperature indicator: Comes on briefly with ignition. If it comes on while riding, check coolant (P. 86).
- PGM-FI (Programmed Fuel Injection) malfunction indicator lamp (MIL): Comes on briefly with ignition (engine stop switch in Run position). If it comes on while riding, there may be a serious PGM-FI system problem (P. 87).
- HISS indicator: Comes on briefly with ignition if the correct key is used. Flashes every 2 seconds for 24 hours when ignition is off (can be turned on/off, P. 26).
- Right turn signal indicator
- High beam indicator
- Left turn signal indicator
- Neutral indicator: Comes on when transmission is in Neutral.
Switches:
- Engine stop switch: Normally in Run position. In an emergency, switch to Off to stop the engine.
- Start button
- Horn button
- Turn signal switch: Pressing turns off the signal.
- Headlight dimmer switch: High beam and Low beam.
- Passing light control switch: Flashes high beam.
- Ignition Switch: Turns electrical system on/off, locks steering. Key can be removed in OFF or LOCK.
- Steering Lock: Locks steering to prevent theft. Push key down and turn to LOCK.
- Hazard switch: Switchable when ignition is on. Signals continue flashing even if ignition is OFF or LOCK.
Starting the Engine:
- Engine stop switch in Run position.
- Ignition switch ON.
- Transmission in Neutral (N indicator on), or pull clutch lever (if side stand raised).
- Press start button with throttle completely closed.
If the engine doesn't start within 5 seconds, turn ignition off, wait 10 seconds, and retry. Extended fast idling can damage the engine. If the engine still doesn't start, refer to troubleshooting (P. 85).
Shifting Gears:
Six forward gears in a one-down, five-up shift pattern. The engine will shut off if put in gear with the side stand down.
Refueling:
Open lock cover, insert ignition key, turn clockwise to remove cap. After refueling, align cap latch with filler neck slot, push until it snaps closed and locks. Key cannot be removed if not locked. Fuel type: unleaded petrol, 91 RON or higher. Tank capacity: 15.7 liters.
Storage Equipment:
- Helmet holder: Located under the rear seat. Use only when parked.
- Helmet set wire: In the tool kit, used with the helmet holder.
- Tool kit: Stored under the rear seat (P. 58). Contains tools for roadside repairs and minor adjustments.
- U-shaped lock storage: Space under the front seat (P. 59).
- Document bag: Located underside of the front seat (P. 59).
Maintenance:
Emphasizes reading "Importance of Maintenance" and "Maintenance Fundamentals" before any work.
- Importance of Maintenance: Essential for safety, performance, investment protection, and emission control. Owner's responsibility to inspect before each ride.
- Maintenance Safety: Read instructions, use correct tools/skills. Stop engine, remove key, park on firm level surface. Allow hot parts to cool. Run engine only in well-ventilated areas if instructed.
- Maintenance Schedule: Specifies periodic maintenance for safe, dependable performance and emission control. Work should be performed by Honda-trained technicians. Keep accurate records. Honda recommends a road test after periodic maintenance.
- Battery: Maintenance-free type. Do not check electrolyte or add distilled water. Clean terminals if dirty/corroded. Do not remove cap seals. Symbol indicates it should not be treated as household waste. Battery gives off explosive hydrogen gas; avoid sparks/flames. Wear protective clothing/face shield.
- Fuses: Protect electrical circuits. Check and replace blown fuses (P. 102). Use fuses of the same rating. Repeated failures indicate an electrical fault.
- Engine Oil: Consumption varies, quality deteriorates. Check level regularly, add recommended oil (P. 50). Use JASO T 903 standard MA, SAE 10W-30, API classification SG or higher. Overfilling or insufficient oil can damage the engine.
- Brake Fluid: Do not add or replace except in emergency. Use fresh fluid from sealed container. Honda DOT 4 Brake Fluid or equivalent. Can damage plastic/painted surfaces.
- Drive Chain: Inspect and lubricate regularly. Check for smooth movement, damaged rollers, loose pins, missing O-rings, kinks. Inspect sprockets. Clean with chain cleaner for O-ring chains or neutral detergent. Lubricate with lubricant for O-ring chains or SAE 80/90 gear oil. Avoid steam cleaners, high-pressure cleaners, wire brushes, volatile solvents, or abrasive cleaners.
- Coolant: Pro Honda HP coolant (pre-mixed 50% antifreeze, 50% distilled water). Check level between UPPER and LOWER marks in reserve tank. If dropping, suspect a leak. Do not overfill. Do not remove radiator cap when hot.
- Tyres (Inspecting/Replacing): Inspect for cuts, slits, cracks, nails, foreign objects, bumps, bulges. Inspect for abnormal wear. Check air pressure at least monthly when cold. Replace when tread wear indicators become visible (minimum tread depth 1.6 mm in Germany). Use recommended size, construction, speed rating, and load range. Balance wheels with Honda Genuine weights. Use only tubeless tires. Improper tires affect handling/stability.
- Air Cleaner: Viscous type. Do not clean with air blow or other methods, as this degrades performance. Service by dealer.
- Tool Kit: Contains pin spanner, open end wrenches (10x14mm, 8x12mm for U type), standard/Phillips screwdriver, screwdriver handle, extension bar, 5mm Hex wrench, 19mm Box end wrench (U type), 24mm Box end wrench (U type), helmet set wire, fuse puller.
- Removing & Installing Body Components: Instructions for rear seat, front seat, side cover, headlight assembly, and clips.
Troubleshooting:
- Engine Will Not Start (HISS indicator stays on): Check starting sequence, fuel level, PGM-FI MIL. If HISS indicator stays on, check for other HISS keys nearby, metallic seals/stickers on key.
- Starter Motor Does Not Operate: Check engine stop switch, blown fuse, loose battery connection, battery condition.
- Overheating (High coolant temperature indicator is on): Pull over, stop engine. Check radiator fan operation. Allow engine to cool. Inspect radiator hose for leaks. Check coolant level. If checks are normal, may continue riding while monitoring temperature.
- Warning Indicators On or Flashing:
- Low Oil Pressure Indicator: Pull over, stop engine. Check oil level. Only continue if indicator goes off.
- PGM-FI Malfunction Indicator Lamp (MIL): Reduce speed, have motorcycle inspected by dealer.
- ABS Indicator (CB500FA only): If on/flashing while riding, or not coming on with ignition, or not going off at 10 km/h, there's a brake system problem. Brakes will still work conventionally.
- Other Warning Indication:
- Fuel Gauge Failure Indication: If fuel gauge indicators display an error pattern, see dealer.
- Tyre Puncture: Repairing or removing a wheel requires special tools/expertise. Emergency repair with a tubeless tire repair kit is risky; ride slowly (max 50 km/h/30 mph) until replaced.
- Removing Front Wheel: Park on firm, level surface. Cover brake caliper. Remove mounting bolts and caliper, supporting it to avoid hose twisting. Avoid grease/oil on disc/pads. Do not pull brake lever. Loosen axle pinch bolt and front axle shaft. Support motorcycle, raise front wheel. Remove axle shaft, wheel, side collars.
- Installing Front Wheel: Attach side collars. Place wheel between fork legs, insert axle shaft. Tighten axle shaft (54 N·m/5.5 kgf·m/40 lbf·ft). Install brake caliper, tighten mounting bolts (30 N·m/3.1 kgf·m/22 lbf·ft). Lower wheel, pump brake lever several times. Tighten axle pinch bolt (22 N·m/2.2 kgf·m/16 lbf·ft). Check wheel rotates freely.
- Removing Rear Wheel: Support motorcycle, raise rear wheel. Loosen rear axle nut, lock nuts, adjusting nuts to move wheel forward. Remove drive chain from sprocket. Remove rear axle nut and washer. Remove axle shaft, washer, brake caliper bracket, rear wheel, side collars. Support caliper. Do not push brake pedal.
- Installing Rear Wheel: Reverse removal. Ensure brake caliper bracket slot is in swingarm lug. Adjust drive chain (P. 74). Tighten rear axle nut (88 N·m/9.0 kgf·m/65 lbf·ft). Tighten drive chain adjusting nuts (21 N·m/2.1 kgf·m/15 lbf·ft). Apply brake pedal several times, check wheel rotates freely.
- Electrical Trouble:
- Battery Goes Dead: Charge with motorcycle battery charger. Remove battery for charging. Do not use automobile charger. If battery doesn't recover, contact dealer. Jump starting with automobile battery is not recommended.
- Burned-out Light Bulb: Turn ignition off/LOCK. Allow bulb to cool. Use specified bulbs (P. 118).
- Headlight Bulb: Remove headlight assembly (P. 61), pull socket, remove dust cover, press pin, pull bulb. Install new bulb. Avoid touching glass.
- Position Light Bulb: Remove headlight assembly (P. 61), pull socket, pull bulb. Install new bulb.
- Brake/Tail Light Bulb: Remove bolts and rear fender cover.
- Front/Rear Turn Signal Bulb: Remove screw/collar, lens. Press bulb, turn counterclockwise. Install new amber bulb.
- License Plate Light Bulb: Remove screws, license light cover/packing. Pull bulb. Install new bulb.
- Blown Fuse: See "Inspecting and Replacing Fuses" (P. 49).
- Fuse Box Fuses: Remove front seat (P. 59), fuse box covers. Pull fuses with puller, check for blown fuse. Replace with same rating.
- Main Fuse: Remove right side cover (P. 60). Disconnect wire connector of starter magnetic switch. Pull main fuse, check for blown fuse. Replace with same rating. Spare main fuse in starter magnetic switch.
- Keys: Ignition key contains a coded chip for the HISS immobilizer system. Handle carefully. Avoid bending, high temperatures, grinding, drilling, or strong magnetic objects. If all keys and key number plate are lost, PGM-FI unit/ignition control module must be replaced. Keep a duplicate key.
- Instruments, Controls, & Other Features:
- Ignition Switch: Headlight always on when ignition is on. Leaving ignition on with engine off drains battery.
- Engine Stop Switch: Use only in emergency. Stopping engine with this switch drains battery if ignition is left on.
- Odometer: Locks at 999999.
- Tripmeter: A and B reset at 9999.9.
- HISS (Honda Ignition Security System): Immobilizes engine if improperly-coded key is used. Indicator comes on then off if correct key is used. Flashes for 24 hours when ignition is off (can be turned on/off, P. 26).
- EC Directive: Immobilizer system complies with R & TTE Directive.
- Document Bag: Stores owner's manual, registration, insurance information.
- Ignition Cut-off System (Banking Sensor): Stops engine/fuel pump if motorcycle falls over. Reset by turning ignition OFF then ON.
- Fuels Containing Alcohol: Some conventional fuels blended with alcohol are available. Use unleaded, minimum octane rating. Ethanol (ethyl alcohol) up to 10% by volume. Methanol (methyl alcohol) up to 5% by volume with cosolvents and corrosion inhibitors. Higher percentages can damage fuel tank paint, rubber tubes, cause corrosion, or poor drivability.
- Catalytic Converter: Three-way converter with precious metals. Converts HC, CO, NOx into safe compounds. Use unleaded petrol. Keep engine in good running condition. Service if engine misfires, backfires, stalls.
- Caring for Your Motorcycle: Frequent cleaning and polishing. Wash thoroughly after riding in seawater or on treated roads. Allow hot parts to cool. Rinse with garden hose, use mild cleaner. Avoid high-pressure washers, directing water at muffler/rear seat/air cleaner/headlight. Dry brakes. Lubricate moving parts and drive chain. Apply wax (avoid matte painted surfaces).
- Aluminium Components: Corrode from dirt, mud, road salt. Clean regularly. Avoid stiff brushes, steel wool, abrasive cleaners.
- Exhaust Pipe and Muffler: Stainless steel, can stain. Clean with wet sponge and liquid kitchen abrasive. Remove heat stains with fine texture compound.
- Storing Your Motorcycle: Use full-body cover if outdoors. For extended storage: wash/wax, coat chrome with rust-inhibiting oil, lubricate drive chain (P. 52). Place on maintenance stand with tires off ground. Remove body cover after rain. Remove battery (P. 63) or disconnect negative terminal.
- Transporting Your Motorcycle: Use motorcycle trailer or flatbed truck with loading ramp/lifting platform and tie-down straps. Do not tow with wheels on ground (can damage transmission).
- You & the Environment: Use biodegradable detergent. Recycle oil and toxic wastes. Do not pour used oil down drains or on ground.
Specifications:
- Main Components:
- Type: PC45
- Overall length: 2,075 mm (81.7 in)
- Overall width: 780 mm (30.7 in)
- Overall height: 1,060 mm (41.7 in)
- Wheelbase: 1,410 mm (55.5 in)
- Minimum ground clearance: 155 mm (6.1 in)
- Caster angle: 25º 30´
- Trail: 103 mm (4.1 in)
- Curb weight: CB500F 190 kg (419 lb), CB500FA 192 kg (423 lb)
- Maximum weight capacity (including rider, passenger, luggage, accessories): 182 kg (401 lb)
- Maximum luggage weight: 11 kg (24 lb)
- Passenger capacity: Rider and 1 passenger
- Minimum turning radius: 2.7 m (8.9 ft)
- Displacement: 471 cm³ (28.7 cu-in)
- Bore × stroke: 67.0 × 66.8 mm (2.64 × 2.63 in)
- Compression ratio: 10.7:1
- Fuel: Unleaded petrol, Recommended 91 RON or higher
- Tank capacity: 15.7 liters (4.15 US gal, 3.45 Imp gal)
- Battery: FTZ10S (12V-8.6Ah (10 HR) / 9.1Ah (20 HR)), YTZ10S (12V-8.6Ah (10 HR) / 9.1Ah (20 HR))
- Gear ratios: 1st 3.285, 2nd 2.105, 3rd 1.600, 4th 1.300, 5th 1.150, 6th 1.043
- Reduction ratios (primary / final): 2.029 / 2.733
- Service Data:
- Tyre size: Front 120/70ZR17M/C (58W), Rear 160/60ZR17M/C (69W)
- Tyre type: Radial, tubeless
- Recommended Tyres: Front DUNLOP D222F/METZELER ROADTEC Z8 INTERACT E, Rear DUNLOP D222/METZELER ROADTEC Z8 INTERACT
- Tyre air pressure: Front 250 kPa (2.50 kgf/cm², 36 psi), Rear 290 kPa (2.90 kgf/cm², 42 psi)
- Minimum tread depth: Front 1.5 mm (0.06 in), Rear 2.0 mm (0.08 in)
- Spark plugs (standard): CPR8EA-9 (NGK)
- Spark plug gap: 0.80 to 0.90 mm (0.031 to 0.035 in)
- Idle speed: 1,200 ± 100 rpm
- Recommended engine oil: Honda 4-stroke motorcycle oil API Service Classification SG or higher, excluding "Energy Conserving" or "Resource Conserving," SAE 10W-30, JASO T 903 standard MA
- Engine oil capacity: After draining 2.5 liters (2.6 US qt, 2.2 Imp qt), After draining & engine oil filter change 2.7 liters (2.9 US qt, 2.4 Imp qt), After disassembly 3.2 liters (3.4 US qt, 2.8 Imp qt)
- Recommended brake fluid: Honda DOT 4 Brake Fluid
- Cooling system capacity: 1.40 liters (1.48 US qt, 1.23 Imp qt)
- Recommended coolant: Pro Honda HP Coolant
- Recommended drive chain lubricant: Drive chain lubricant designed specifically for O-ring chains
- Drive chain slack: 35 to 45 mm (1.4 to 1.8 in)
- Standard drive chain: DID 520V0, No. of links 112
- Standard sprocket sizes: Engine sprocket 15T, Rear wheel sprocket 41T
- Bulbs:
- Headlight: 12V-60/55W
- Brake/Tail light: 12V-21/5W
- Front turn signal lights: 12V-21W × 2
- Rear turn signal lights: 12V-21W × 2
- Position light: 12V-5W
- License plate light: 12V-5W
- Fuses:
- Main fuse: 30A
- Other fuses: CB500F 15A, 7.5A; CB500FA 30A, 15A, 7.5A
- Torque Specifications:
- Engine oil drain bolt: 30 N·m (3.1 kgf·m, 22 lbf·ft)
- Oil filter: 26 N·m (2.7 kgf·m, 19 lbf·ft)
- Front wheel axle shaft: 54 N·m (5.5 kgf·m, 40 lbf·ft)
- Front wheel brake caliper mounting bolts: 30 N·m (3.1 kgf·m, 22 lbf·ft)
- Front wheel axle pinch bolt: 22 N·m (2.2 kgf·m, 16 lbf·ft)
- Rear wheel axle nut: 88 N·m (9.0 kgf·m, 65 lbf·ft)
- Drive chain adjusting lock nuts: 21 N·m (2.1 kgf·m, 15 lbf·ft)