© 2003 American Honda Motor Co., Inc - All Rights Reserved. AII 25876 (0308) 7 of 8
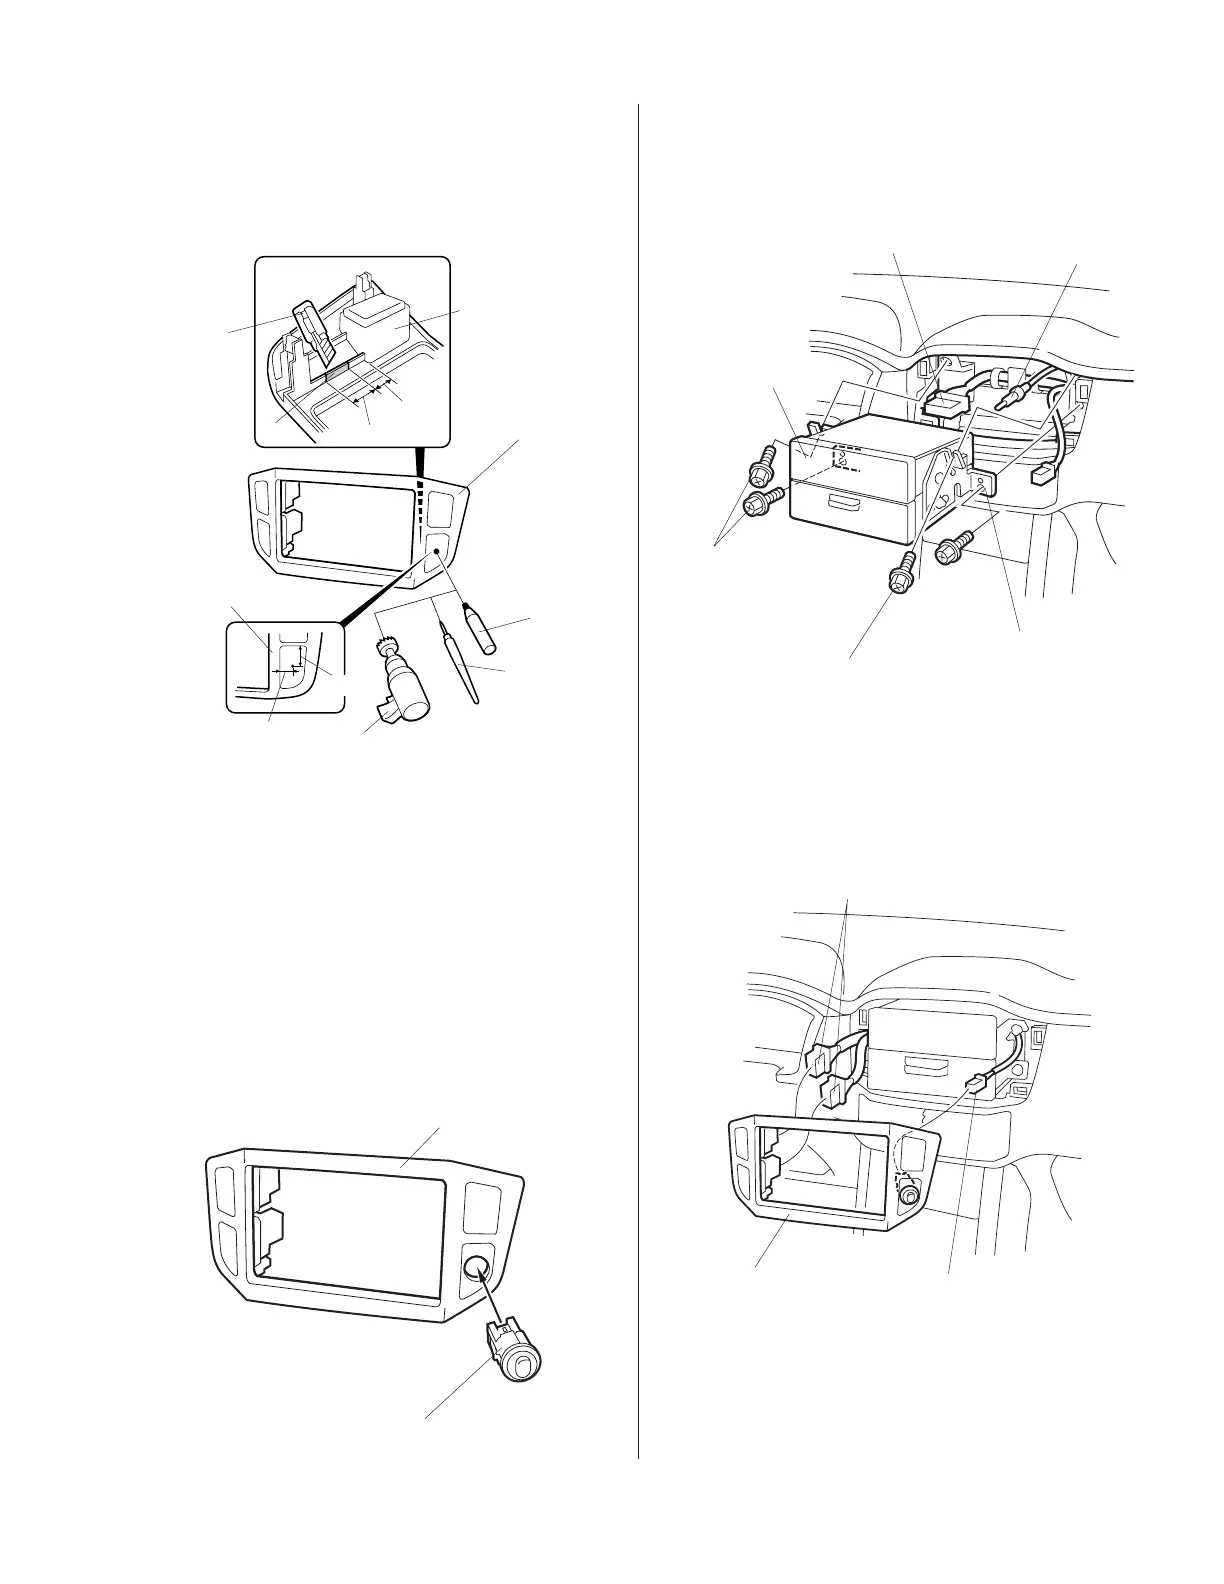
28. On the front of the audio panel measure and mark
the panel in the area shown. Using an awl, center
punch the marked location.
29. While wearing eye protection, drill a 20 mm hole
through the audio panel at the marked location
using a 20 mm hole saw. Remove any burrs from
the edge of the hole with a file.
30. Install the subwoofer switch into the 20 mm hole
in the audio panel.
31. Slide the audio unit into the center panel opening,
plug in the vehicle connector and the antenna
lead, and reinstall the four bolts.
32. Hold the audio panel near the audio unit panel
opening; connect the subwoofer harness 2-pin
connector and the vehicle connectors into the
audio panel, then reinstall the audio panel.
3403210M
SUBWOOFER
2-PIN CONNECTOR
AUDIO
PANEL
VEHICLE CONNECTOR
Installing the Subwoofer Switch
27. Get the audio panel removed in step 6. Using a
utility knife, cut off the rib from the back of the
audio panel in the area shown.
3403181M
AWL
UTILITY
KNIFE
BACK OF
AUDIO PANEL
20 mm HOLE SAW
15 mm
22 mm
AUDIO PANEL
RIB
20 mm
15 mm
AUDIO
PANEL
FELT-TIP
PEN
3403190M
AUDIO PANEL
SUBWOOFER SWITCH
3403200M
VEHICLE
CONNECTOR
ANTENNA
LEAD
AUDIO
BRACKET
BOLT
(reused)
AUDIO
UNIT
BOLT
(reused)
www.collegehillshonda.com