8
Figure 5.11Figure 5.10
FINAL INSTALLATION
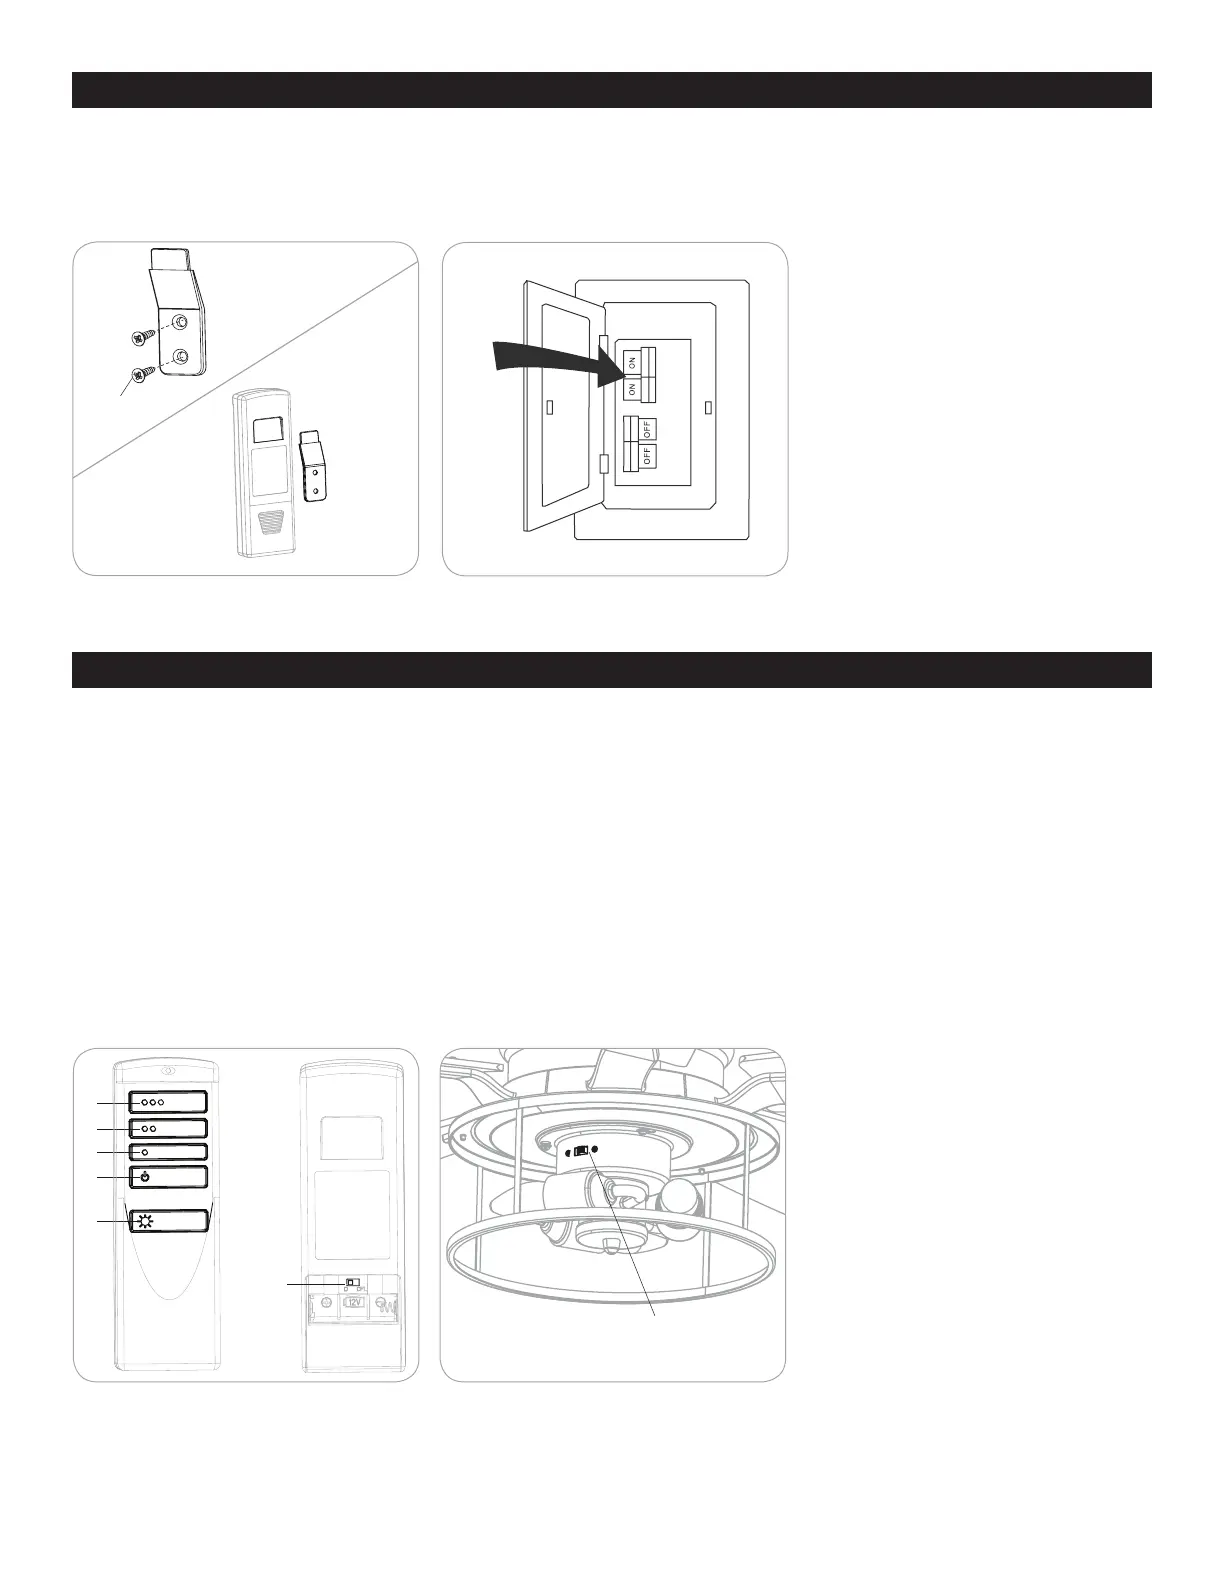
10. If desired, the wall bracket in remote pack can be installed to a wall using the provided mounting screws. The remote can be
stored in the mounting bracket for easy access (Figure 5.10).
11. Turn on power to fan at breaker box and the wall switch (Figure 5.11). Assembly is complete.
OPERATING INSTRUCTIONS
Screw
Wall
Bracket
Figure 6.2Figure 6.1
Reverse Switch
1. To operate the fan using remote control, press and release the following buttons:
A - High fan speed
B - Medium fan speed
C - Low fan speed
D - Turns the fan off. Press and hold this button for 5 seconds to enter Light Delay Off mode, which will turn off light after one
minute. The LED indicator on the remote control will ash four times to conrm mode setting.
E - Light Control: Dimmable Bulbs - Press light control to turn lights off and on. Press and hold light control to dim or
brighten the lights. Non-dimmable Bulbs -Turns the lights on and off. Note: The dimmer function does not work with non-
dimmable bulbs.
F - D/CFL Switch: Located inside the battery compartment in remote transmitter. Button must remain in the “D” position at all
times for this item. (Figure 6.1).
2. Use the reverse switch located on the light kit to optimize your fan for seasonal performance. In warmer weather, push the
reverse switch left which results in downward airow creating a wind chill effect. In cooler weather, push the reverse switch
right which results in upward airow that will help move hot air of the ceiling (Figure 6.2).
Note: Mesh on light kit not shown.
 Loading...