11
01 User 1 *1234
User(L2)
The scroll keys are used to select the user to be edited. Pressing enter here will show the
options for the user, starting with the PIN code option. Again, the scroll keys can be used to
move between the options. Pressing the ent key allows the displayed option to be modified.
Most users can only access the PIN option. Only Master users can access the other functions.
The programmable options for each user are listed below:
1 = PIN
This allows a new 4, 5, or 6 digit PIN code to be entered.
2 = Type
This allows the user type to be selected. There are 4 types available to choose from:
0 = Cleaner: Can only set and unset the system
1 = User: Can do all day-to-day operation but cannot override fault conditions
2 = Manager: As per User but can override faults and reset alarms and tampers
3 = Master: As per Manager but can add, remove and alter user codes.
3 = Group(s)
If group mode is enabled, this will allow the system groups that the user has access to to be
altered. The numbers shown on the display indicate the groups that the user has access to.
Pressing the appropriate number key toggles the group on or off.
4 = Name
This allows a 6-character label to be assigned to the user, to aid identification when viewing
the event log.
5 = RF Fob
This allows a wireless keyfob to be assigned to the user. The fob serial number is shown in the
bottom row. If a new fob is to be assigned it should be ‘learned’ in as follows:
1. Press the star key to start the learn process.
2. Press any button on the keyfob. The display will indicate success.
If a keyfob needs to be deleted, while the serial number is displayed, press the B< key to
delete the serial number then press ent.
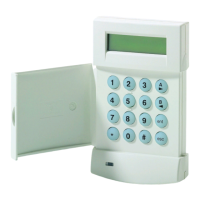
6 = Prox Tag (Mk7 Keyprox Units Only)
NOTE: For programming prox tags onto a 6160 keyprox, use menu 5 = RF Fob, but hold
the tag up in place of steps 1 and 2.
This option allows a prox tag to be entered or deleted. On entering the option, the serial
number of the current tag, programmed is displayed. To delete the current tag, press the B<
key until the serial number is cleared then press ent. To program a new tag, clear any current
serial number then press the 1 and A> keys simultaneously then present the new tag to the
bottom of the keyprox. The new serial number should appear on the screen. Press the ent key
to save the new number.
www.PDF-Zoo.com
 Loading...

