HE440A, HE480A STEAM POWER HUMIDIFIER
68-0265EF-1 4
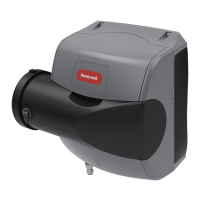
Fig. 4. Mounting humidifier horizontally under duct
extension using mounting bracket.
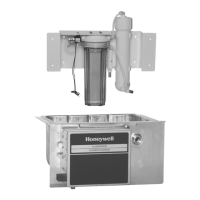
Two-Stage Water Treatment System
Mounting holes are provided for two mounting configurations:
• Between two exposed wall studs.
• Wall mounted.
NOTE: Do not mount on duct or furnace cabinet.
Choose a location convenient for running a drain line, water
supply and wiring between the humidifier, water treatment
system and equipment fan.
WARNING
Electrocution, Heavy Equipment and Chemical
Hazard.
Can cause death, blindness, water damage to
home and heater failure.
Do not cut into any air conditioning or electrical line.
Mount the humidifier in level position to avoid water
damage and heater failure.
Wear safety glasses when cutting or drilling.
Reinforce duct, as necessary, to ensure stability.
CAUTION
Steam Condensation, Fire and Freezing Water
Hazard.
Can cause fan or limit control failure or result in
water damage in home.
Do not install humidifier where return air duct sidewalls
are constructed of wood (floor joist).
Do not install humidifier where temperature is lower
than 40°F (4°C) or higher than 160°F (71°C).
Mounting Steam Power Humidifier
Mount Horizontally Using Mounting Bracket
(Preferred Mounting Method)
IMPORTANT
Be sure duct is at least 11 in. (280 mm) wide to use
this mounting method.
The duct is the strongest when using the mounting bracket
method because less duct reinforcement is required to
support the bracket using this bracket location. It is important
to evaluate if reinforcement is necessary to help support the
weight of the humidifier and keep it level.
1. Measure and mark an 8-1/2 in. (215 mm) x 11-1/2 in.
(290 mm) outline on the bottom of the duct in the
desired location.
2. Drill 3/8 in. hole (10 mm) within the outlined mounting
hole location.
IMPORTANT
Be sure to carefully cut around the marked lines.
3. Use the tin snips to cut around the outline.
4. Remove the sheet metal.
5. Place the two 8-1/2 in. (215 mm) S-cleat pieces (pro-
vided) on the narrow sides of the rectangular opening
so the opening (slot) protrudes down and out from the
duct.
6. Place the 11-1/2 in. (290 mm) piece of S-cleat on the
long side of the rectangular opening closest to the cen-
ter of the duct so the opening (slot) shows below the
duct.
7. Use two machine screws and nuts (provided) to attach
the mounting bracket (L-shaped with six holes) to the
top/front surface of the humidifier. (The humidifier is
now ready for mounting.)
8. Slide the humidifier tabs into the installed S-cleat. Be
sure the back tab engages completely with the S-cleat
and the mounting bracket touches the side of the duct.
9. Using the mounting bracket as a guide, drill three 7/64
in. (3 mm) holes through the duct.
10. Secure the humidifier to the duct with three no. 8 sheet
metal screws (not provided).
M20328
HUMIDIFIER
HUMIDIFICATEUR
MOUNTING
BACKET
 Loading...