Configuration | 91
800-22740 - A - 02-2017
To configure Video Matrix settings
Click Video Matrix in the System configurations interface to open the Video Matrix
configurations interface.
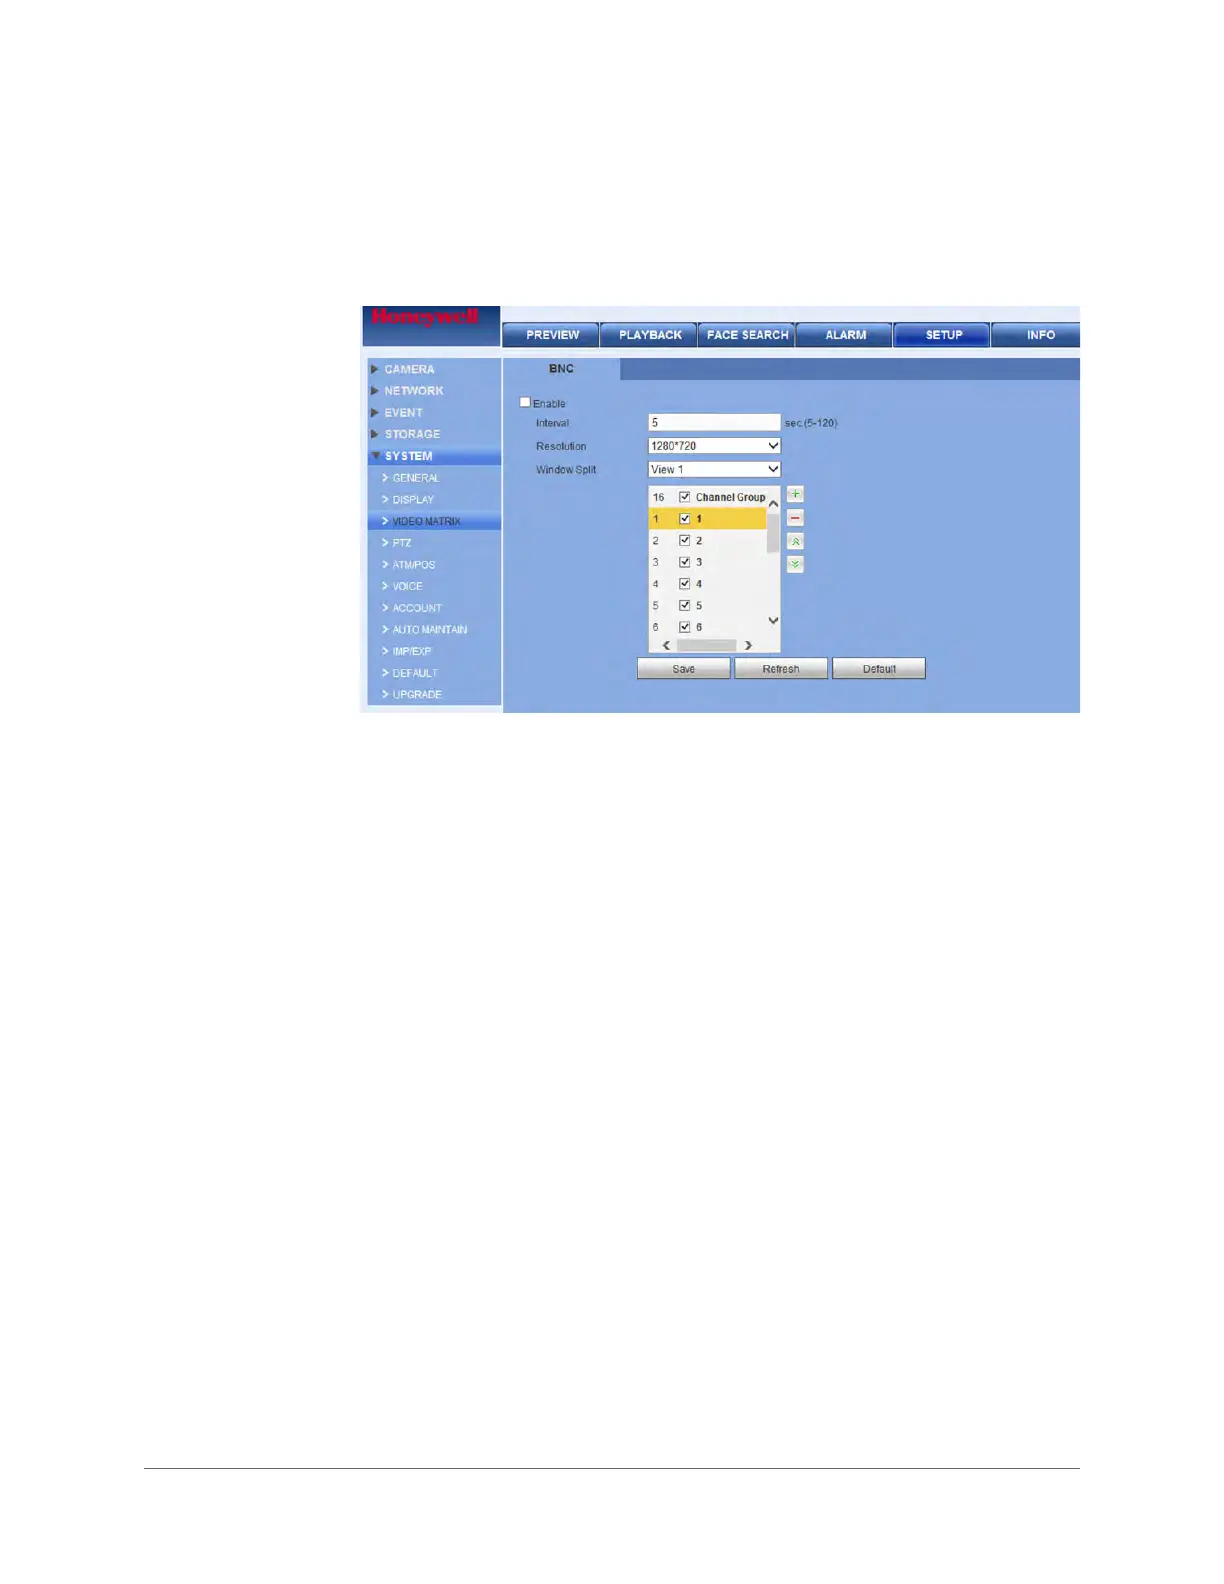
Figure 3-56 Video Matrix Configurations Interface
3. On the Video Matrix tab, configure the following settings:
4. Click + to add a channel group.
5. Click Save to save your settings.
Other Functions/Buttons
Modify - Double-click a channel or select a channel, then click Modify to change the
current channel setup.
Delete - Click - to remove a selected channel group.
Move Up - Click to move the current selected channel group up the list.
Move Down - Click to move the current selected channel group down the list.
•Enable Select the check box to enable the zero-channel function or clear
the check box to disable it.
• Interval This is the interval the DVR waits before sending out email
notifications after an event is detected. Enter a time between 0
and 1440 minutes. 0 means that there is no interval.
•Resolution Select the desired video resolution from the list. The default
setting is 1280 x 720.
• Window Split Select from the drop-down list. BNC supports only 1-split mode.
HDMI supports 1/4/9/16-split mode.
 Loading...