• Select correct Time Zone
• Enable/disable Day Light Savings Time.
• If required select Day Light Saving Start/End Month/Week
• Select “Save”
Manually Controlling Home Automation Devices
Your system may be equipped Home Automation (Z-Wave) Devices.
These devices are normally controlled using programmed scenes but can
also be activated/controlled manually. To control home automation
devices manually, perform the following:
Mode
Press these Keys or
Icons…
What happens
Activating
Z-Wave
Devices
Automation
+
OR
68
OR
OR
OR
• You may be able to override
automatically controlled Z-
wave devices using the
Automation commands.
• Some devices can be manually
activated or deactivated using
the Automation commands.
• See your Installer for details
on controlling Z-Wave devices.
For additional information
regarding your system’s Home
Automation features refer to the
full version User Guide and to
the Home Automation Guide
(P/N 800-16091 or later).
Video Camera Control
Your system may be equipped to view and control video cameras. To
view video and/or control the camera, perform the following:
Video
• Select a camera from the displayed list.
• Control the camera as applicable using the displayed
controls.
For additional information regarding the video camera
control feature refer to the LYNX Touch L5200 User Guide
(P/N/ 800-16083 or later).
Connecting a Mobile Device (iOS)
Before attempting to connect your Mobile Device to the LYNX Touch
Control Panel, ensure that the LYNX Touch is connected to a WiFi Network
(router). Perform the steps below to connect up to four Mobile Devices to
the LYNX Touch control.
Connect your Mobile Device to the WiFi Network
1. Ensure that you have connected your Mobile Device to the same WiFi
Network as your LYNX Touch Control Panel. For additional information
refer to the LYNX Touch User Guide P/N 800-10615V1 (or higher).
Connect your Mobile Device to the LYNX Touch
1. At the LYNX Touch Master User screen, select the “Keypad” icon.
2. At the Mobile Device, select the “L5100 Connect” icon.
3. A Honeywell License and User Agreement is displayed. After reading
the agreement, select “Agree”. You must agree to the terms in order
to use the application.
4. “Discovering Control Panel…” is displayed.
5. Within 10-20 seconds the Device will display the Security Screen or
the Dashboard screen if Total Connect Services are enabled.
6. The control will display ID information for your Mobile Device.
7. Select the “” to return to the Master User Screen.
8. A Security Screen is displayed on your Mobile Device, which can now
be used to locally control your system.
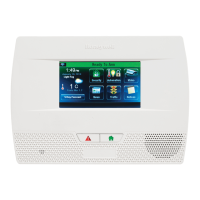
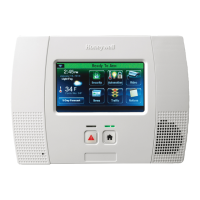
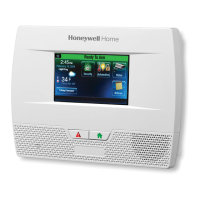
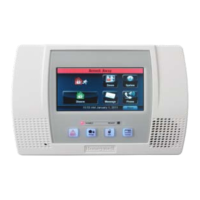
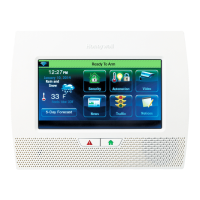
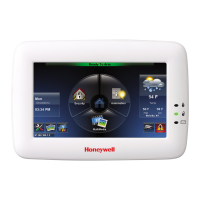
LYNX TOUCH L5200 SERIES SECURITY SYSTEM
Quick Guide to User Functions
Full User Guide Available Online: This Quick Guide describes the most frequently used features and functions of your system. For full details of
all user functions, please see the system’s User Guide located online at: http://www.security.honeywell.com/hsc/products (see LYNX Touch
L5200 Security System User Guide P/N 800-16083 or higher). The full version User Guide is also available from your installer upon request.
Congratulations on your ownership of a Honeywell Security System. This system provides:
• Three forms of detection: burglary, fire and emergency (see your installer for which forms of detection are installed)
• At least one keypad which provides control of system and displays system status
• Various sensors for perimeter and interior burglary detection
• Optional smoke or combustion detectors designed to provide early warning in case of fire.
Your system may also be programmed to automatically send alarm and status messages to a Central Monitoring Station.
System Basics
The following is a list of some of the most common features and
functions of your system:
• Several modes of burglary detection: Stay, Away, Instant.
• Bypass feature lets you bypass selected zones while leaving the
rest of the system armed.
• Chime mode alerts you to the opening of protected doors and
windows while the system is disarmed.
• Fire and carbon monoxide detection are always active (if
installed) and an alarm sounds if a fire or carbon monoxide
condition is detected.
• Panic keys (if programmed) let you manually initiate fire, police
and medical alarms using the keypad.
• 4-digit security codes are used in conjunction with keypad
commands to perform system functions.
• Each user (up to 32) can be assigned a different security code.
• The system sensing devices have been assigned to various
“zones,” which are specific areas of detection (e.g., front door,
kitchen window, etc.).
• Zone numbers (points of detection) are displayed at the keypad
when an alarm or trouble condition occurs.
• Message Center allows recording and play-back of brief voice
messages.
• Speaker Phone allows the control to be used for hands free
telephone conversation. See the full User Guide for details.
• Two-way Voice allows the Central Station to listen, talk or
conduct a two-way conversation with in individuals at the
premises. See the full User Guide for details.
• Follow me reminder announcements allow the panel to dial a
number and deliver system status messages. See the full User
Guide for details.
• A Scheduling feature can be programmed to automatically
perform certain functions (e.g., arm the system) at a
predetermined time each day. See the full User Guide for details.
Entry/Exit Delays
• Entry Delays give you time to disarm the system when you
enter through the designated entrance door.
• You must disarm the system before the entry delay period ends,
or an alarm will occur (keypad beeps during the entry delay
period, reminding you to disarm the system).
• Exit delay gives you time after arming the system to leave
through the designated exit door(s) without setting off an alarm.
If programmed, a slow beeping will sound during the exit delay
period until the last 10 seconds, which then changes to fast
beeping (alerting you to the end of exit delay). If you cannot
leave within this delay time period, you should stop, disarm the
system, and start over to avoid a false alarm.
• See your installer for your delay times. See the full User Guide
for details on Exit Error alarms.
Notes on Burglary Detection
• The system must be armed before the burglary detection can
sense intrusions.
• To arm your system, select the desired arming key or icon and
enter your security code.
• To arm your system, if the Quick Arm feature is enabled select
the desired arming key or icon followed by the Quick Arm icon.
You do not need to enter your security code.
• To disarm the system, select the Disarm icon and enter your
security code.
• When an alarm occurs, the control sounds and displays the
zone(s) causing the alarm. An external sounder may also
sound, if installed.
• If your system is connected to a Central Monitoring Station, an
alarm message is also sent (delayed 30 seconds by default to
reduce false alarms).
• To stop the alarm sounding, simply disarm the system.
• Memory of Alarm: When an alarm condition occurs, the
keypad displays the number(s) of the zone(s) that caused the
problem, and displays the type of alarm. Clear the Memory of
Alarm display by entering another “off” sequence.
IMPORTANT
If you return to the premises and the burglary sounder is
on, or the keypad beeps rapidly upon entering the
premises, it indicates that an alarm has occurred during
your absence and an intruder may still be on the
premises. LEAVE IMMEDIATELY and CONTACT THE
POLICE from a nearby safe location.
Notes on Fire and CO Detection
• Your fire alarm system (if installed) is on 24 hours a day, for
continuous detection. In the event of an emergency, the
smoke and heat detectors sound their alarms, triggering a
loud, interrupted pulsed sound from the control and any
external sounder(s) (if installed).
• You can silence the alarm at any time by entering an Off
sequence.
• Carbon monoxide (CO) detectors, if installed, provide
continuous detection. If a high level of carbon monoxide is
detected, an interrupted pulsed alarm sound occurs at the
control and the detector(s). Immediately move to a spot
where fresh air is available, preferably outdoors. From a safe
area, call your security service provider for further
instructions. To silence the control sounding, enter an Off
sequence. To silence the detector, see its instructions.