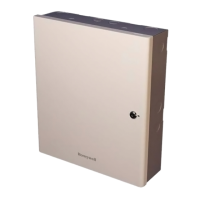
MPA2
Quick Startup Guide
Access Control System MPA2
Doc: 800-25470
06/2019
This document describes the basic setup, wiring, and configu-
ration steps for getting started with a MPA2 access control
panel.
Setup Process
Step 1. Preparing to Start Up
Step 2. Connecting Devices
Step 3. Powering Up
Step 4. Connecting to the Web Server
Step 5. "Logging In" to the System
Step 6. Configuring the System
Step 1: Preparing to Start Up
1. Select/Check the power PSU 13, 8 V DC or PoE(+).
2. Select/Check the Host connection IP (Ethernet) or USB.
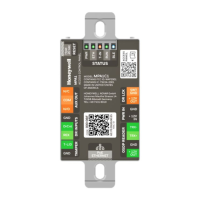
3. Check DIP-Switch default status. (DIP Switch 3 and 9 are
ON).
For default IP, Ethernet host connection (LAN/WAN1), set
DIP-Switch 4 to ‘ON’. (See Step 5:2)
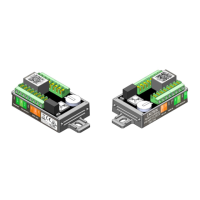
4. Check the Relay configuration.
Step 2: Connecting Devices
1. Check the Input/Output devices (Door Status / Door Con-
tact) connections (P10/P18 or RJ45).
2. Check/Select the your Reader connections (OSDP/Wiegand
- RJ45).
Note: a. For OSDP readers Dip Switch 1 & 10 are ON.
b. For Wiegand readers Dip Switch 1 & 10 are OFF.
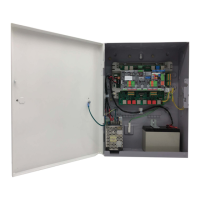
Step 3: Powering up
1. Power Up the Panel (13, 8 V PSU or PoE (+)).
2. Check Power LEDs on Mains/on PoE.
3. Observe Power Up sequence (Heart Beat LED Green).
4. Test Reader(s) (OSDP/Wiegand).
5. Test Input devices (Door Status / Door Contact).
Step 4: Connecting to the Web Server
Note: These steps are for computers with Windows 7 operating
system or higher. The steps for other operating systems
might be slightly different.
1. Click Start > Control Panel.
2. Click Network and Sharing Center.
3. Click Change adapter settings.
4. Identify your local Ethernet connection (Local Area
Connection) and double-click on the link.
5. Click Properties.
6. Highlight the Internet Protocol (TCP/IPv4).
7. Click Properties. View your system’s current IP properties.
8. Select Use the following IP address.
9. Enter 192.168.1.10 in the IP address field.
10. Enter 255.255.255.0 in the Subnet Mask field.
11. Click OK; OK; Close
Step 5: “Logging In” to the System
1. Launch the Internet browser.
Note: Honeywell recommends Google Chrome™.
2. Enter the panel’s IP address in the address box.
• IP/Ethernet > https://192.168.1.150 (DIP-Switch 4 to ‘ON’
Position) or USB > https://192.168.2.150 (fixed)
A message warns that the connection is not private.
3. Click Advanced. A detailed message about the connection is
displayed.
4. Click Proceed to 192.168.1.150. The Sign In page is
displayed.
a. Enter admin in both Username and Password fields.
b. Change the Password for better security.
WAN/LAN 1
WAN/LAN 1
WAN/LAN 1