T775A/B/M SERIES 2000 ELECTRONIC STAND-ALONE CONTROLLERS
33 62-0254—13
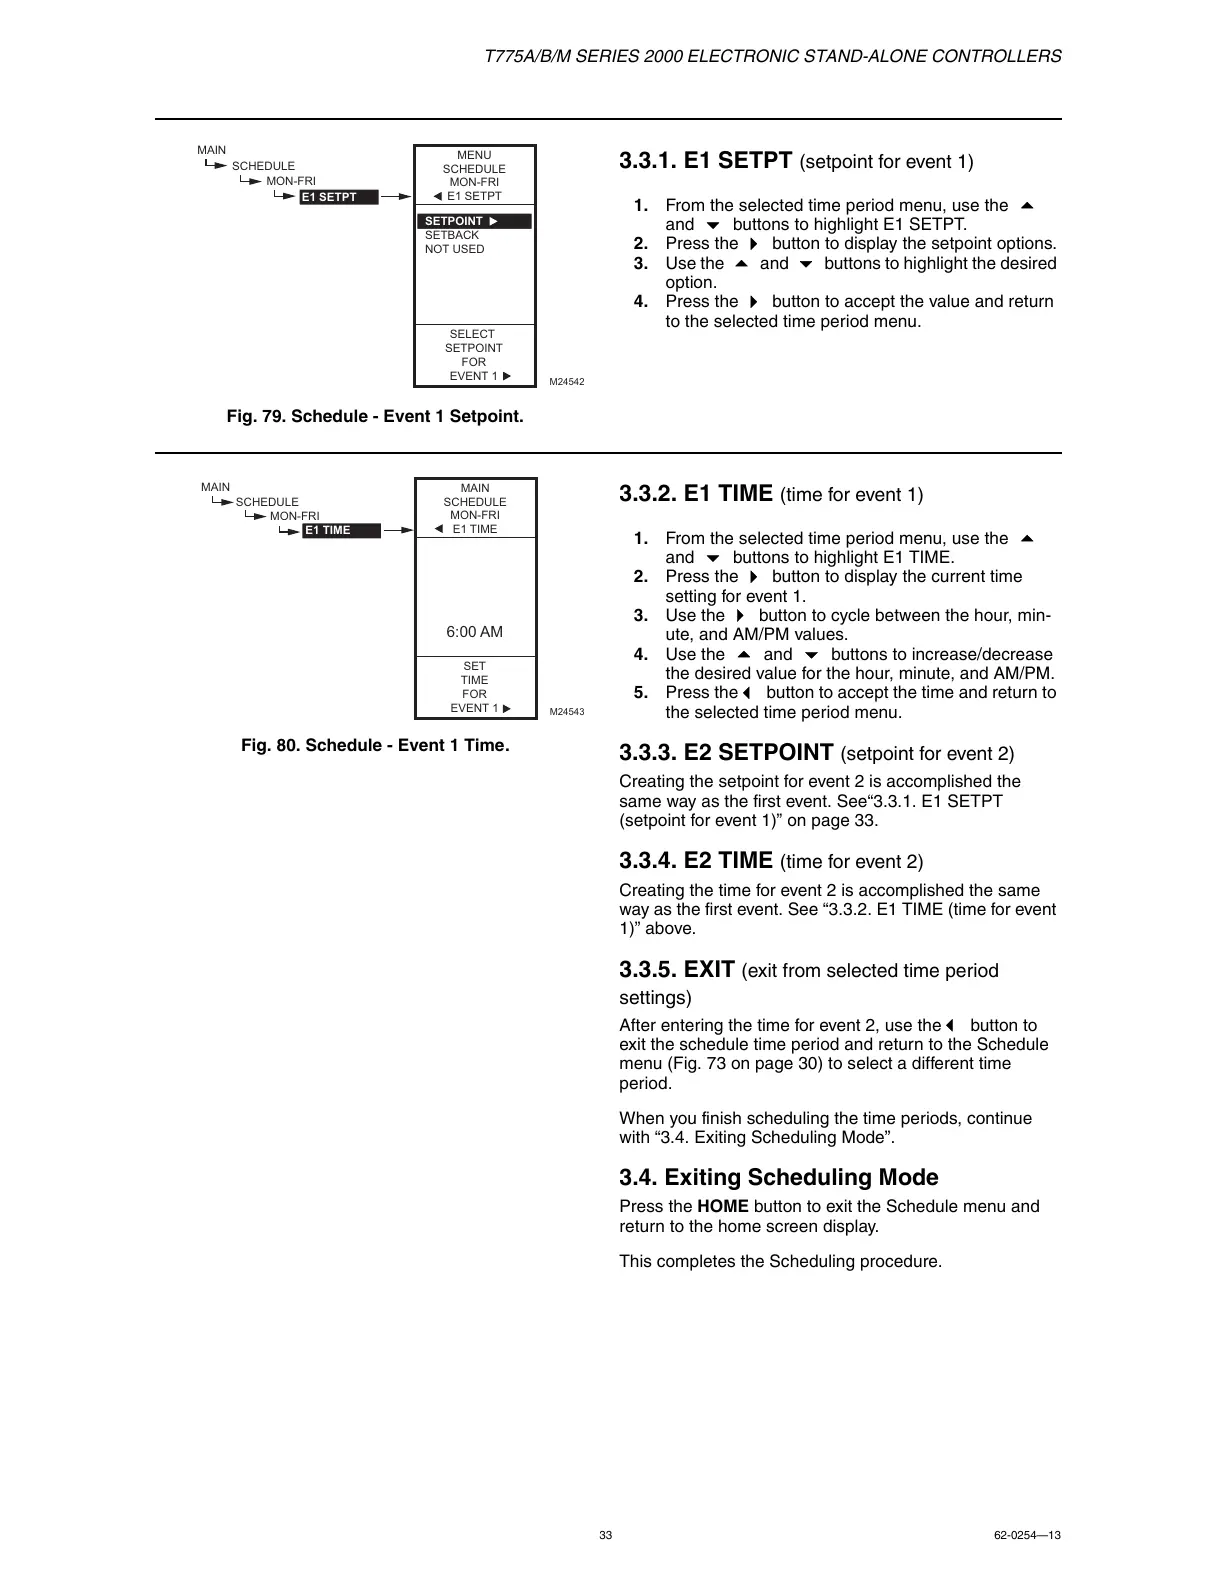
Fig. 79. Schedule - Event 1 Setpoint.
3.3.1. E1 SETPT (setpoint for event 1)
1. From the selected time period menu, use the
and buttons to highlight E1 SETPT.
2. Press the
button to display the setpoint options.
3. Use the
and buttons to highlight the desired
option.
4. Press the
button to accept the value and return
to the selected time period menu.
Fig. 80. Schedule - Event 1 Time.
3.3.2. E1 TIME (time for event 1)
1. From the selected time period menu, use the
and buttons to highlight E1 TIME.
2. Press the
button to display the current time
setting for event 1.
3. Use the
button to cycle between the hour, min-
ute, and AM/PM values.
4. Use the
and buttons to increase/decrease
the desired value for the hour, minute, and AM/PM.
5. Press the
button to accept the time and return to
the selected time period menu.
3.3.3. E2 SETPOINT (setpoint for event 2)
Creating the setpoint for event 2 is accomplished the
same way as the first event. See“3.3.1. E1 SETPT
(setpoint for event 1)” on page 33.
3.3.4. E2 TIME (time for event 2)
Creating the time for event 2 is accomplished the same
way as the first event. See “3.3.2. E1 TIME (time for event
1)” above.
3.3.5. EXIT (exit from selected time period
settings)
After entering the time for event 2, use the button to
exit the schedule time period and return to the Schedule
menu (Fig. 73 on page 30) to select a different time
period.
When you finish scheduling the time periods, continue
with “3.4. Exiting Scheduling Mode”.
3.4. Exiting Scheduling Mode
Press the HOME button to exit the Schedule menu and
return to the home screen display.
This completes the Scheduling procedure.
MAIN
SCHEDULE
MON-FRI
E1 SETPT
MENU
SCHEDULE
MON-FRI
E1 SETPT
SELECT
SETPOINT
FOR
EVENT 1
SETPOINT
SETBACK
NOT USED
M24542
MAIN
SCHEDULE
MON-FRI
E1 TIME
SET
TIME
FOR
EVENT 1
MAIN
SCHEDULE
MON-FRI
E1 TIME
6:00 AM
M24543
 Loading...