Installation Guide
69-2019EFS—02 2
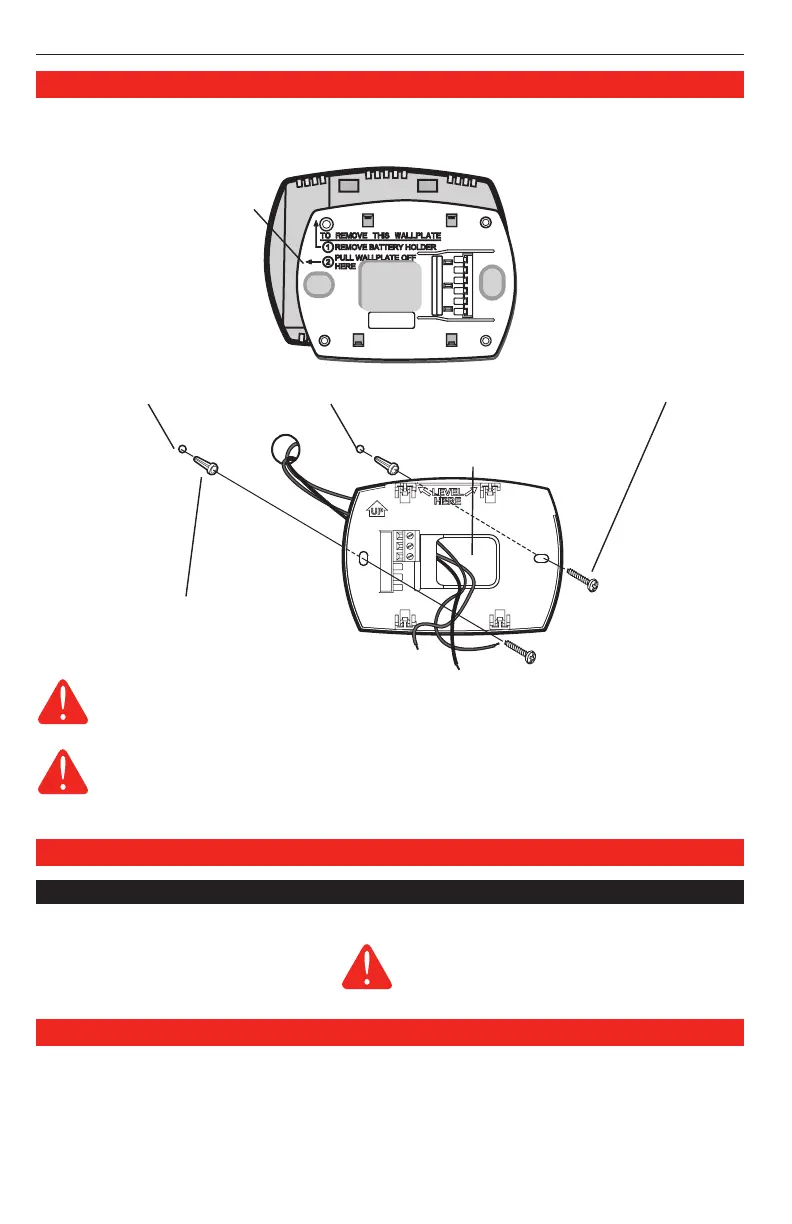
Wallplate installation
1. Separate wallplate from thermostat.
2. Mount wallplate as shown below.
MERCURY NOTICE
If this product is replacing a control that contains mercury in a sealed tube, do not
place the old control in the trash. Contact your local waste management authority for
instructions regarding recycling and proper disposal.
Pull here to remove wallplate
from new thermostat.
CAUTION: ELECTRICAL HAZARD
Can cause electrical shock or equipment damage. Disconnect power before
beginning installation.
Thermostat Terminals (connect to network zone panel or EIM):
Wiring
Terminal designations
Thermostat mounting
Once wallplate is securely mounted on wall:
1. Push excess wire back into the wall opening.
2. Plug wall opening with non-flammable insulation.
3. Align the 4 tabs on the wallplate with the slots on the back of the thermostat.
4. Gently push the thermostat onto the wallplate; thermostat will snap into place.
Drill 3/16” holes for drywall. Drill 7/32” holes for plaster.
Wall anchors
Wallplate
Wire hole
Mounting screws
1 Data communication
2 Power
3 Common
This thermostat does not use batteries.
Installing batteries could lead to corrosion of
the batteries and damage the thermostat.
 Loading...