5
1-14
Push bolt into hole on lower f r ont of handle.
If bolt will not go through hole easily,
check the following:
• the bracket is properly positioned (Fig.
1-9)
• the handle is pushed completely down
(Fig. 1-13)
1-15
Place n u t in recessed area at back of
h a n d l e . Hold nut in place while tightening
bolt securely with a scre w d r i v e r.
N o t e : Only one nut is needed on this
model. The extra nut is not re q u i r ed but
has been provided for your convenience.
1-10
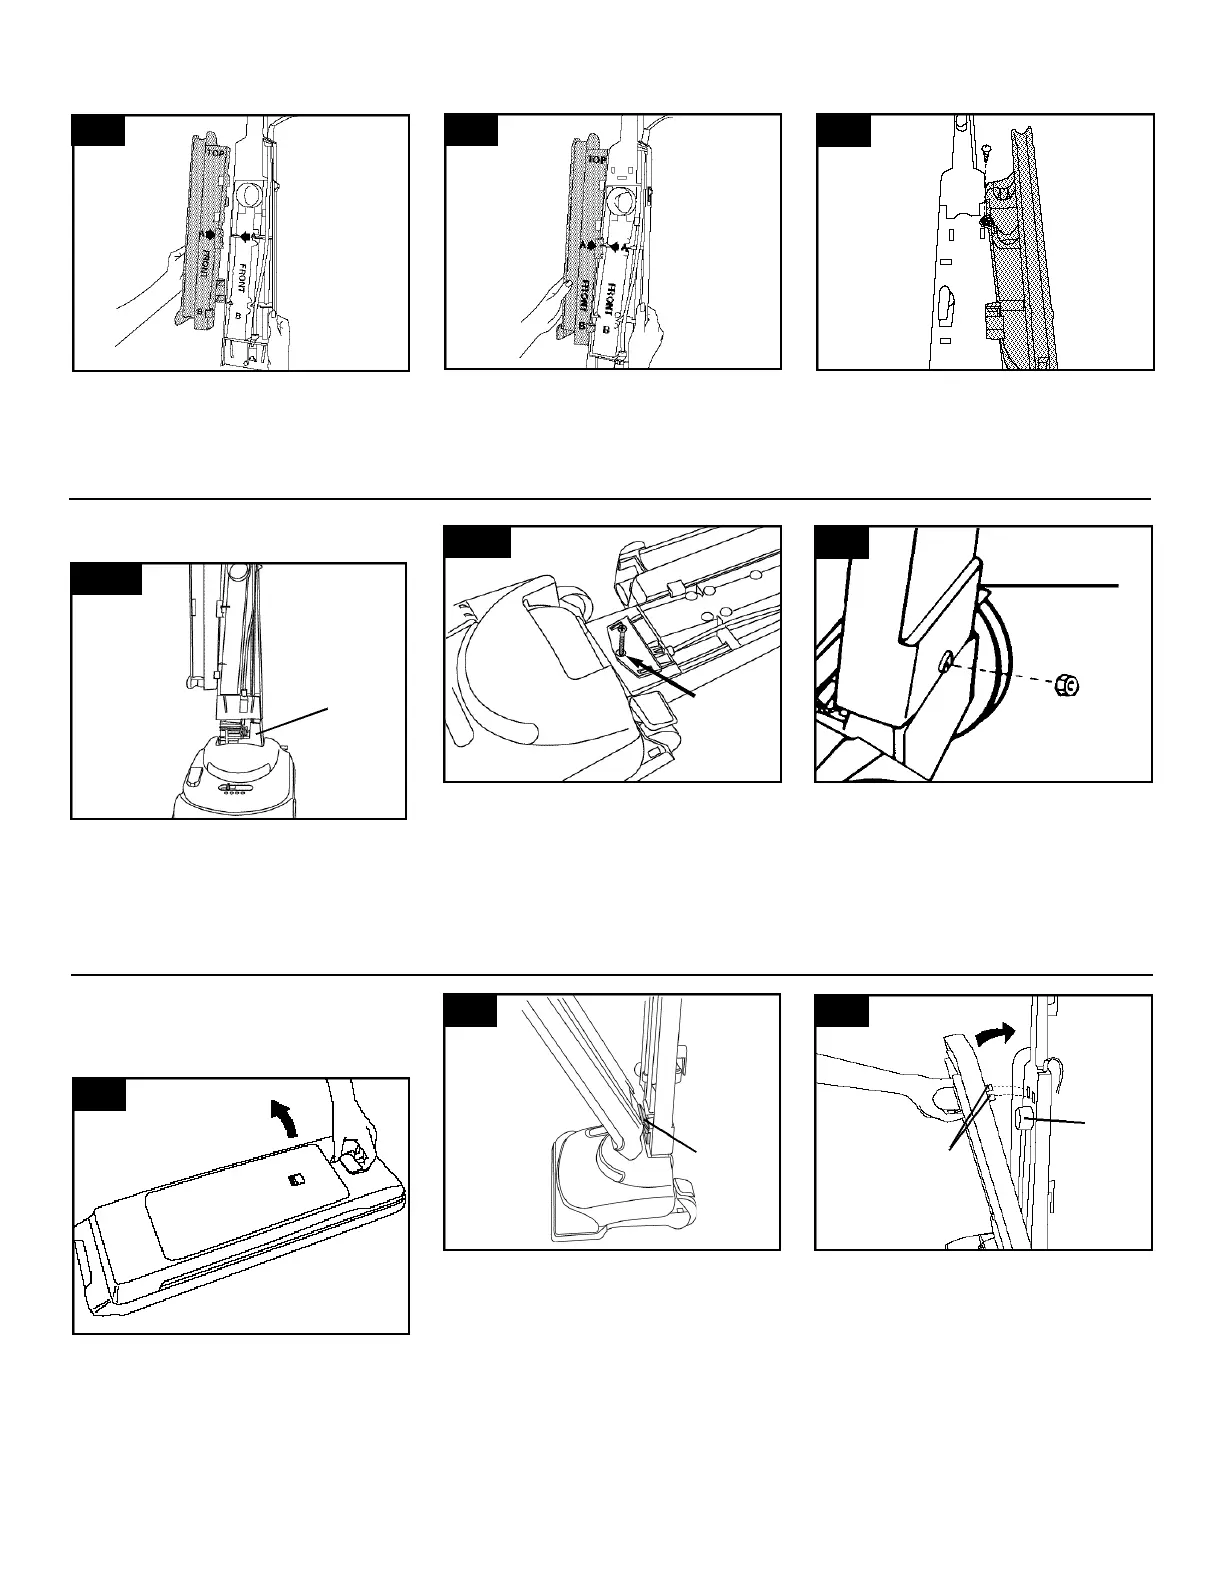
Hold rack and handle side by side as
s h o w n .
1-11
1-12
1-16
1-17
1-18
Hook tool rack over left edge of handle,
matching arrows and letters.
Holding tool rack in place, turn handle over
and align screw holes. Insert small screw
and tighten secure l y. (Extra eff o r t may be
re q u i re d . )
T
S
R
N
Pull bag door latch forw a rd and re m o v e
d o o r. Set bag door aside.
Slide large tab (R) on bottom back of bag
c o m p a r tment into slot between the bracket
and the lower handle.
Note round opening and hooks (S) on
back of bag compartment. Place opening
over dirt tube (T) and align hooks with slots
in handle.
Push very firmly to snap both hooks
into handle.
Pull on bag compartment to make sure it is
completely snapped to handle.
1-13
With cord hooks to the back, place
assembled handle onto handle base of
cleaner body (N).
Rock handle side to side while push-
ing down firmly. Extra pushing effort
may be required.
Attach handle
Attach tool rack
Attach bag
compartment
 Loading...