(5)
(4)
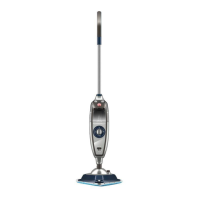
3.0 Operating Tips
For indoor use only. Sweep abrasive soils before •
scrubbing.
While the brush or pad driver is spinning, keep the oor •
machine moving to avoid “donut” burns on the oor.
To Start Operation:
Unlock the handle by raising the locking lever.•
Lower the handle to a comfortable position, typically •
waist height.
Relock the handle by pushing the lever down. NEVER •
OPERATE THE MACHINE WITH THE HANDLE
UNLOCKED.
This oor machine is a high torque motor. Hold the •
machine rmly with both hands when starting up.
Push the red safety interlock switch forward to unlock •
the dual triggers.
Squeeze the dual triggers to release power to the motor. •
Once power is on, either trigger will keep power to the
motor.
To stop the oor machine release both triggers.•
The spinning brush helps move the oor machine. (Lift •
the handle slightly to work to the right. Push the handle
down slightly to work to the left.)
3.1 To Store your Machine
Lock the handle in the “up” position. Tilt the machine •
back and remove the pad driver or brush.
Wind the cord around the handles and the bottom cord •
hook.
Wash brushes or pads and hang to dry. Never store •
machine standing on the brush.
Inspect and maintain equipment on a regular schedule •
for best results.
Check and clean pads after each operation. Remove soil •
and chemical buildup. Replace worn or damaged pads.
Check the triggers and switches for proper operation.•
Repair or replace damaged skirts and dumpers.•
Use air pressure or vacuum to remove dust and debris •
from the motor vents.
Report problems and repair promptly.•
2.1 Attach the Power Cord
The triple-wire grounded power cord has been factory-
installedintothehandletube.Aexiblerubbercable
connector (11) is used to secure the plug-in connections.
Theoormachineshipswiththisconnectormountedonthe
cord coming out of the handle (10). Stretch the connector
and slip the male connector (9) (coming out of the motor
housing) through the connector hole and then into the
female connector.
Now, plug the end of the 50 foot cord into a grounded power
outlet. Squeeze the triggers on the handle and check for
power to the motor.
2.2 Install Brush / Pad Driver
Abrushorpaddrivermountsontoyouroor
machine with a “B” style universal clutch plate.
UNPLUG BEFORE INSTALLATION
Lock the machine handle in the “up” position and
tiptheoormachinebackfully.
Slide the brush or pad driver clutch plate
(11) over the drive plug (12).
Give the brush a quick counter clockwise
spin to lock the brush onto the drive plug.
Now, lower the machine back onto the brush.
The installation of the brush and pad driver is now
complete and the machine may be operated.