EasyManua.ls Logo

Hoover Condenser Tumble Dryer - User Manual

Hoover Condenser Tumble Dryer
24 pages
Print Icon
To Next Page IconTo Next Page
Loading...
Instruction Book
Condenser Tumble Dryer
VHC168A
English
®
40006170.qxd 30/09/2009 16:36 Page 1
Question and Answer IconNeed help?

Do you have a question about the Hoover Condenser Tumble Dryer and is the answer not in the manual?

Summary

Introduction

Delivery Information

Check for included items like the instruction manual, guarantee card, and energy label.

Unpacking the Product

Instructions for safely removing the dryer from packaging and checking for transit damage.

Safety Reminders

Installation Safety Precautions

Guidelines for safe dryer installation, preventing hazards like obstructions and falls.

Safe Use Guidelines

Instructions and warnings for operating the dryer safely, including child supervision.

Laundry Precautions

Advice on suitable laundry, materials to avoid, and chemical treatments.

Environmental Considerations

Information on environmentally friendly disposal of packaging and the appliance.

GIAS Service Contact

Information on contacting GIAS Service for technical support and repairs.

Installation

Electrical Requirements

Details on power supply, plug, earthing, and wiring for correct appliance connection.

Adjusting the Feet

Procedure for levelling the dryer using its adjustable feet for stability.

Ventilation

Preparing the Load

Clothes Preparation

Steps for preparing laundry, such as closing fastenings and checking pockets.

Maximum Drying Weight

Specifies the maximum load capacity for different fabric types (cottons, synthetics).

Sorting the Load

Guidance on sorting laundry by care symbols, thickness, fabric type, and drying level.

Drying Advice

Items Not Suitable for Tumble Drying

Lists materials and garments that pose a fire risk if tumble dried.

Energy Saving Tips

Recommendations for efficient drying to save time and electricity.

Controls and Indicators

Control Panel Overview

Description of the dryer's control panel, buttons, and indicator lights.

Selecting a Programme

Door and Filter

Opening the Door

Instructions for opening the dryer door and restarting the cycle.

Filter Maintenance

Procedure for cleaning the fluff filter to ensure optimal dryer performance.

Filter Care Indicator

Explanation of the indicator light that signals when the filter requires cleaning.

Water Container

Removing the Water Container

Step-by-step guide to safely remove, empty, and refit the water container.

Condenser

Removing the Condenser

Instructions for accessing, cleaning, and reinstalling the condenser unit.

Operation

Cancelling and Resetting Programme

How to cancel an ongoing drying cycle and reset the machine.

Start Delay Function

Information on setting a delayed start for the drying cycle.

Cleaning and Routine Maintenance

Dryer Cleaning Procedures

Routine cleaning tasks for the interior and exterior of the dryer.

Technical Specifications

Key performance and dimensional data for the appliance.

Troubleshooting

Common Dryer Problems

Guidance on diagnosing and resolving frequent issues with the dryer's operation.

Customer Service

Hoover Spares Information

Details on how to obtain genuine replacement parts for the appliance.

GIAS Service Contact

Contact information for professional service and repair assistance.

Your Guarantee

Hoovercare

Overview

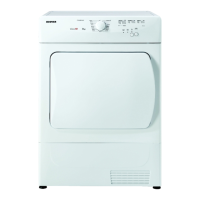
This document is an instruction manual for the Hoover Aristocrat VisionHD VHC168A Condenser Tumble Dryer.

Function Description

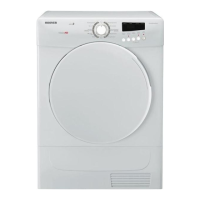
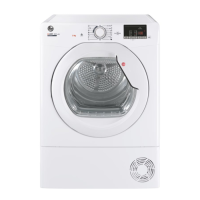
The Hoover Aristocrat VisionHD VHC168A is a condenser tumble dryer designed for domestic use, specifically for drying household textiles and garments. It features sensor drying technology, offering various drying options to suit different fabric types and desired dryness levels. The dryer collects water removed from the laundry in a dedicated container, eliminating the need for external venting. It also incorporates a "Relax" program for conditioning and anti-crease functions, and a "Rapid" program for quick drying of smaller loads.

Important Technical Specifications

  • Model: VHC168A
  • Type: Condenser Tumble Dryer
  • Capacity: 8 kg (for cottons), 4 kg (for synthetics)
  • Drum Capacity: 115 litres
  • Electrical Requirements: 230-240V, 50 Hz single phase, supply circuit rated to at least 13A. The appliance is earthed and fitted with a BS 1362 ASTA approved 13A fuse.
  • Dimensions:
    • Height: 85 cm
    • Width: 60 cm
    • Depth: 60 cm
  • Energy Label Band: C

Usage Features

The dryer offers a range of programs controlled by a Programme Selector dial, including:

  • Sensor Programs:
    • Bone Dry: For items like bath towels and bathrobes, requiring maximum dryness.
    • Extra Dry: A high level of dryness.
    • Cupboard Dry: For items that will be put away without ironing.
    • Iron Dry: Leaves laundry suitable for ironing.
    • Wool Finish: A gentle 12-minute warm air cycle specifically for woollens to make them softer after air-drying or to "refresh" them after storage.
    • Relax: Provides a conditioning and anti-crease function. It heats the load for 9 minutes followed by a 3-minute cool-down period, ideal for garments left in a linen basket or stiffened from outdoor drying, making ironing quicker and easier.
    • Rapid 40': A quick drying cycle for loads up to 2kg, suitable for all tumble-dry appropriate fabrics, monitoring dryness and temperature to achieve a cupboard dry level in less than 40 minutes.
  • Timed Drying Programs:
    • 30', 45', 60', 75', 90', 120', 150' minutes of drying.
    • Refresh: Tumbles laundry in cool air for 20 minutes.
  • Controls and Indicators:
    • Delay Start Button: Allows delaying the start of the drying cycle by 3, 6, or 9 hours.
    • Delicates Button: Reduces the heat level for delicate items (indicator light ON for low heat, OFF for high heat). This setting must be selected at the start of the program or the machine reset.
    • Start/Pause Button: To commence or pause the selected drying program.
    • Progress Display:
      • DRY: Flashes when a program is selected, lights continuously when the program starts.
      • Cool Down Indicator: Lights when the machine enters the cool-down phase (10-15 minutes before completion).
      • END: Lights when the program is finished.
    • Empty Water Indicator: Lights when the water container is full and needs emptying.
    • Filter Care Indicator: Lights when the fluff filter needs cleaning.
  • Loading: Open the door by pulling the handle. Ensure garments do not hinder door closure. Close the door gently until it "clicks" shut.
  • Safety: The drum and door can become very hot during use. Do not stop the dryer before the end of the drying cycle unless items are removed quickly and spread out to dissipate heat.
  • Preparation:
    • Read the instruction book thoroughly before first use.
    • Remove all items from inside the drum.
    • Wipe the drum and door with a damp cloth to remove dust.
    • Ensure laundry is suitable for tumble drying (check care labels).
    • Close all fastenings and empty pockets. Turn articles inside out.
    • Place clothes loosely in the drum to prevent tangling.
    • Do not overload the drum.
    • Sort laundry by care symbols, amount/thickness, type of fabric (cottons/linen, synthetics), and desired drying level (iron dry, cupboard dry).
    • For small loads or pre-dried fabrics, use timed programs (30-75 minutes) and select appropriate heat.
    • The dryer will operate for 10 minutes before cooldown if the sensor does not detect a small load.
    • If the load is too large or wet, the dryer will automatically go into cooldown after approximately 3 hours.
  • Energy Saving:
    • Only dry laundry that has been thoroughly wrung or spin-dried.
    • Dry the maximum weight of laundry possible.
    • Clean the filter before every cycle.
    • Do not exceed maximum weight.
    • Do not put dripping wet items into the dryer.
  • Cancelling/Resetting: Press the Start/Pause button for 3 seconds; the DRY light will flash to indicate reset.

Maintenance Features

  • Filter Care:
    • The fluff filter must be cleaned before every drying cycle to maintain efficiency.
    • To clean: Pull the filter upwards, open it, gently remove lint with a soft brush or fingertips, snap it together, and push back into place.
    • DO NOT use water to clean the filter.
    • The Filter Care Indicator lights up when cleaning is needed.
  • Water Container:
    • The water container should be emptied after every drying cycle. The Empty Water Indicator lights when it is full.
    • To remove: Gently pull the bottom of the kickplate to unclip it, then unhinge the top section. Pull the handgrip to slide the container out.
    • Support with both hands as it can weigh about 4kg when full.
    • Open the lid, empty the water, refit the lid, and slide the container back into position (PUSH FIRMLY INTO PLACE).
    • Refit the kickplate by engaging hinges and snapping lower clips.
  • Condenser:
    • Regularly check and clean the condenser to maintain efficiency.
    • Always switch off and remove the plug before cleaning.
    • To remove: Remove the kickplate (as for water container). Turn the two locking levers anti-clockwise and pull out the condenser unit.
    • Clean any dust or fluff with a cloth, then wash the unit under a running tap, turning it to allow water to flow between the plates.
    • Refit the condenser correctly (indicated by arrow) and push firmly into place. Lock levers by turning clockwise. Refit the kickplate.
  • General Cleaning:
    • After each use, wipe the inside of the drum and leave the door open for a while to allow air circulation.
    • Wipe the outside of the machine and the door with a soft cloth.
    • DO NOT use abrasive pads or cleaning agents.
    • Periodically clean the inner door and gasket with a damp cloth to prevent sticking or fluff build-up.

Hoover Condenser Tumble Dryer Specifications

General IconGeneral
BrandHoover
ModelCondenser Tumble Dryer
CategoryDryer
LanguageEnglish

Related product manuals