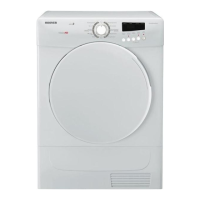
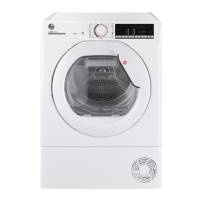
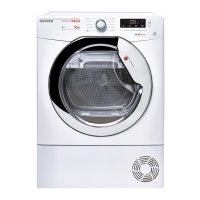
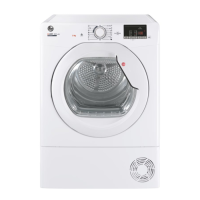
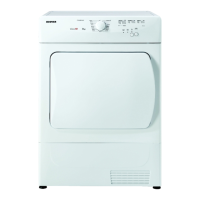
This document is an instruction manual for a Hoover VisionHD Vented Tumble Dryer, model 40005096. The dryer has an 8kg capacity and features a vented system.
Function Description
The Hoover VisionHD Vented Tumble Dryer is designed for domestic use to dry household textiles and garments. It operates by tumbling laundry in thermostatically controlled warm air. A key feature of this vented system is the discharge hose, which carries hot, moist air away from the dryer to prevent re-circulation and ensure efficient operation. The dryer includes various drying time options and a 'Fast Iron' programme designed to condition and anti-crease garments, making ironing quicker and easier. It also has a 'ACRYLIC/SYNTHETIC' button to reduce heat for delicate items. The machine is equipped with a filter to collect lint and fluff, which needs regular cleaning to maintain efficiency and prevent fire hazards.
Important Technical Specifications
- Drum Capacity: 115 litres
- Maximum Load: 8 kg
- Dimensions:
- Height: 85cm
- Width: 60cm
- Depth: 60cm
- Energy Label Band: C
- Electrical Requirements:
- Voltage: 230-240V
- Frequency: 50 Hz single phase
- Supply Circuit Rating: At least 13A
- Plug: Moulded-on non-rewireable plug with a BS 1362 ASTA approved 13A fuse.
- Earthing: The appliance must be earthed.
- Discharge Hose:
- Diameter: 110mm
- Length: Extends 1.8 meters
Usage Features
Preparation:
Before first use, users should read the instruction book, remove all internal packaging, and wipe the drum and door with a damp cloth. Laundry should be sorted by care symbols (suitable for tumble drying, high/low temperature drying, or not suitable), amount/thickness, and fabric type (cottons/linen, synthetics). Fastenings should be closed, pockets emptied, and articles turned inside out. The drum should not be overloaded; large wet items can exceed the maximum admissible load.
Drying Process:
- Open the door and load the drum, ensuring garments do not obstruct closure.
- For delicate items, press the 'ACRYLIC/SYNTHETIC' button to select low heat. Press again for high temperature.
- Turn the 'DRYING TIME' Selector to the desired drying time or 'Fast Iron' option.
- Drying Times (examples for 8kg cottons): 150-170 min for 8kg, 40-55 min for 1kg.
- Drying Times (examples for 4kg synthetics): 80-90 min for 4kg, 50-65 min for 1kg.
- Drying Times (examples for 4kg acrylic): 60-75 min for 4kg, 30-40 min for 1kg.
- Fast Iron Programme: Heats the load for 8 minutes, followed by a 2-minute cool-down period. This helps relax creases.
- Refresh Programme: Available.
- Close the door until it clicks shut.
- Press the 'ON/OFF' button; the indicator will light, and the cycle begins.
- The last 15 minutes of any cycle involve tumbling in cool air to reduce creasing.
- Once complete, the drum stops, and the dial points to 0. Open the door and remove the laundry.
Safety Reminders:
- Do not use if damaged; call service.
- Avoid adapters, multiple connectors, or extensions.
- Do not install near curtains or where items can fall behind it.
- The appliance must not be installed behind a lockable or sliding door.
- Supervise children and do not let them play with the appliance.
- Never use without the fluff filter in position or if damaged.
- The hot surface symbol indicates temperatures may exceed 60°C during operation.
- Always unplug before cleaning.
- Do not use if faulty.
- Ensure lint and fluff do not accumulate around the machine.
- Allow the dryer to complete the cool-down period before removing laundry, as the drum can be very hot.
- Do not dry unwashed items or fabrics treated with dry cleaning fluids.
- Avoid drying foam rubber materials, shower caps, waterproof textiles, rubber-backed articles, or items with foam rubber pads due to fire risk.
- Always refer to laundry care labels.
- Clothes should be spin-dried or thoroughly wrung before drying; dripping wet items should not be put in.
- Remove lighters and matches from pockets.
- Do not use flammable liquids near the machine.
- Never put glass fibre curtains in the machine.
- Items soiled with substances like cooking oil, acetone, alcohol, petrol, kerosene, spot removers, turpentine, waxes, and wax removers should be washed in hot water with extra detergent before drying.
- Use fabric softeners as specified by their instructions.
Energy Saving Advice:
- Only dry laundry that has been thoroughly wrung or spin-dried.
- Dry the maximum weight of laundry to save time and electricity.
- Check that the filter is clean before every drying cycle.
- Do not exceed the maximum weight.
- Do not put dripping wet items into the tumble dryer.
Maintenance Features
Cleaning the Dryer:
- Filter: Clean the fluff filter after every drying cycle.
- Pull the filter upwards.
- Open the filter.
- Gently remove lint with a soft brush or fingertips.
- Snap the filter together and push back into place.
- The 'FILTER CARE' Indicator lights up when the filter needs cleaning or when the venting hose is blocked/kinked.
- Drum and Door: After each use, wipe the inside of the drum and leave the door open for a while to allow air circulation. Wipe the outside of the machine and the door with a soft cloth.
- Inner Door and Gasket: Periodically clean with a damp cloth to prevent sticking and fluff build-up.
- Cleaning Agents: DO NOT use abrasive pads or cleaning agents.
Ventilation:
- Ensure adequate ventilation in the room to prevent gases from other appliances (e.g., open fires) from being drawn in.
- Exhaust air must not be discharged into a flue used for other fuels.
- Regularly check that the air flowing through the dryer is not restricted.
- Keep inlet and outlet areas free from obstructions. A gap of at least 12mm between the machine and any obstructions is required.
- Prevent items from falling or collecting behind the dryer.
- Never install the dryer against curtains.
Discharge Hose Installation (Vented System):
- It is essential to use a venting hose to carry moist air away.
- The hose is assembled to the machine as shown in the manual.
- It can be fitted through a wall, open door, or window.
- Do not use two hoses joined together, as this reduces drying performance.
- Do not restrict airflow by kinking the hose or using a smaller diameter connector.
- Avoid U-shaped curves, which restrict airflow and collect water.
- Regularly check the hose for fluff or water build-up.
Troubleshooting:
The manual provides a checklist for common issues like long drying times, clothes not drying, dryer not operating, noisy dryer, or the 'Filter Care' indicator being on. Users are advised to check these points before contacting customer service.
Customer Service and Guarantee:
- GIAS Service: For technical advice, service, or repairs, contact 08705 400 600 (UK) or 018301 666 (Eire).
- Hoover Spares Service: For genuine Hoover spares, contact 01204 556111.
- Guarantee: The appliance is covered by a one-year guarantee for free service calls and a five-year guarantee for parts (labour costs chargeable after 12 months). Proof of purchase is required. The guarantee is void if repairs are done by unauthorised engineers or if the product is misused.
- Hoovercare: An optional annual maintenance and repair scheme is available in the UK (08705 400 600).