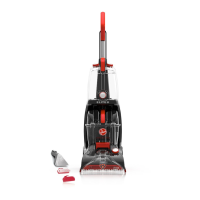
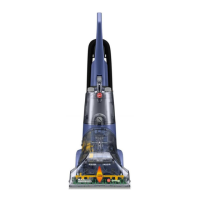
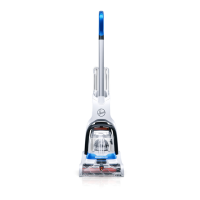
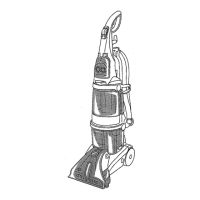
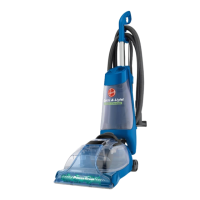
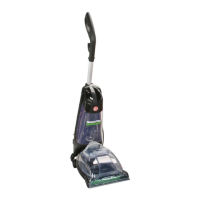
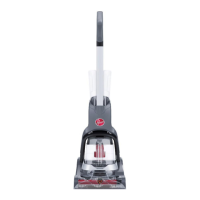
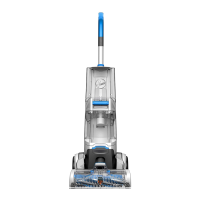
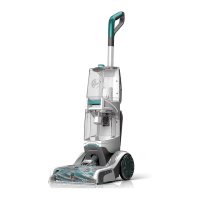
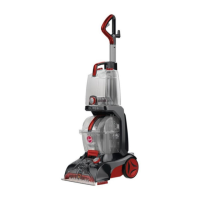
The Hoover Power Scrub Elite™ is a carpet cleaner designed for home use, offering both quick and deep cleaning modes. It is equipped with a range of features and accessories to facilitate effective carpet and upholstery cleaning.
Function Description:
The Hoover Power Scrub Elite™ is a versatile carpet cleaner that provides two primary cleaning modes: Quick Clean Mode and Deep Clean Mode. The Quick Clean Mode is designed for a fast surface clean, allowing carpets to dry in less than 1 hour. The Deep Clean Mode offers thorough, deep cleaning for more stubborn dirt and stains. The machine works by dispensing a cleaning solution onto the carpet, scrubbing with rotating brushes, and then extracting the dirty water into a separate recovery tank. It also includes tools and accessories for cleaning upholstery, stairs, and hard-to-reach areas. The device is intended for household use only, and commercial use will void the warranty.
Important Technical Specifications:
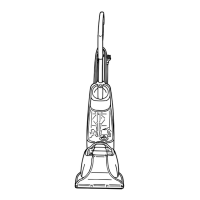
The carpet cleaner operates on a 120-volt circuit and requires a properly grounded outlet. It features a Clean Water/Solution Tank and a Dirty Water Recovery Tank. The SpinScrub® Brush Assembly utilizes multiple rows of brushes for effective scrubbing. The unit is designed with a Water & Solution Trigger for controlled dispensing, an ON/OFF Pedal, and a Wash/Rinse Mode Selector. A Cleaning Mode Dial allows users to switch between Quick Clean and Deep Clean modes. The solution connection port is designed for attaching a hose for accessory tools.
Usage Features:
- Assembly: The handle is inserted into the base and secured with screws. The Solution/Clean Water Tank is angled above the Dirty Water Recovery Tank and clicked into place. The power cord is wrapped around the cord hooks for storage.
- Filling the Clean Water/Solution Tank: The clean water cap is twisted off, and warm water (not boiling or microwaved, and not above 140°F/60°C) is added to the fill line. The solution cap is then twisted off, and Hoover cleaning solution is poured into the tank. The caps are replaced, and the tank is angled back onto the base.
- Powering On: The power cord is unwrapped and plugged into an electrical outlet. The cleaner is turned on by stepping on the ON/OFF Pedal.
- Cleaning Modes: The Cleaning Mode Dial on the base of the unit allows selection between "Quick Clean" for quick surface cleaning and "Deep Clean" for thorough cleaning.
- Washing and Rinsing: The Wash/Rinse dial on the Clean Water Tank should be set to "Wash" for applying solution and scrubbing. To rinse, the trigger is released, and the machine is pulled backward without squeezing the trigger until little water is visible. For best results, Hoover recommends rinsing the carpet with clean water only by setting the wash/rinse dial to "Rinse."
- Tools and Accessories:
- Stair Tool: 6 inches wide with 2 built-in rows of bristles for cleaning carpeted stairs.
- Upholstery Tool: 1 row of bristles for effectively cleaning upholstery.
- Crevice Tool: Designed for use around baseboards and hard-to-reach areas.
- 2-in-1 Antimicrobial Tool: Offers two inserts – a rubber rub insert for unpleasant stain removal and hygienic clean-ups, and a bristle insert for tough scrubbing power.
- Attaching the Hose: The hose is attached to the unit by opening the Hose Connection Port on the nozzle. The hose end is inserted, aligning the indicator with the unlock arrows. The hose is then rotated clockwise to the locked position, and the Hose Solution Port door is held open while the Hose Solution Tube connector is firmly plugged into the port.
- Attaching Tools: Tools connect to the hose by sliding them onto the connector until they securely lock into place. The handle should be in the upright position to shut off the SpinScrub® brushes when using the hose.
- Pretreating: For best results, pretreat stains with a Hoover spot treatment (refer to the Hoover Cleaning Solution Guide).
- Emptying the Dirty Water Tank: The cleaner is turned off and unplugged. The Dirty Water Tank Latch is released, and the tank handle is removed from the carpet cleaner base. The tank is placed on a flat surface, and the lid is unlatched below the Quick Spout Pour cap. The tank is then emptied, rinsed, and allowed to air dry.
Maintenance Features:
- Nozzle Cleaning and Storage: To prevent possible leaking, the Clean Water Tank and Dirty Water Tank should be removed and emptied. With the handle in the upright position, the carpet cleaner is tilted back so the handle rests on the floor. The Nozzle is rotated to the unlock position and pulled forward to remove it from the carpet cleaner. Rinse debris from the Nozzle. Position the Nozzle onto the foot, aligning the tabs at the bottom with the notches on the foot. Snap the Nozzle to the foot and rotate the Nozzle latch to the lock position. The nozzle must be in the proper position for the Dirty Water Tank to go on properly and for the unit to have proper suction.
- Brush Change and Clean: To prevent possible leaking, the Clean Water Tank and Dirty Water Tank should be removed and emptied. With the handle in the upright position, the carpet cleaner is tilted back until the handle rests on the floor. The brush assembly is grabbed and pulled firmly. The brushes can be cleaned under running water. To replace, align black posts on both ends of the brush assembly with the slots on the bottom of the cleaner. Make sure the hexagonal post aligns with the hexagonal hole. Turn brushes slightly until the post fits easily into the hole. Press the brush assembly firmly to snap into place.
- Storage: Empty the Clean Water Tank and let it air dry. Replace on the cleaner. Empty the Dirty Water Tank, rinse the tank and lid thoroughly with clean water, and let it air dry. Allow brushes and the underside of the carpet cleaner to air dry thoroughly before storing the carpet cleaner on a carpeted or wood surface.
- Lubrication: The motor is equipped with bearings that contain sufficient lubrication for the life of the motor. Additional lubricant should not be added to motor bearings.
- After Using Tools: The hose should be drained by removing the solution tank and turning the cleaner ON. Aim the hose in a downward angle and press the trigger to remove excess water. Turn OFF the cleaner. Disconnect the hose and solution tube from the cleaner. Drain the solution tube by placing the round end in the sink and placing the tool in the sink. Press the trigger to release air and fluid. Replace the hose and tools in the Mesh Tool Storage Bag. Always turn off the appliance before connecting or disconnecting the hose.