This document is an instruction manual for a Hoover cordless stick vacuum cleaner, designed for domestic cleaning. The manual provides comprehensive guidance on safe use, assembly, operation, maintenance, and troubleshooting.
Function Description:
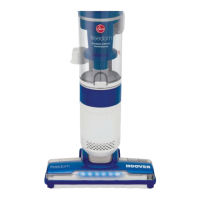
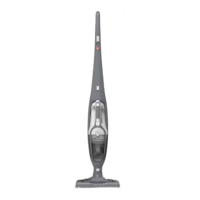
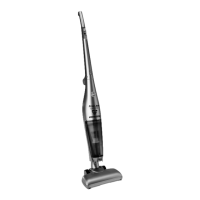
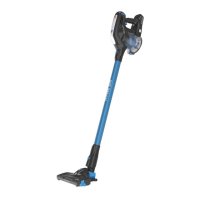
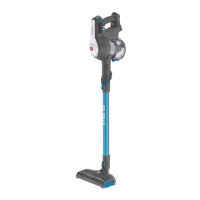
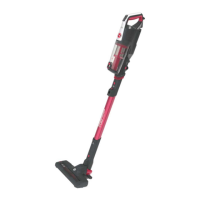
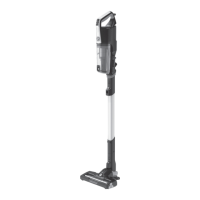
The Hoover cordless stick vacuum cleaner is a versatile appliance intended for dry domestic cleaning tasks. It operates on a rechargeable Lithium-ion battery pack, offering cordless convenience. The device can be used in two working modes: temporary mode, where it operates only when the on/off switch is pressed, and continuous mode, which can be engaged by locking the switch lever. It features various attachments for different cleaning needs, including a power nozzle for floors, a crevice tool for tight spaces, and a 2-in-1 dusting brush for surfaces. Some models also include a mini-turbo nozzle for deep cleaning textile surfaces and pet hair removal. The appliance is designed to be stored on a wall mount, which also facilitates charging.
Important Technical Specifications:
- Power Supply: Rechargeable Lithium-ion battery pack.
- Charging Voltage: 230V (UK 240V) socket outlet.
- Initial Charge Time: At least 12 hours before first use. Subsequent charges take approximately 6 hours.
- Charging Temperature Range: Never charge batteries above 37°C or below 0°C.
- Battery Status Indicators: Handheld LED light [H] illuminates red during charging and blue when fully charged. During discharge, both handheld and nozzle LED lights are blue. The handheld LED blinks when battery capacity is below 5%.
- Filtration System: Includes a mesh filter and an exhaust filter, both washable.
- Dust Capacity: Features a dust cup that should be emptied when dust reaches the max fill line.
Usage Features:
- Assembly: The appliance is assembled by connecting the nozzle head to one side of the tube and the other side of the tube to the handheld unit, with audible "click" sounds confirming secure connections. The wall mount [A] can be fixed to a wall using provided screws and plugs for storage and charging.
- Charging: The charger jack plug is connected to the appliance. The power switch lever must be in the off position during charging. The charging LED indicator [H] provides visual feedback on the charging status.
- Working Modes:
- Temporary Mode [3A]: The cleaner operates only while the on/off switch is pressed.
- Continuous Mode [3B]: The switch lever can be pulled back to lock it in place for continuous operation, and pushed forward to disable it.
- Attachments:
- Crevice Tool [J]: For reaching narrow and difficult areas.
- 2-in-1 Dusting Brush [B]: For cleaning various surfaces.
- Long Rotation 2 In 1 Brush [L]: (Specific models)
- Mini-turbo Nozzle [Y]: (Specific models) Ideal for deep cleaning textiles and removing pet hair. Users are advised to remove collected hair/threads with scissors after use.
- Accessory Storage: Accessories can be inserted directly into the air inlet of the handheld unit or one side of the tube. Some accessories can be stored on the wall mount.
- Nozzle LED Light [E]: Illuminates during operation, providing visibility in darker areas.
Maintenance Features:
- Emptying the Dust Container:
- Remove the tube by pressing the accessory release button [G].
- Push down the dust cup empty button [N] to release the bin flap and empty the contents [6].
- Close the dust cup flap until it clicks.
- Recommended to empty after each use or when dust reaches the max fill line.
- Cleaning the Dust Container and Filter:
- Remove the tube [4].
- Empty the dust cup [6].
- Press the dust cup release button [W] and pull the dust cup away [7].
- Turn the mesh filter [U] anticlockwise to align the arrow mark and pull it out [8].
- Turn the cyclone separator [V] anticlockwise to align the arrow mark and pull it out [8].
- Press the two exhaust filter release buttons [P] simultaneously and remove the exhaust filter [T] [9].
- Wash the exhaust filter [T] in lukewarm water and allow it to dry for 24 hours before reassembly [10, 11].
- Wash the dust cup [O], mesh filter [U], and cyclone separator [V] in lukewarm water, ensuring they are fully dry before returning to the main body [10].
- Reassemble the handheld unit and attach it to the wall mount [12].
- Do not use hot water or detergents on exhaust filters.
- Ensure filters are completely dry before reassembly.
- It is recommended to wash the mesh filter at least once a month for optimum performance.
- Changing and Cleaning the Agitator:
- Switch off the cleaner.
- Remove the power nozzle [D] from the tube.
- Slide the agitator release button [C] outward to remove the agitator [13].
- Remove debris from the agitator or replace it if necessary.
- Refit the agitator by sliding the release button outward, locating the agitator in the correct position (it only fits in one direction), and then releasing the button to lock it automatically.
- Replacing the Batteries:
- Ensure the cleaner is unplugged and the batteries are fully discharged.
- Pull back the battery pack release button [X], and the battery pack [S] will be pushed out a short distance automatically [14a].
- Slowly pull the battery pack from the slot [14b].
- Replace with a new, approved Lithium-ion battery pack.
- Dispose of old batteries safely at a recycling station.
- Only use approved replacement parts. Do not attempt to open or repair the battery pack.
Safety and Environmental Guidelines:
- Always switch off and remove the charger before cleaning or maintenance.
- Keep hands, feet, loose clothing, and hair away from rotating brushes.
- Use only the original charger and attachments supplied by Hoover.
- Do not pick up hard/sharp objects, matches, hot ashes, flammable liquids, or aerosols.
- Do not use outdoors or on wet surfaces.
- Dispose of the appliance and batteries responsibly according to local environmental regulations, taking them to designated collection points for recycling.
- In case of power cord damage, stop use immediately and contact an authorized Hoover service engineer for replacement.
- For servicing or repairs, contact an authorized Hoover service engineer to ensure continued safe and efficient operation.