8
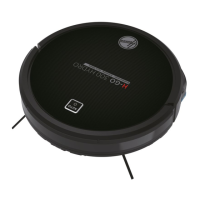
CLEANING ANTI FALL SENSORS
To maintain the safe operation of your robot it is important to keep the Anti fall sensors clean.
There are 3 sensors are located on the underside of the robot. Turn the robot upside down and clean
them with a soft brush to remove any accumulation of dust, dirt or debris. [Fig. 17]
CLEANING THE AGITATOR
Regularly clean the agitator to maintain maximum cleaning performance.
1. Turn the Robot off.
2. Turn the Robot over. [Fig. 18]
3. Press the clips on the sole plate, remove the cap and then remove the agitator. Remove hair and
lint, etc. by hand or with a brush.
CLEANING THE EDGE SIDE BRUSHES
The edge cleaning brushes can be easily worn from heavy use so you should check them regularly to
monitor their condition.
1. Switch the Robot off and turn it over.
2. Unclip the two edge side brushes.
3. Use a pair of scissors to remove any trapped hair or debris.
CLEANING THE DRIVE WHEELS
1. Switch the Robot off and turn it over.
2. Remove any dirt or hair trapped in the wheels.
3. Clean the wheels with a dry cloth. [Fig. 19]
IMPORTANT NOTICE
Only use approved replacement parts for your Robot.
Using parts not validated by Hoover are dangerous and will invalidate your guarantee.
If the Robot will not to be used for several months, please remove the batteries and store in cool a dry
location.
IMPORTANT: Always make sure your device is switched off before changing.
IMPORTANT INFORMATION
Hoover Spares and Consumables
Always replace parts with genuine Hoover spares. These are available from your local Hoover dealer
or direct from Hoover. When ordering parts always quote your model number.
Quality
Hoover’s factories have been independently assessed for quality. Our products are made using a
quality system which meets the requirements of ISO 9001.
Your Guarantee
The guarantee conditions for this appliance are as dened by our representative in the country in
which it is sold. Details regarding these conditions can be obtained from the dealer from whom the
appliance was purchased. The bill of sale or receipt must be produced when making any claim under
the terms of this guarantee.
Subject to change without notice.
TROUBLESHOOTING
The following is a list of commonly encountered problems and solutions.
If any of these problems persist contact your local Hoover representative.
The Robot does not work
• Robot requires attention.
• Check that the Robot is switched on.
• Check that the dust container, filter are clean.
• Check if the Robot needs to be charged.
Cleaning power is weak
• Turn power off and empty dust container.
• Check and clean the filter and motor.
• Check and clean the Floor Brushes.
• Check and clean the sensors.
• Check and clean the drive wheels.
The Robot is very noisy
while cleaning
• Clean the dust container and filter.
• Check the brushes and drive wheels for dirt and debris.
The Robot does not
automatically charge
• Make sure there are no barriers between the Robot and the
charger station.
Robot is trapped
• The Robot will attempt to free itself but in some cases assist
the Robot manually.
Fig. 19
Fig. 18
Fig. 17
GB
 Loading...