4
CLEANER MAINTENANCE
REPLACEMENT OF THE ANTI-CALC FILTER
The product is provided with a water lter containing special resins capable for stopping
the calc and extending the life of your product.
Periodically check your water lter. When the GREEN GRAINS inside the lter TURN
BLUE, change your water lter.
If the lter is not changed at the correct time, deposits may accumulate on the heater,
causing damage.
1. Unplug the cleaner from power supply.
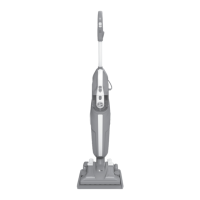
2. Remove the clean water tank from cleaner. [4]
3. Release the lter by pulling it away from the clean water tank. [29]
4. Replace with a new lter, place it onto the clean water tank and rotate to lock.
5. Re-t the clean water tank to the cleaner. [4]
EMPTY THE WATER TANK
1. Unplug the cleaner from the mains power and ensure the unit has cooled.
2. Release the clean water tank by sliding the water tank release button downwards
and remove tank from cleaner. [4]
3. Open the cap of clean water tank.
4. Empty any excess water from the tank. [30]
5. Close the cap and re-t the clean water tank to the cleaner.
EMPTY THE DUST BIN AND FILTERS MAINTENANCE
When the dust reaches the max level indicator on the container, empty the dust bin.
IMPORTANT: To maintain optimum performance, do not allow the dust to exceed
the max level.
1. Turn off the cleaner with the main switch and unplug the power cable.
2. Press the bin release button and remove the bin assembly from the cleaner. [31]
3. Remove the pre-motor lter assembly and the vortex nder from bin assembly. [32]
4. Empty the dust from the bin. [33]
5. Ret the vortex nder and pre-motor lter assembly to bin assembly.
6. Ret the dust container lid to bin assembly and ret it to the cleaner main body.
WARNING: Do not use the appliance without the dust container complete with lter.
To maintain optimum cleaning Performance, regularly remove the lters and tap against
the side of the bin to release dust. The lters should be washed every 5 dust bin empties
or when the lter has excessive dust level.
IMPORTANT: All bagless cleaners require regular lter cleaning. Failure to clean your
lters may result in air blockage, overheating and product failure. This may invalidate your
guarantee.
IMPORTANT: Regularly check and maintain the lters.
IMPORTANT: Always ensure the lter pack is fully dry before use.
CLEAN THE STEAM OUTLET ON THE MOP HOLDER
Unplug the cleaner from the mains power and ensure the unit has cooled.
1. Remove the mop holder from the nozzle and detach the microber mop. [3]
2. Clean any debris from steam outlet on the mop holder.
REMOVING AND PREVENTING BLOCKAGES
Unplug the cleaner from the mains power and ensure the unit has cooled.
Use the Descaling tool regularly to remove any build up of limestone in the steam outlet
of the following parts [34]:
Portable Steam Handheld
Main Nozzle
Refresh Conical Pipe
Steam Hose
REMOVING AND CLEANING THE MICROFIBRE MOPS
The product is provided with 2 reusable microbre mops:
White mop: Medium density, it is ideal for everyday use on delicate surfaces (wooden
and laminate oors).
Blue and white striped mop: High density, it is particularly indicated for high trafc areas
and to remove stubborn dirt.
Unplug the cleaner from the mains power and ensure the unit has cooled.
Remove the microbre mop from the nozzle or the small textile pad from multi-purpose
nozzle.
Wash the microbre mops and the textile pad by hand or in the washing machine with a
mild detergent at MAX temperatu
r
e 30OC.
CLEANER STORAGE
Once nished your cleaning session, unplug the power plug and wrap cord around the
cord storage hooks on the rear.
You can disassemble the main handle by pressing the handle release button and store it
on the nozzle by lifting the pin integrated onto the side of the main handle and inserting it
into the slot on the main body side. [35,36]
This will allow a more compact and convenient cleaner storage.
Please always store your cleaner on the plastic storage tray (included in the pack)
in order to protect your oors from the heat and humidity.
GB