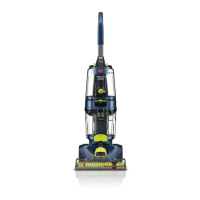
CONNECTHOSEFOR TOOL USE
Howto Attach
1. Open Accessory Hose Suction Port (A, Fig. 31).
Insert hose end, aligning the indicator with the
unlock arrows.
2. Rotate clockwise to lock position (B, Fig. 31).
3. Hold open the Accessory Hose Solution Port
door (Fig. 32).
4. Plug Accessory Hose Solution Tube connector
firmly into Hose Solution Port (C, Fig. 32).
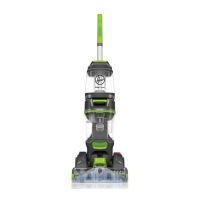
Howto Remove
1. Disconnect Accessory Hose Solution Tube
Connector from Accessory Hose Solution Port
by pulling up firmly. Do not pull on tube, this
may cause damage. Accessory port door wil!
automatically close.
2. Rotate accessory Hose end counterclockwise
from the locked position to the unlocked
position and remove by pulling out.
3. Snap Accessory Hose Suction Port door back
into place. Make sure to snap both sides to
unsure proper suction, unit may lose suction if
not closed properly.
TOOLS(*Available on select models only.)
A. Stair Tool*: 6 inches wide,2built-in rowsof brushes
to help provide the scrubbing action that some spots
may need for removalon your carpeted stairs.
B. Upholstery Tool has a built-in brush to help
provide the scrubbing action some spots may need
for removal.
C. SpinScrub _°_Hand Tool* has rotating brush(s)
for extra scrubbing action on small carpet areas,
carpeted stairs and upholstery. For some models,
the brush(s) can be removed for converting to the
scrub module.
D. Crevice Tool*: Great for use around baseboards
and those hard to reach areas.
NOTE: Tools located and stored in Mesh Bag.
Howto AttachTools
k.
1. To ensure maximum performance and to protect your carpet,
be sure to place the handle in the upright position while using
the accessory hose. Placing handle in the upright position
shuts off the SpinScrub brushes.
NOTE: All tools attach to the hose in the same manner:
2. Connect tool to hose by sliding it onto connector unti! the
tab locks it securely (E, Fig. 34).
3. Using your thumb, push forward and up on the latch to
remove tool (F, Fig. 34).
Actual model may vary from images shown. 12

 Loading...