Do you have a question about the Hoover SPRINT EVO and is the answer not in the manual?
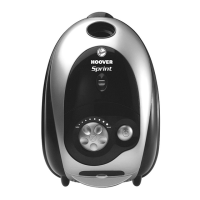
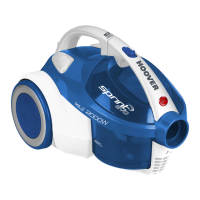
List of main parts of the Hoover cleaner, including body, dust container, and controls.
Connect the hose to the cleaner main body until it clips and locks.
Press hose release buttons to detach the hose from the cleaner.
Attach the hose handle to the upper end of the telescopic tube.
Attach the lower end of the telescopic tube to the carpet and floor nozzle.
Pull power cord to the red marker and plug into supply.
Adjust tube height and hose handle for comfortable cleaning position.
Press the nozzle pedal to select the surface type for cleaning.
Slide the On/Off control to the ON position to start the cleaner.
Use the suction regulator on the hose handle to vary suction power.
Press On/Off, unplug, then press cord rewind button.
Park the nozzle in the rear parking slot for convenient storage.
Use the Crevice Tool for cleaning corners and hard-to-reach areas.
Use the Dusting Brush for delicate surfaces like bookshelves.
Use mini turbo nozzle for stairs, textiles, and pet hair removal.
Use mini turbo nozzle for textiles and allergen removal.
Use the Hard Floor Nozzle for parquet and delicate floors.
Instructions on how to empty the dust container when full.
Slide release button and lift dust container from the main body.
Tap container against bin, then press flap opening button to empty dust.
Close the dust container flap and refit it to the cleaner main body.
Guide to cleaning pre-motor and exhaust filters for optimal performance.
Remove, clean, and dry the pre-motor filter and protective mesh.
Instructions for unclipping, washing, and remounting the exhaust filter.
Check dust container, filters, hose, or tube for blockages.
Procedure if cleaner switches off due to overheating and thermal cut-out.
Check electricity, dust container, filters, blockages, and overheating before calling service.
Information on ordering genuine Hoover spares and consumables.
Contact details for customer service and warranty support.
Details on safety certification, BEAB mark, and ISO 9001 quality.
Guidance on correct disposal of the appliance according to WEEE directive.
Information on product compliance with EU directives and guarantee conditions.
| Brand | Hoover |
|---|---|
| Model | SPRINT EVO |
| Category | Vacuum Cleaner |
| Language | English |