2
GB
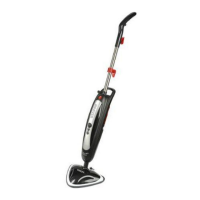
ASSEMBLING YOUR CLEANER
Remove all components from the packaging.
1. Attach the hose to the main body of the cleaner. [2]
2. Attach the extension tube to the hose handle. Connect the other extension tubes
together.
3. [4]
4. Attach the extension tubes to the connector until it clicks in place. [5]
5. Ensure the handle safety latch is locked. [6]
NOTE:
press the release latch and pull apart.
USING YOUR CLEANER
BEFORE YOU BEGIN CLEANING
1. Remove the clean water lid by pushing down and turning anti-clockwise. [7]
2. Fill the measuring jug no more than the M
3. [8]
4. Replace the lid by pushing down and turning clockwise.
5. Ensure the handle safety latch is locked. [6]
1.
2. Plug the steam cleaner into the main power and switch on. The red ON light will
illuminate. [9]
3. After a few minutes the green Steam Ready light will illuminate indicating the cleaner
is ready for use.
4. Release the steam handle safety latch. [10]
5. To produce steam press the Steam Trigger Button. [11]
6. Move the cleaner slowly backwards and forwards paying particular attention to high
1. [12]
2.
in place.
3. Repeat steps 2-6 as detailed above.
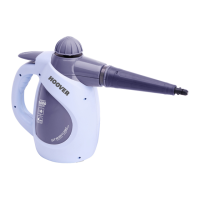
ACCESSORIES
1. Ensure the handle safety latch is locked. [6]
2. To attach the concentration nozzle push onto the handle/extension tube until it
clicks in place. [14]
3. Push the desired small tool onto the conic tool and concentration tool aligning the
arrows. [15]
4. Twist clockwise to secure in place. [15]
5. Plug the steam cleaner into the main power and switch on. The red ON light will
illuminate. [9]
6. After a few seconds the green Steam Ready light will illuminate indicating the
cleaner is ready for use.
7. Release the steam handle safety latch. [10]
8. To produce steam press the Steam Trigger Button. [11]
NOTE: The conic
Use on heavily soiled areas such as showers, kitchens. [16]
Use on windows and mirrors for a smear free clean. [17]
Use the upholstery cloth over the window tool for use on sofas
and chair fabrics. [18]
Use on stubborn grease and grime. [19]
For oven grills and racks. [20]
For hard to reach areas such as taps etc. [21]