EasyManua.ls Logo

Hoover U5433 User Manual

Hoover U5433
14 pages
To Next Page IconTo Next Page
Page #1 background imageLoading...
Page #1 background image
Review this
manual before
operating cleaner
1
HOOVER
WindTunnel
by
Important Safeguards!
When using an electrical appliance, always follow basic precautions, including the following:
READ ALL INSTRUCTIONS BEFORE USING THIS APPLIANCE
Warning: To reduce the risk of fire, electric shock, or injury:
Do not use outdoors or on wet surfaces.
Close supervision is necessary when any appliance is used by or near children.
Do not allow vacuum cleaner to be used as a toy or to run unattended at any
time.
Keep hair, loose clothing, fingers, feet and all parts of body away from openings,
rotating agitator and other moving parts. Do not operate cleaner in bare feet or
when wearing open toe shoes or sandals.
Do not pick up anything that is burning or smoking, such as cigarettes, matches,
or hot ashes.
Do not use to pick up flammable or combustible liquids such as gasoline or use
in areas where they may be present.
Avoid picking up hard, sharp objects with the cleaner. They may damage the
cleaner and the bag.
Always turn off this appliance before connecting or disconnecting hose.
Do not use without dust bag or filters in place. Change bag frequently when
picking up very fine materials such as powder.
Use extra care when cleaning on stairs.
Do not put any object into openings. Do not use with any opening blocked; keep
free of dust, lint, hair, or anything that may reduce air flow.
Do not pull or carry by cord, use cord as a handle, close door on cord or pull
cord around sharp edges or corners. Do not run appliance over cord. Keep cord
away from heated surfaces.
Always disconnect cord from electrical outlet before servicing the cleaner.
Unplug cleaner when not in use. Turn off all controls before unplugging.
Do not unplug by pulling on cord. To unplug, grasp the plug, not the
cord. Never handle plug or appliance with wet hands.
The use of an extension cord is not recommended.
Do not use with damaged cord or plug. If appliance is not working as it should,
has been dropped, damaged, left outdoors, or dropped into water, take it to a
Hoover Service Centre or Authorised Hoover Service Dealer.
Use vacuum cleaner only for its intended use as described in the instructions.
Use only attachments recommended by The Hoover Company; others may cause
hazards.
Owner’s Manual
IMPORTANT
Electricity Supply
The cleaner must be connected to an alternating current (AC) supply at the
voltage shown on the rating plate.
IMPORTANT
Switch off and remove power plug from electrical outlet socket before
inspecting or servicing cleaner.
*
Index
Assembling Cleaner......................... 2-4
Cleaner Descriptions ...........................4
How To Use
Embedded Dirt FINDER
TM
Feature .....5
Cleaning Tools ................................7
Upright Cleaner........................... 5-6
If You Have a Problem ........................13
Important Safeguards..........................1
Lubrication..........................................13
Maintenance
Authorised Service .......................13
Cleaning Filters.............................10
Clearing Blockages ......................12
Optional Cloth Filter Bag ...............9
Replacing Agitator........................12
Replacing Belt...............................11
Replacing Edge Groomers...........12
Replacing Headlight .....................10
Replacing Paper Filter Bag ............8
Thermal Protector ..............................12
Unpacking Cleaner...............................2
© 1997 The Hoover Company
Save these instructions!
*
Question and Answer IconNeed help?

Do you have a question about the Hoover U5433 and is the answer not in the manual?

Hoover U5433 Specifications

General IconGeneral
BrandHoover
ModelU5433
CategoryVacuum Cleaner
LanguageEnglish

Summary

Important Safeguards

Electrical Safety

Connect to AC supply and switch off before servicing.

General Usage Precautions

Follow basic precautions to reduce risk of fire, shock, or injury.

Assembling Cleaner

Unpack and Identify Parts

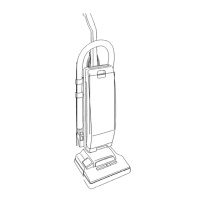
Remove all parts from carton and identify each item shown.

Record Model and Serial Number

Fill in and retain model and serial number for personal records and warranty.

Attach Rack and Handle

Assembly Steps

Follow instructions to attach hose rack and handle to cleaner body.

Attach Hose

Connect Hose to Cleaner

Align and twist hose into the dirt duct and position over rack.

Position Tools

Store Cleaning Accessories

Insert dusting brush, crevice tool, and furniture nozzle into storage areas.

Cleaner Description

Identify Cleaner Components

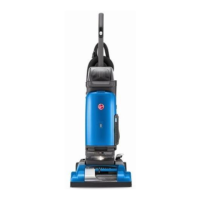
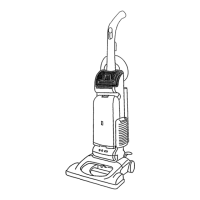
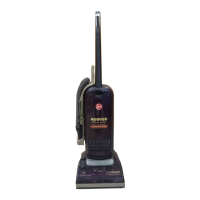
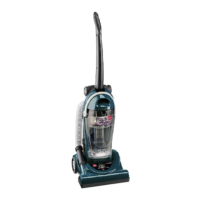
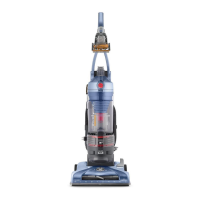
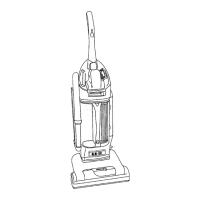
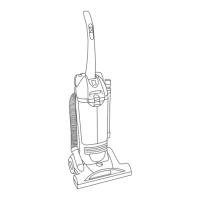
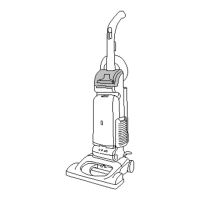
Identify parts of the cleaner using the provided diagram and list.

How to Use

Powering On and Off

Plug in cord, push switch up to turn ON, push down to turn OFF.

Transporting the Cleaner

Move cleaner using handle in upright position or carrying handle.

Embedded Dirt FINDER Feature

Understand indicator lights for carpet dirt levels and sensitivity settings.

Handle Positions

Use upright, operating, or low positions for storage, general use, or reaching under furniture.

Electronic Performance Indicator

Monitor amber light for reduced performance and filter bag replacement.

Carpet Height Adjustment

Adjusting Nozzle Height

Slide nozzle control knob to adjust height for different carpet pile heights.

Recommended Height Settings

Use lowest setting for all carpet, higher for deep pile for easier pushing.

Special Cleaning Techniques

Cleaning Lightweight Rugs

Lift nozzle to prevent rug from clinging when cleaning lightweight rugs.

Edge Cleaning

Use edge groomers to remove dirt near baseboards and furniture.

Stair Cleaning

Use stair cleaning handle or hose/furniture nozzle for cleaning stairs.

Cleaning Tools

Tool Usage and Care

Tools clean above floor; wipe hose, wash tools with detergent, rinse, and air dry.

Attaching Tool Cover

Align hinges and push cover to secure; it has a 'break-away' feature.

Selecting and Attaching Tools

Use correct tool (brush, crevice, furniture nozzle) and attach to hose/wand.

Maintenance

Paper Filter Bag Replacement

Change bag when dirt reaches dotted line or for fine materials; use genuine Hoover bags.

Filter Bag Purchase Info

Buy filter bags from Hoover dealer/service center; quote model number.

Filter Bag Replacement Steps

Remove door, pull collar, align new bag, and re-secure door.

Optional Cloth Filter Bag

Cloth Filter Bag Emptying

Empty bag from time to time; cleaner won't operate effectively if overfilled.

Cloth Filter Bag Emptying Procedure

Remove door, pull collar, slide clip, empty bag, replace clip, and re-secure door.

Secondary and Final Filters

Filter Cleaning and Replacement

Hand wash filters and air dry; check layers for correct Hoover part number.

Attaching Filter Door

Align hinges and push door to secure; it has a 'break-away' feature.

Headlight Replacement

Bulb Purchase Information

Cleaner uses a 12 volt, wedge base type 912 bulb; Hoover part No. 27313-101.

Headlight Replacement Procedure

Remove lens screws, pull old bulb, push new bulb, and replace lens screws.

Belt Replacement

When to Replace Belt

Check belt condition; replace if stretched, cut, or broken.

Belt Purchase Information

Use genuine HOOVER belts; ask for part No. 38528-033.

Belt Replacement Procedure

Remove bottom plate, lift agitator, slide new belt onto pulley, insert agitator, and reassemble.

Agitator Brush Roll Replacement

When to Replace Agitator

Replace if worn; check if brushes touch a card when turning agitator.

Agitator Purchase Information

Buy 13" or 15" agitator; ask for Hoover part No. 48414057 or 48414017.

Agitator Replacement Procedure

Remove bottom plate, belt, agitator; continue with belt section for reassembly.

Edge Groomer Replacement

When to Replace Edge Groomers

Replace when groomers no longer extend past the bottom plate surface.

Edge Groomer Purchase Info

Ask for Hoover part No. 39511004 when purchasing edge groomers.

Edge Groomer Replacement Procedure

Remove bottom plate, lift old groomers, slide new ones into position, and reassemble.

Thermal Protector

Automatic Shut-off Function

Internal protector stops cleaner if it overheats to prevent damage.

Resetting Thermal Protector

Turn OFF, unplug, check filters/blockages, wait 30 mins for automatic reset.

Troubleshooting Guide

Cleaner Not Running

Check plug, voltage, fuse/breaker, or thermal protector activation.

No Suction or Pickup

Check for broken belt, worn agitator, full bag, incorrect height, or blockages.

Cleaner Hard to Push

Adjust carpet height setting to a higher position.

Lubrication

Motor and Agitator Bearings

Motor bearings are lubricated for life; agitator bearings may need periodic service.

Service and Parts

Obtaining Service and Parts

Contact Hoover dealer for replacement parts and service; quote model number.

Cord Replacement Safety

Damaged cords must be repaired by an Authorised Hoover Repairer to avoid hazards.

Related product manuals