EasyManua.ls Logo

Horiba Scientific LAQUAtwin CA-11 - User Manual

Horiba Scientific LAQUAtwin CA-11
3 pages
Print Icon
To Next Page IconTo Next Page
Loading...
Instruction Manual (Operation)
LAQUAtwin CA-11 / K-11 / NA-11 / NO3-11
Part Names
1. Sensor
2. Sensor cover
3. Liquid Junction
4. Membrane
5. Lithium batteries
6. MEAS key
7. ON/OFF key
8. CAL key
9. Waterproof gasket
10. Strap eyelet
Attach the sensor
1. Power OFF the meter
2. Confirm that the
waterproofing gasket is
clean and undamaged.
3. Slide the sensor onto the
meter, catch "A" on the meter should fit into hole
"a" on the sensor.
Be careful not to twist the waterproof gasket.
Detach the sensor
1. Power OFF the meter.
2. Lift the sensor tongue tip and
slide the sensor a little away from
the meter.
3. Pull out the sensor all the way
from the meter.
Insert batteries
1. Power OFF the meter.
2. Detach the sensor.
3. Slide both batteries into the battery
case as shown.
4. Attach the sensor.
Use 2x CR2032 batteries, place the
plus sides (+) upwards.
Remove batteries
1. Power OFF the meter.
2. Detach the sensor.
3. Use a ball-point pen or other tool
to pry the batteries out from the
clips.
4. Attach the sensor.
Electrode conditioning
Perform electrode conditioning before using the
sensor for the first time or after several days of
disuse.
Perform calibration after conditioning.
1. Power OFF the meter.
2. Place some drops of 2000 ppm standard solution
on the sensor.
3. Wait a few hours.
4. Dispose of the standard solution.
5. Rinse the sensor with DI or tap water.
Power on / off
1. Press ON/OFF key to switch the
meter on or off.
Keys must be pressed for 1 second to
function.
Settings menu
Customize the meter to the specific needs.
Operating keys functions
MEAS: Select options in the menu.
CAL : Confirm settings, go to next option.
ON/OFF: Escape without saving.
Open settings menu
1. Power OFF the meter.
2. Simultaneously press and hold MEAS and
ON/OFF keys (approx. 3 seconds).
Set units of measurement
Unit options vary with different meter models.
3. Press MEAS to scroll
4. Press CAL to confirm and go to the next setting.
Set Low calibration point
Set the value to match the standard solution.
Value can be set from 5 to 990ppm.
5. Press MEAS to scroll. Keep pressed to increase
scrolling speed
6. Press CAL to confirm and go to the next setting
Set High calibration point
Set the value to match the standard solution.
Value can be set from 160 to 9990ppm.
7. Press MEAS to scroll. Keep pressed to increase
scrolling speed
8. Press CAL to confirm and go to the next setting
Stability mode
Choose A.S. (Auto Stable) or A.H. (Auto Hold)
A.S. mode: appears at stable value. If the value
changes disappears until new stability is reached
(continuous measurement)
A.H. mode: appears at stable value and holds it in
the display. Press MEAS to do another measurement.
9. Press MEAS to scroll.
10. Press CAL to confirm and go to the next setting.
Multiplying compensation
Apply compensation coefficient (0.01 to 9.90) to to the
measured value. The compensated result is displayed
as the measured value.
11. Press MEAS to scroll. Keep pressed to increase
scrolling speed
12. Press CAL to confirm and go to the next setting.
Backlight on / off
13. Press MEAS to scroll.
14. Press CAL to confirm and go to END. Meter will
shut down automatically.
Calibration
Calibration is required before measurement.
Use standard solutions within the measurement
range in the specifications.
Calibration values are saved even if the meter is
switched OFF.
Calibration value is rewritten if calibration is
repeated using the same standard solution.
Calibrate with solutions close to the expected value.
1. Open the sensor cover.
2. Rinse the sensor with DI or tap
water.
3. Dry the sensor with a tissue.
Rinse again with some of the next standard solution
for increased accuracy
4. Cover the complete sensor with
standard solution.
5. Close the sensor cover.
6. Switch on the meter.
7. Press CAL key. Set calibration
value blinks and is shown.
8. Press CAL to calibrate or MEAS to
select the other calibration point.
and blink.
After calibration complete, and
stop blinking and the measured
value is displayed.
The 1
st
point has now been calibrated.
9. Repeat step 1 to 8 for the 2
nd
calibration point.
Clear Calibration data
Clear calibration data in the following cases:
If the number of previous calibration points is
uncertain
After the sensor is replaced
When Er4 persists
1. Power OFF the meter.
2. Simultaneously press and hold MEAS and CAL
keys (approx. 3 seconds).
3. Press CAL to confirm or ON/OFF to cancel
Temperature adjustment
Only available in A.S. Stability mode, see Setting
Menu. Normally this is not necessary. Adjust the
temperature only when the value is not correct.
1. Prepare a reference thermometer.
2. Allow the meter and thermometer to reach the
same temperature.
3. Make sure you are in A.S. mode
4. Press MEAS to view temperature
5. Press CAL, value blinks
6. Press MEAS to adjust the value to match the
thermometer.
Press CAL to confirm. and ºC will blink until
adjustment is done.
Note
IMPORTANT
ppm (default)
mg/L
kg/10a
(default)
(default)
Tip
Waterproof
gasket
Backlight ON
(default)
(default)
Question and Answer IconNeed help?

Do you have a question about the Horiba Scientific LAQUAtwin CA-11 and is the answer not in the manual?

Summary

Settings and Configuration

Calibration and Measurement

Calibration

Requirements for calibration, including using standard solutions.

Set Low Calibration Value

Instructions for setting the low calibration value using the standard solution.

Set High Calibration Value

Instructions for setting the high calibration value using the standard solution.

Troubleshooting and Errors

Error Solutions

Provides solutions for common errors like faulty meter, internal board issues, or calibration errors.

Error Codes

Explanation of error codes and their meanings for troubleshooting.

Sampling and Measurement Procedures

Overview

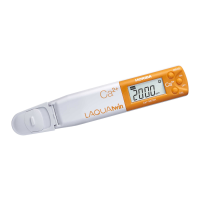
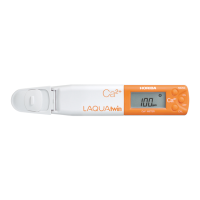
The HORIBA LAQUAtwin is a portable, compact meter designed for quick and accurate measurement of various ions, including Calcium (CA-11), Potassium (K-11), Sodium (NA-11), and Nitrate (NO3-11). It is a user-friendly device suitable for both field and laboratory use, allowing for efficient monitoring of water quality and other solutions.

Function Description

The LAQUAtwin operates on the principle of an Ion Selective Electrode (ISE), which measures the concentration of specific ions in a solution. The device features a sensor that comes into direct contact with the sample, and the resulting electrical potential is converted into a concentration reading displayed on the LCD screen.

The meter offers two stability modes:

  • A.S. (Auto Stable) mode: In this mode, the "AS" indicator appears when the value is stable. If the value changes, "AS" disappears until a new stability is reached, allowing for continuous measurement. This is ideal for monitoring dynamic changes in ion concentration.
  • A.H. (Auto Hold) mode: In this mode, "AH" appears at a stable value and holds it in the display. To perform another measurement, the MEAS key must be pressed. This mode is useful for taking discrete measurements and recording stable readings.

A unique feature of the LAQUAtwin is its multiplying compensation function, which allows users to apply a compensation coefficient (ranging from 0.01 to 9.90) to the measured value. The compensated result is then displayed alongside the measured value, providing flexibility for specific application requirements.

The device also includes a backlight function for improved visibility in low-light conditions, which can be toggled on or off through the settings menu.

Usage Features

The LAQUAtwin is designed for ease of use, with a straightforward interface and intuitive operation.

Sensor Attachment and Detachment:

The sensor is easily attached and detached from the meter. To attach, the sensor slides onto the meter, ensuring the "A" mark on the meter aligns with the hole "a" on the sensor. Detachment involves lifting the sensor tongue tip and sliding it away. It's crucial to handle the waterproof gasket carefully to avoid twisting.

Power On/Off:

The meter is switched on or off by pressing the ON/OFF key for approximately 1 second.

Calibration:

Calibration is a critical step before measurement to ensure accuracy. The LAQUAtwin supports up to two calibration points, allowing for a wider measurement range and improved precision.

  1. The process begins by opening the sensor cover, rinsing the sensor with DI or tap water, and drying it with a tissue.
  2. The sensor is then covered with a standard solution, and the sensor cover is closed.
  3. Upon switching on the meter, the CAL key is pressed. The calibration value blinks, and "CAL" is shown.
  4. Pressing CAL again calibrates the first point, or MEAS can be used to select another calibration point. Once calibration is complete, "CAL" stops blinking, and the measured value is displayed.
  5. The process is repeated for the second calibration point if dual-point calibration is desired. For increased accuracy, it is recommended to rinse the sensor with some of the next standard solution before covering it completely. Calibration values are saved even if the meter is switched off, and repeating calibration with the same standard solution overwrites previous values.

Settings Menu:

The settings menu allows users to customize the meter to their specific needs. It is accessed by simultaneously pressing and holding the MEAS and ON/OFF keys for approximately 3 seconds while the meter is off.

  • Unit Options: Users can select the desired unit of measurement (e.g., ppm, mg/L, kg/10a) by scrolling with MEAS and confirming with CAL.
  • Calibration Points: Both low and high calibration points can be set to match the standard solutions used. Values can be adjusted by scrolling with MEAS (holding to increase speed) and confirmed with CAL.
  • Stability Mode: Users can choose between A.S. (Auto Stable) or A.H. (Auto Hold) mode.
  • Multiplying Compensation: The compensation coefficient can be set to apply to the measured value.
  • Backlight: The backlight can be toggled on or off.

Temperature Adjustment:

This feature is available only in A.S. Stability mode and is generally not necessary unless the temperature value is incorrect. It involves preparing a reference thermometer, allowing the meter and thermometer to reach the same temperature, viewing the temperature with MEAS, and then adjusting the value to match the thermometer using MEAS, confirming with CAL.

Sampling Sheet B:

For small sample volumes (50 µL to 100 µL), a sampling sheet can be used. The sheet is taken with tweezers, wiped across the sample, and then the normal measurement steps are followed.

Sampling Sheet B and Holder:

For samples with tiny particles (e.g., soil extract) that might influence measurement results, a sampling sheet holder and cover can be used. The sensor cover is replaced with the sheet holder, the sheet is opened, a sampling sheet is placed on the sensor, and the holder is closed. A few drops of the sample are then placed on the sheet holder, and normal measurement steps are followed.

View mV or Temperature:

In A.S. Stability mode, users can view temperature, mV, or units by repeatedly pressing the MEAS key from the measurement screen.

Battery Installation and Removal:

The meter uses two CR2032 batteries, placed with the plus sides (+) upwards. To install, the sensor is detached, batteries are slid into the case, and the sensor is reattached. To remove, a ball-point pen or other tool can be used to pry the batteries out of the clips.

Maintenance Features

Proper maintenance ensures the longevity and accuracy of the LAQUAtwin meter.

Electrode Conditioning:

Before using the sensor for the first time or after several days of disuse, electrode conditioning is required. This involves placing drops of a 2000 ppm standard solution on the sensor for a few hours, then disposing of the solution and rinsing the sensor with DI or tap water. Calibration should be performed after conditioning.

Cleaning and Storage:

  • After each use, the sensor should be cleaned with DI or tap water.
  • Moisture should be gently removed from the sensor by dabbing with a tissue.
  • The sensor cap should be closed and slid when storing.
  • The sensor can be stored dry, but conditioning should be performed if the meter has been out of use for a longer period.
  • The meter should be stored at room temperature.

Clear Calibration Data:

Calibration data should be cleared in specific situations:

  • If the number of previous calibration points is uncertain.
  • After the sensor is replaced.
  • When an Er4 error persists. To clear calibration data, power off the meter, then simultaneously press and hold MEAS and CAL keys for approximately 3 seconds. Press CAL to confirm or ON/OFF to cancel.

Reset to Factory Defaults:

All settings will be reset, and calibration data will be deleted. To perform a factory reset, power off the meter, then simultaneously press and hold MEAS, ON/OFF, and CAL keys for approximately 3 seconds. Press CAL to confirm or ON/OFF to cancel. If resetting does not resolve an issue, the meter may need to be replaced.

Horiba Scientific LAQUAtwin CA-11 Specifications

General IconGeneral
Resolution (ppm)1 ppm
Accuracy (ppm)±10% of reading
Minimum Sample Volume0.3 mL
Operating Temperature5 to 40°C
IP RatingIP67
Measurement MethodIon selective electrode method
Calibration1 or 2-point calibration
Temperature CompensationAutomatic
Operating Humidity85% or less (no condensation)
Power Supply2 x CR2032 batteries
Battery LifeApproximately 400 hours
Dimensions164 x 29 x 20 mm

Related product manuals