Do you have a question about the Horizon Fitness 5.0R and is the answer not in the manual?
| Weight Capacity | 300 lbs |
|---|---|
| Display Size | 5.5" |
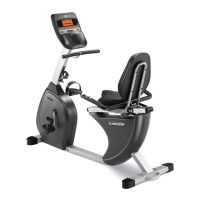
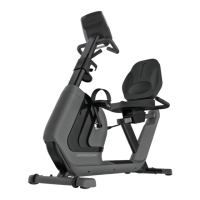
| Type | Recumbent |
| Display | LCD |
| Warranty | 1 year parts, 1 year labor |
| Heart Rate Monitoring | Contact |
| Flywheel Weight | 15.4 lbs |
Instructions for safely moving the recumbent bike, including using wheels and leveling feet.
Safety precautions to reduce injury risk when moving the bike, ensuring adequate clearance.
Guidelines for placing the bike on a level surface with adequate space, avoiding vents and water.
Guidance on adjusting the bike for optimal user comfort and body positioning for effective workouts.
Details on adjusting seat height, horizontal position, and pedal straps for proper user fit.
Comprehensive safety instructions covering exercise precautions, footwear, clothing, and supervision.
Crucial warnings for the assembly process, emphasizing part tightening and following instructions.
Diagram identifying all bike components and a list of included main parts and hardware.
Unpacking, identifying parts and hardware, and contact information for assistance during assembly.
Attaching the front and rear stabilizers to the main frame using bolts and washers.
Attaching the seat cushion, seat back, handlebar set, and seat slider knob.
Inserting the seat slider rail through the seat frame, ensuring proper lever position.
Connecting the assembled seat set and rear cover bracket to the main frame.
Connecting handlebar cable to seat cable and attaching the seat slider cover.
Routing wires, attaching the console mast to the frame, and securing the mast cover.
Connecting console cables and fan cable to the console, then mounting the console.
Identifying and attaching the left and right pedals and pedal straps to the crank arms.
A congratulatory message indicating the successful assembly of the recumbent bike.
Detailed explanation of console display, buttons, programs, Bluetooth, USB port, and energy saver.
Descriptions of workout programs: Manual, Distance, Calories, Fat Burn, and Intervals.
Instructions for quick start-up, selecting workouts, resetting, and finishing workouts.
Guidance on connecting to third-party apps and using Bluetooth heart rate straps.
Answers to frequently asked questions about bike sounds, loudness, belt life, and moving the unit.
Procedure for resolving squeaking/chirping noises and contact information for customer support.
Guidelines for cleaning, and a preventive maintenance schedule for ensuring machine longevity.