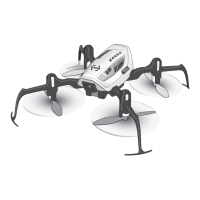
This document describes the Blade® Glimpse™ quadcopter, a sophisticated hobby product designed for both Ready-To-Fly (RTF) and Bind-N-Fly (BNF) configurations. The quadcopter is equipped with SAFE® Technology, an innovative combination of multi-axis sensors and software that allows model aircraft to know its position relative to the horizon. This spatial awareness is utilized to create a controlled flight envelope that maintains a safe region of bank and pitch angles, making it easier for pilots to develop skills and achieve a greater degree of security and flight control.
Function Description:
The Blade Glimpse quadcopter is a remote-controlled aerial vehicle designed for recreational flight and aerial photography/videography. It features a built-in camera and Wi-Fi connectivity for real-time video streaming to a smartphone or tablet. The quadcopter can be controlled using a dedicated transmitter (RTF version) or bound to a compatible DSMX®/DSM2® transmitter (BNF version). The SAFE® Technology provides flight envelope protection, multiple flight modes for different skill levels, and self-leveling capabilities, making it suitable for both beginners and experienced pilots.
Important Technical Specifications:
- Airframe: Blade Glimpse
- Motors: 8mm Brushed
- On-board Electronics: 4-in-1 mixer/ESCs/Gyro
- Battery: 500mAh 1S 3.7V 25C Li-Po
- Charger: 1S USB Li-Po Charger, 500 mAh
- Transmitter (RTF): MLP4DSM
- Micro SD Card: Required (for photo/video storage)
- Smart Device: 5.8 GHz Wi-Fi Capable (for camera control and app function)
- Length: 6.29 in (160mm)
- Height: 1.97 in (50mm)
- Propeller Diameter: 2.36 in (60mm)
- Flying Weight: 1.83 oz (52 g)
- Camera: 5.8GHz Wi-Fi capable for smartphone or tablet integration.
- Radio System: Requires a radio-specific setup for basic flight. Uses DSM2®/DSMX® technology for binding.
Usage Features:
- First Flight Preparation: Includes steps for removing and inspecting contents, charging the flight battery, installing the flight battery, programming the transmitter, binding the transmitter, familiarizing with controls, and finding a suitable area for flying.
- Flying Checklist: Emphasizes turning on the transmitter first, plugging in the flight battery, allowing the 4-in-1 control unit to initialize, arming the propeller, flying the model, landing, unplugging the flight battery, and turning off the transmitter last.
- Battery Charging: Uses a 1S USB Li-Po charger. The charger's LED is solid red during charging and turns off when charging is complete (approximately 60 minutes for a fully discharged 500mAh battery).
- Transmitter Battery Installation (RTF): Requires 4 AA batteries, installed with correct polarity. Rechargeable NiMH batteries are recommended.
- Flight Battery Installation: Involves lowering the throttle and throttle trim, powering on the transmitter, sliding the battery into the mounting slot, connecting the battery cable, and placing the quadcopter on a flat surface until the LED on the 4-in-1 control unit is solid blue.
- Transmitter and Receiver Binding (BNF): Requires setting the model type to "Acro" or "Airplane" mode, centering all trims, powering off and then fully lowering the throttle, connecting the flight battery (blue LED flashes rapidly), putting the transmitter into bind mode, releasing the bind button/switch after 2-3 seconds (blue LED on 4-in-1 control unit turns solid), and disconnecting the flight battery and powering off the transmitter.
- MLP4DSM Binding Procedure (RTF): Involves disconnecting the flight battery, centering all trims, powering off and fully lowering the throttle, connecting the flight battery (red LED flashes during initialization, then flashes blue when ready to bind), pushing in and holding down the left stick while powering on the transmitter (you will hear a 'click'), releasing the left stick (transmitter beeps, power LED blinks, quadcopter is bound when blue LED on 4-in-1 control unit turns solid), and disconnecting the flight battery and powering off the transmitter.
- Transmitter Control: Details the functions of the bind button, aileron/elevator trim, throttle trim, aileron/rudder trim, ON/OFF switch, rudder trim, throttle trim, and dual rate selection.
- Rate Selection (RTF): The MLP4DSM transmitter automatically defaults to high rate when powered on. Rates can be changed by pressing and releasing the right control stick. Low-rate mode offers smoother/easier control response, while high-rate mode provides maximum values for faster flight and acrobatic maneuvers.
- Primary Flight Controls: Explains throttle (climb/descend), rudder (nose yaw left/right), elevator (forward/backward), and aileron (left/right).
- LED Codes: Provides a table of LED colors (blue, red) and statuses (rapid blink, slow blink, solid, blink) for the quadcopter and RTF transmitter, indicating operations like bind mode, no link to transmitter, stability mode, low battery, low rate, and high rate.
- Flying the Quadcopter: Includes instructions for takeoff (increase throttle to approximately 2 ft. hover) and hovering (minor throttle adjustments to maintain altitude).
- Low Voltage Cutoff (LVC): The ESC automatically lowers power to the motor when the battery reaches 3V to prevent over-discharge. Flight after LVC can damage the battery.
- Camera Control and App Function: Download and install the Glimpse app from the Apple App Store or Google Play. Power on the transmitter and Glimpse. Open Wi-Fi settings on your smartphone/tablet and connect to the Glimpse network (Glimpse_######) using the password "12345678". Open the Glimpse App on your smartphone/tablet. Place your smartphone in the transmitter holder. Use onscreen controls to take photos and videos.
- Install the Phone Holder: Instructions for attaching the phone holder to the transmitter for both RTF and BNF versions.
- App Controls: Displays an interface with SD card capacity, photo button, and video record button.
- Retrieving Your Photos and Video: Insert the micro SD card into the quadcopter, then remove it and insert it into the provided SD card adapter to connect to a computer or use a micro USB cable to connect the quadcopter directly to a computer.
Maintenance Features:
- Post-Flight Inspection and Maintenance Checklist:
- Cleaning: Ensure the battery is disconnected. Remove dust and debris with a soft brush or lint-free cloth.
- Motors: Replace motors if they do not spin steadily or veer off during a climb.
- Wiring: Check for loose connectors and damaged wiring.
- Fasteners: Ensure all screws, fasteners, and connectors are tight. Do not over-tighten metal screws.
- Propellers: Check for damage (cracks, burrs, chips, scratches). Replace damaged parts before flying.
- Troubleshooting Guide: Provides a table of common problems, possible causes, and solutions, including issues with control response, throttle, flight battery, LED indications, and crashes.
- Control response inconsistent or requires extra trim: Aircraft not initialized on a level surface, battery not correctly placed in battery slot, throttle too high and/or throttle trim too high.
- Will not respond to throttle: Quadcopter moved during initialization, throttle channel is reversed.
- Does not function and smells burnt: Flight battery connected with the wrong polarity.
- Reduced flight time or is underpowered: Flight battery charge is low, inadequate power to flight battery charger, flight battery is damaged, flight conditions might be too cold.
- LED on receiver flashes rapidly and quadcopter will not respond to transmitter (during binding): Bind switch or button was not held while transmitter was powered on, aircraft or transmitter is too close to large metal object/wireless source, less than a 5-second wait between first powering on the transmitter and connecting the flight battery.
- LED on the receiver flashes rapidly and the quadcopter will not respond to the transmitter (after binding): The quadcopter is bound to a different model memory, flight battery or transmitter battery charge is too low, aircraft or transmitter is too close to large metal object/wireless source.
- Crashes immediately upon lift-off: Propellers in wrong locations or incorrect flight mode selected.
- Exploded View and Parts Listings: Provides a visual breakdown of the quadcopter components and a list of part numbers with descriptions for easy identification and ordering of replacement parts.
- Limited Warranty: Details the warranty coverage, what is not covered, limitation of liability, law, warranty services, questions, assistance, and services, warranty requirements, and non-warranty service.
- FCC and IC Information: Provides regulatory compliance statements for the device, including conditions for operation and warnings regarding interference.
- Compliance Information for the European Union: States that Horizon Hobby, LLC declares compliance with essential requirements and relevant provisions of RED and EMC Directives. Includes instructions for disposal of WEEE by users in the European Union.
Safety Precautions and Warnings:
- Always keep a safe distance from your model to avoid collisions or injury.
- Operate your model in open spaces, away from full-size vehicles, traffic, and people.
- Carefully follow directions and warnings for all equipment.
- Keep all chemicals, small parts, and anything electrical out of reach of children.
- Avoid water exposure to all equipment.
- Never place any portion of the model in your mouth.
- Never operate your model with low transmitter batteries.
- Always keep aircraft in sight and under control.
- Always move the throttle fully down at rotor strike.
- Always use fully charged batteries.
- Always keep the transmitter powered on while the aircraft is powered.
- Always remove batteries before disassembly.
- Always keep moving parts clean.
- Always keep parts dry.
- Always let parts cool after use.
- Always remove batteries after use.
- Never operate aircraft with damaged wiring.
- Never touch moving parts.
- WARNING: Read the entire instruction manual to become familiar with the features of the product before operating. Failure to operate the product correctly can result in damage to the product, personal property, and cause serious injury.
- CAUTION: Procedures, which if not properly followed, create the probability of physical property damage AND a possibility of serious injury.
- NOTICE: Procedures, which if not properly followed, create a possibility of physical property damage AND a little or no possibility of injury.
- Age Recommendation: Not for children under 14 years. This is not a toy.
- Battery Charging Warnings: Only use chargers specifically designed for Li-Po batteries. Failure to do so could result in fire, causing injury or property damage. Never exceed the recommended charge rate. Never leave charging batteries unattended or overnight. Always charge batteries away from flammable materials. Always inspect batteries before charging. Disconnect batteries after charging. Always constantly monitor the temperature of the battery pack while charging. Only use a charger specifically designed to charge Li-Po batteries. If the battery begins to balloon or swell, discontinue use immediately. Never cover warning labels with hook and loop strips. Never charge batteries outside recommended levels. Never charge damaged batteries. Never attempt to dismantle or alter the charger. Never allow minors to charge battery packs. Never charge batteries in extremely hot or cold places.
- CAUTION (Installing Flight Battery): Always disconnect the Li-Po battery from the aircraft when not flying to avoid over-discharging the battery. Batteries discharged to a voltage lower than the lowest approved voltage may become damaged, resulting in loss of performance and potential fire when the batteries are charged.
- CAUTION (Transmitter Binding): When using a Futaba® transmitter with a Spektrum module, you must reverse the throttle channel and rebind. Refer to your Spektrum module manual for binding and failsafe instructions.
- CAUTION (FCC Information): Changes or modifications not expressly approved by the party responsible for compliance could void the user’s authority to operate the equipment.