5 6
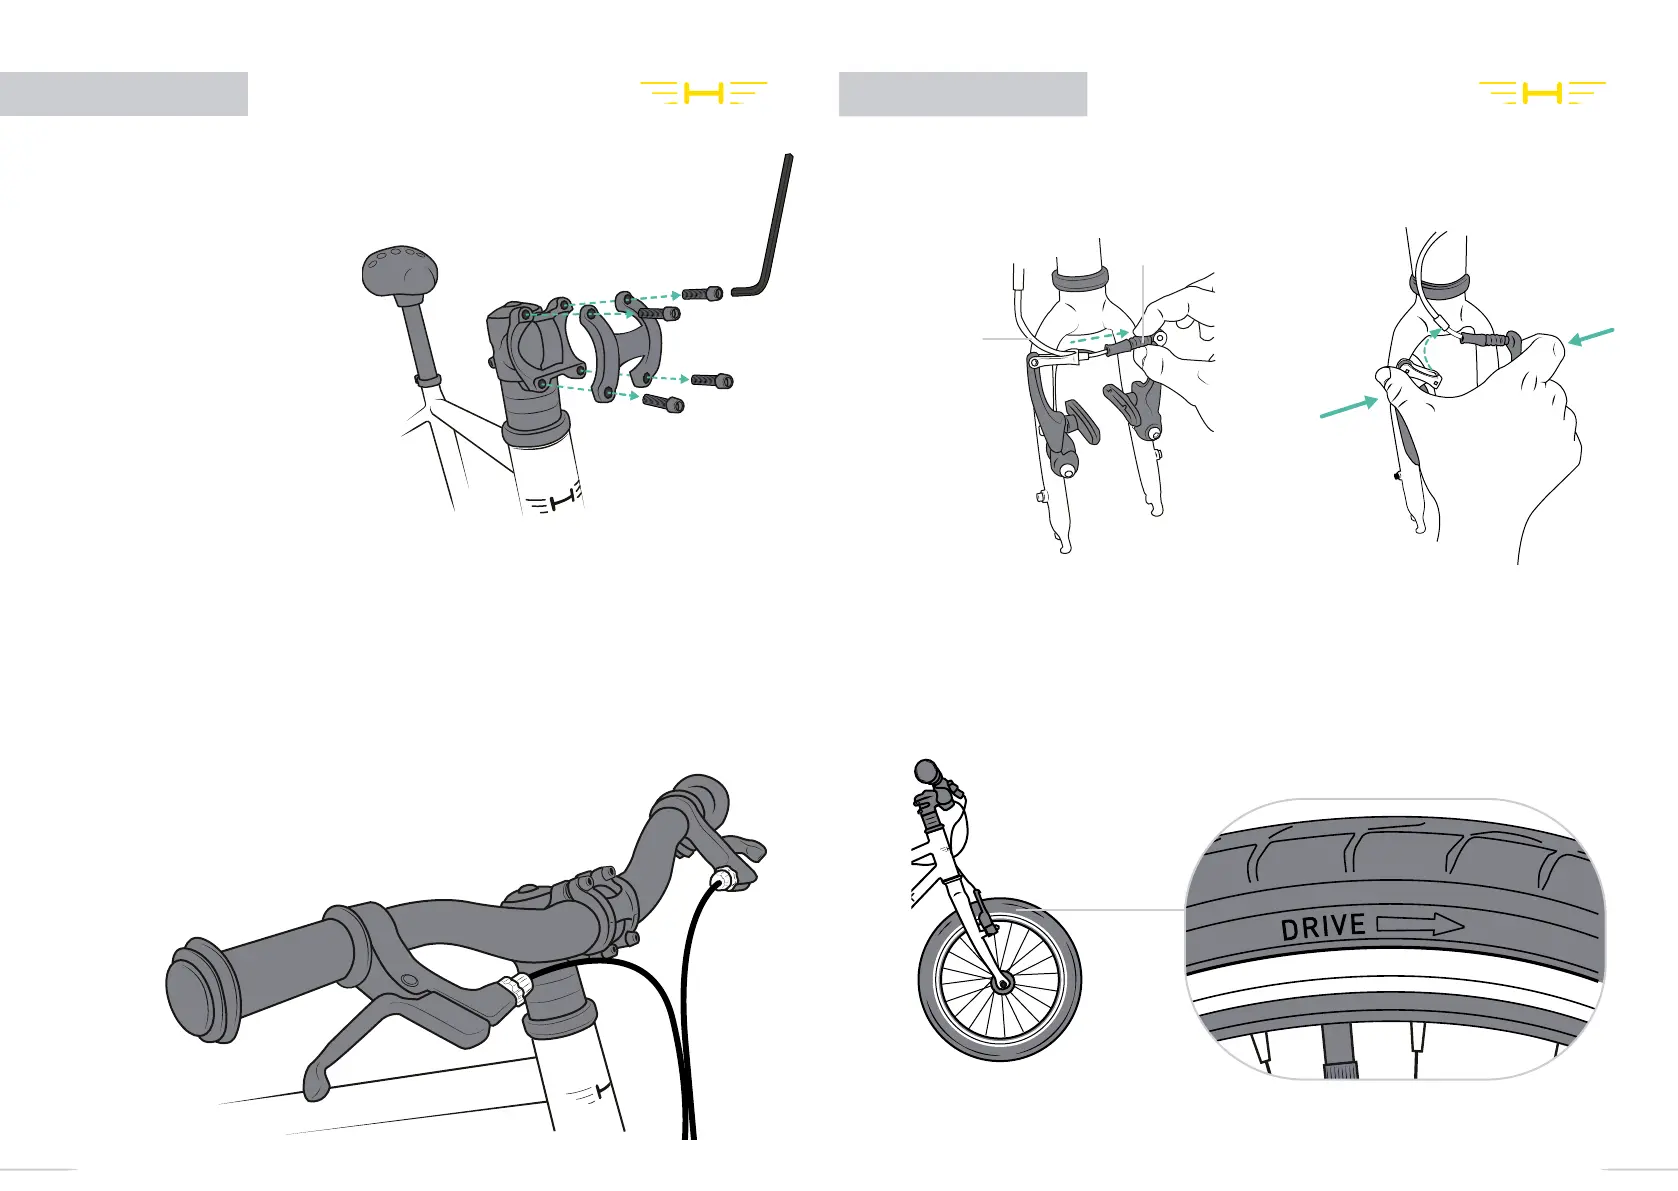
Handlebars
The handlebar arrives detached from HERO and needs to be mounted.
a. Remove the 4 bolts from
the handlebar clamp with a
4mm Allen key.
b. Place the handlebar centrally against the stem, with the cables untwisted
and insert all four bolts by hand.
1.
3.
4.
2.
c. Check that the angle of the brake levers sit a little lower than the
handlebar. The rider should not have to strain their wrists to reach the
brake levers.
d. Use a 4mm Allen key to tighten the bolts in the
sequence shown in the diagram below (5-7Nm). It is
important to tighten bolts 1-4 gradually and repeat until
fully secure so that the gap between the clamp halves is
the same all the way around.
Front Wheel
In order to fit the front wheel the V brakes need to be released as shown here:
Fig 1. Fig 2.
noodle
boot
The front wheel can now be attached.
Check the side wall of the tyre for the direction arrow to ensure it is the right
way around. The arrow points forward.
 Loading...