14
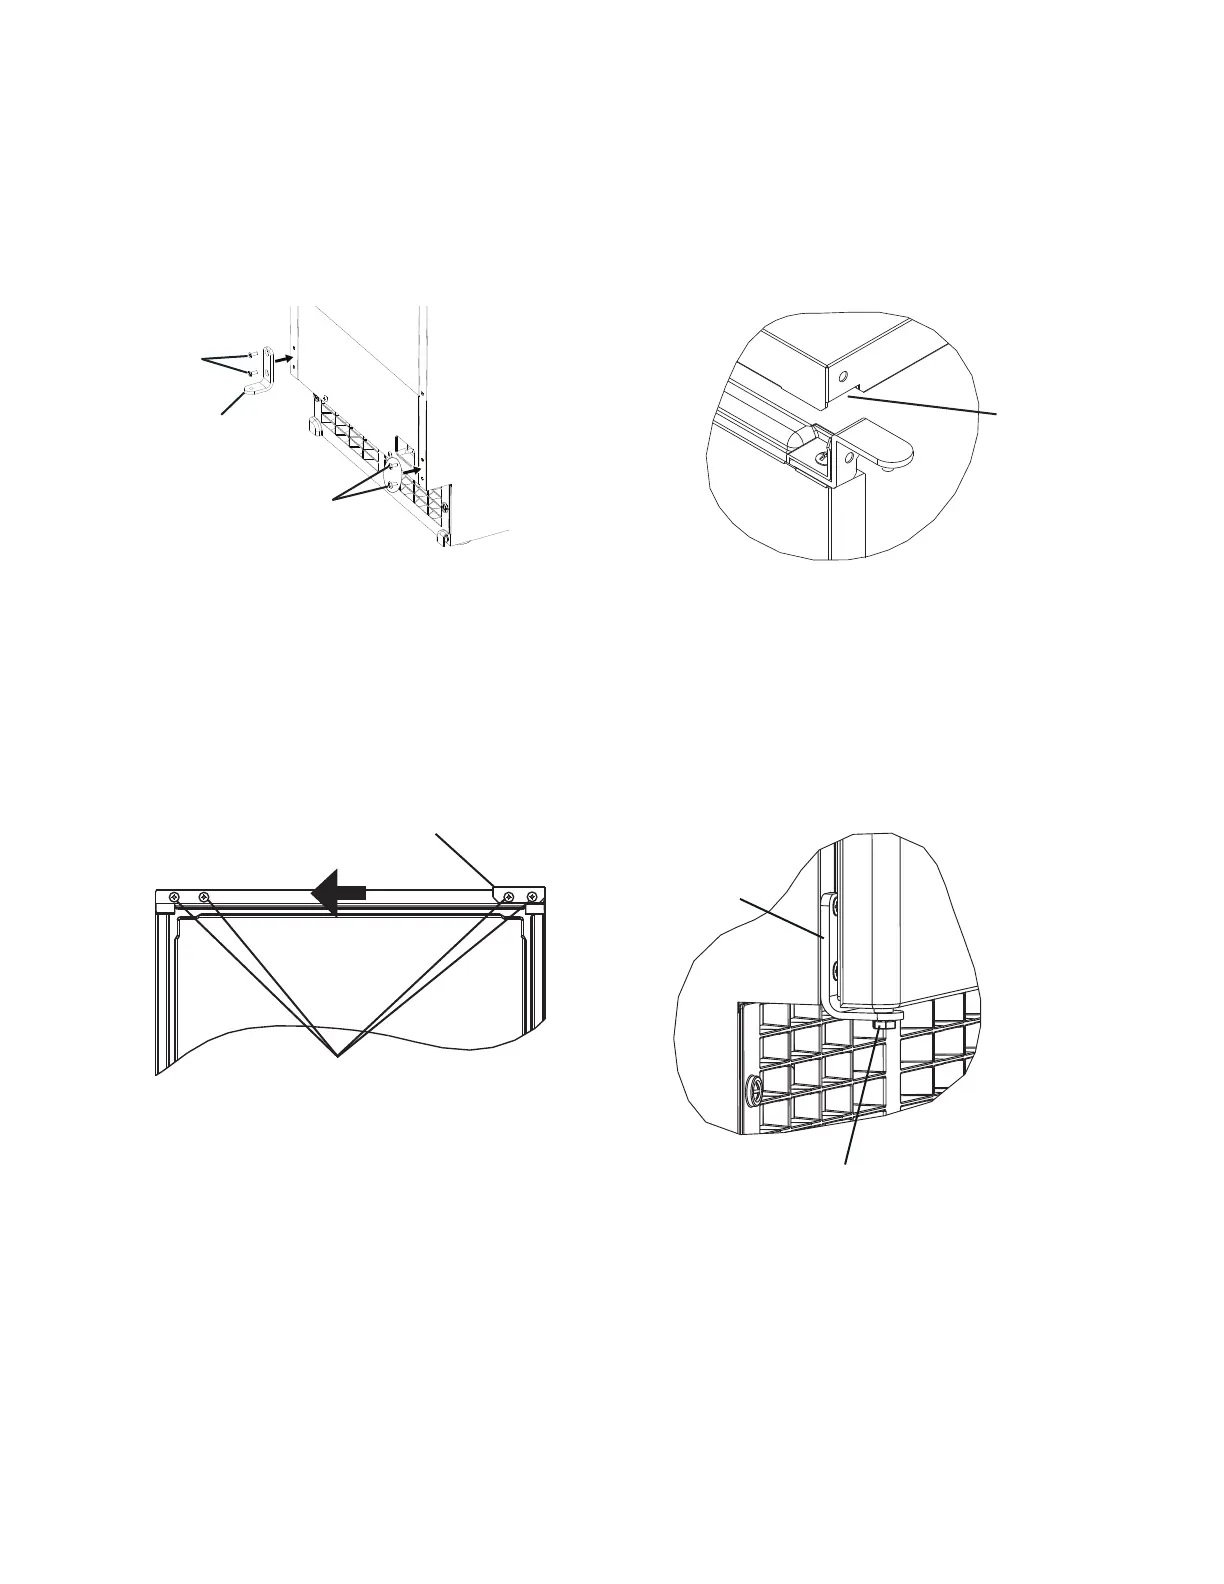
4) Remove hinge (B) from the right side of the appliance and the 2 ller screws from the
left side. Attach the 2 ller screws to the right side and attach hinge (B) to the left side.
See Fig. 4.
5) Rotate the top panel 180° from its previous position. This brings the notch that was
previously in the right rear to the left front. See Fig. 5. Hook the rear part of the panel on
the body, then secure the front with the 2 bolts removed in step 2.
6) Remove the 2 screws attaching the door handle and also remove the other 2 screws
indicated in the illustration. Use 2 of the screws to attach the handle to the other side of
the door and attach the other 2 screws in the remaining 2 holes. See Fig. 6.
7) Attach the door to hinge (A), then continue to maintain a hold on the door. Screw the
hinge stop pin into hinge (B) until it is tight. See Fig. 7.
Hinge Stop Pin
Hinge (B)
Door Handle
Screws
Fig. 6
Fig. 7
Notch
Top Panel
Fig. 4
Fig. 5
Hinge (B)
Filler
Screws
Screws
 Loading...