Hospitex Diagnostics EOS Bravo and EOS Bravo Plus Service Manual
42
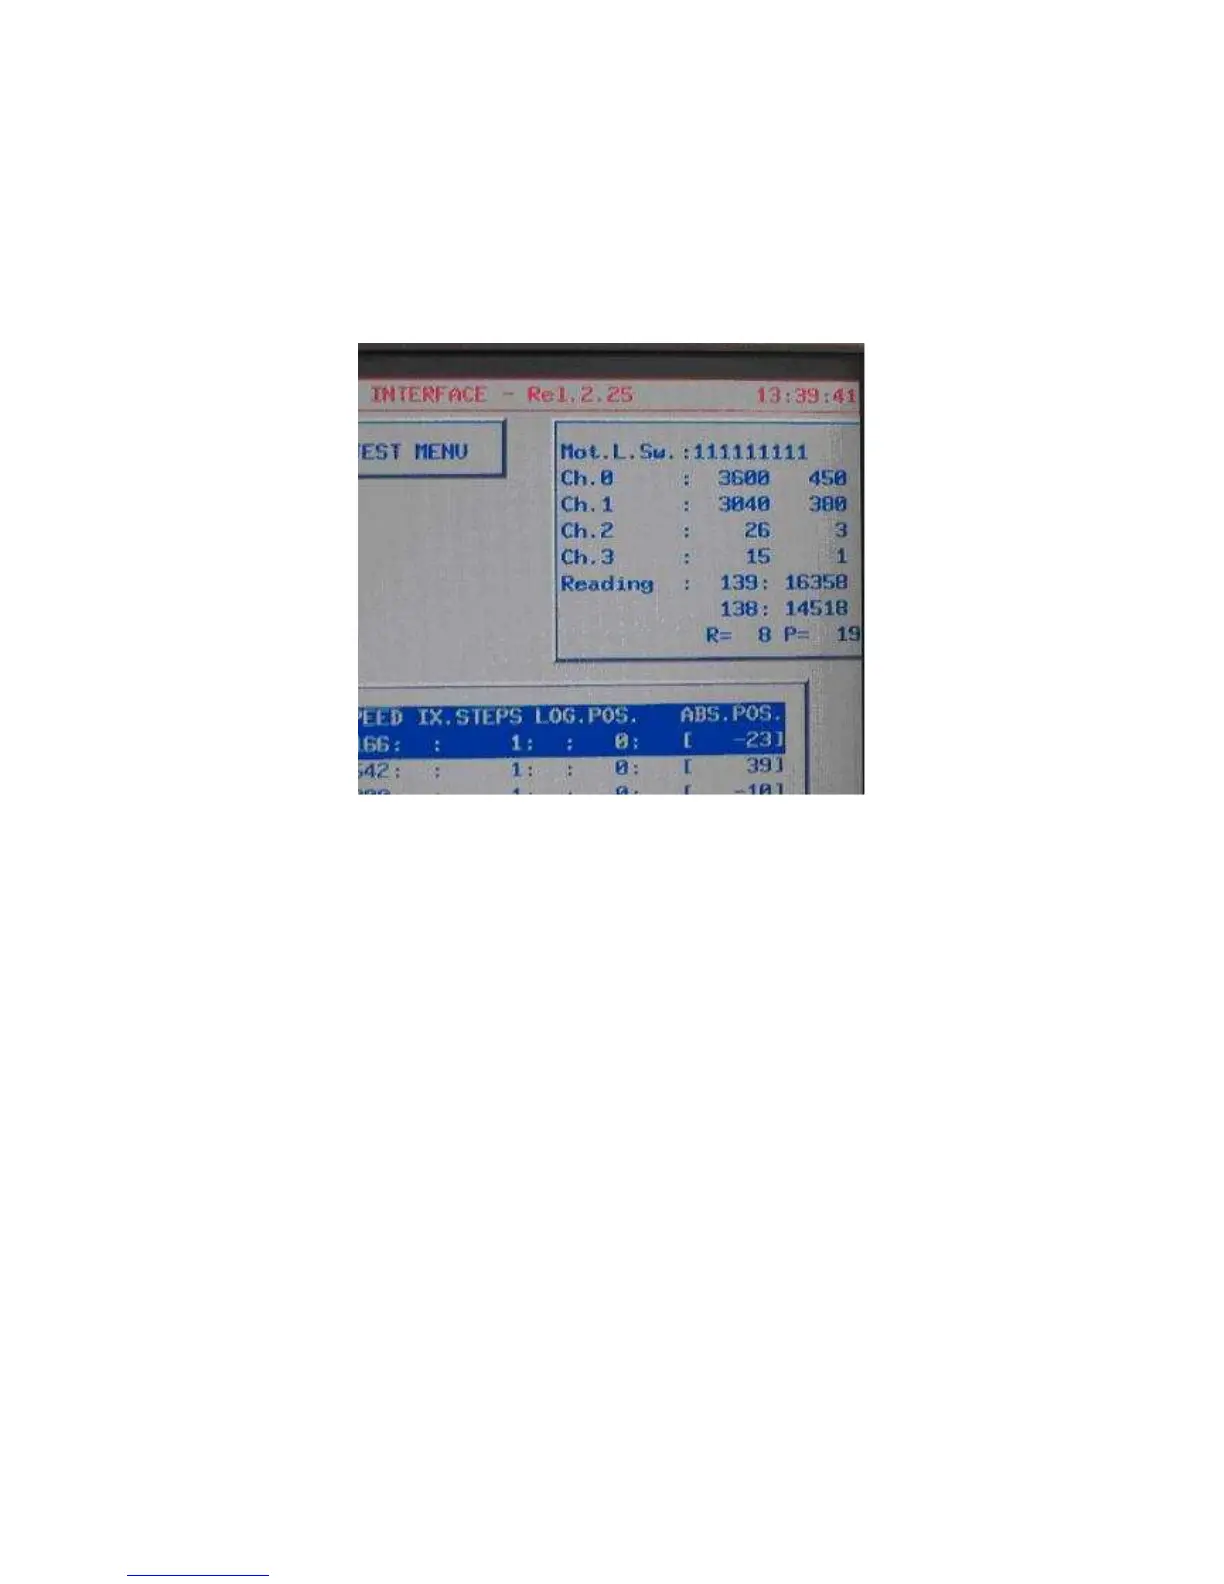
32) verification of the analogical entrance functionality going to the screen hardware test,
pressing in sequence the keys F5 (service), F3 (diagnostics) and again F3 (hardware test)
starting from the main menu, and then activate the continuous visualisation of the entrance
state, pressing the key F5 (entrance vis. ) which will be visible on the upper right side of the
screen.
Control that the number situated on the extreme right of the line with the digit CH.0 indicates a
value tending to 420 and the one at the extreme right line with the digit Ch. 1 indicates a value
tending to 380.
33) control that the tension of the optical lamp is not under the + 5,60 V otherwise regulate it
once again to arrive to the value between the + 5,60 Vcc and + 5,65 Vcc.
34) turn off the instrument, put all the missing screws to complete the fixing of the power and
CPU boards and fix the fan holder with the four screws TC+M3x10. Connect the two fans to the
connector of the cabling with the digit V1 and V2 (MX254 2 poles).
35) turn on the instrument and verify that the two fans are moving regularly without noise and
the air is sent towards the power board.
36) start the initial zero cycle of the instrument, pressing the key Enter which should proceed
and terminate without errors occur. At the end of the you should find the main menu screen.
 Loading...