This document is a user manual for a Hotpoint Ariston dishwasher, model LL 43. It provides comprehensive instructions for installation, operation, maintenance, and troubleshooting in multiple languages, including Italian, English, French, German, Dutch, Spanish, and Greek.
Function Description
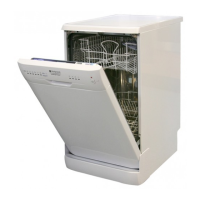
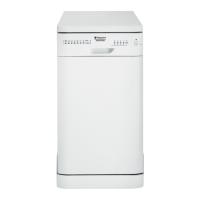
The Hotpoint Ariston LL 43 is a dishwasher designed for domestic use, capable of washing dishes, pans, and cutlery. It features various wash cycles tailored to different levels of soiling and types of crockery, aiming for optimal cleaning and drying performance while considering energy and water efficiency. The appliance includes an automatic filter cleaning system that may extend cycle durations. It also incorporates safety features such as anti-flooding protection and a system to prevent operation without properly installed filters.
Important Technical Specifications
- Dimensions:
- Width: 45 cm
- Height: 85 cm
- Depth: 60 cm
- Capacity: 9 standard place-settings
- Water Supply Pressure: 0.05 ÷ 1MPa (0.5 ÷ 10 bar), 4.3 psi - 145 psi
- Power Supply Voltage: As indicated on the appliance data plate
- Total Absorbed Power: As indicated on the appliance data plate
- Fuse: As indicated on the appliance data plate
- Compliance: Conforms to European Community Directives 73/23/EEC (Low Voltage), 89/336/EEC (Electromagnetic Compatibility), 97/17/EC (Labelling), and 2002/96/CE (WEEE).
Usage Features
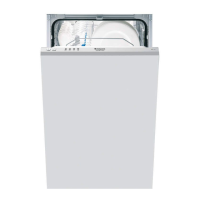
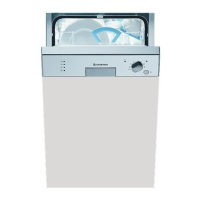
Installation:
The dishwasher should be unpacked and checked for damage. It must be positioned on a level, sturdy floor, with adjustable feet to ensure stability. Water and electricity connections should be performed by a qualified technician, ensuring new hoses are used and the appliance does not rest on cables or hoses. The water inlet hose should be connected to a 3/4 gas threaded tap, and the water run until clear. Hot water supply (up to 60°C) is permissible. The water outlet hose should be connected to a drain duct with a minimum diameter of 4 cm or hung over a sink, ensuring the free end is not immersed in water. An anti-flooding system, including a "Water Stop" safety device with a transparent outer hose and a red inner hose, is integrated.
Loading the Racks:
Before loading, food residues should be removed from crockery, and liquids emptied from glasses. Sprayer arms must rotate freely after loading.
- Lower Rack: Designed for pans, lids, plates, salad bowls, and cutlery. Large plates and covers should be placed at the sides to avoid blocking the upper sprayer arm. Some models feature tip-up sections for flexible loading.
- Cutlery Basket: Knives and sharp utensils should be placed points-down or horizontally in the upper rack's tip-up compartments. Some baskets include a grille element to separate cutlery.
- Upper Rack: For delicate and lightweight crockery like glasses, cups, saucers, and small pans. Lightweight items should be positioned to prevent displacement by water jets. Mugs and cups can be placed on tip-up compartments.
- Rack Height Adjustment: The upper rack's height can be adjusted (ideally when empty) to accommodate different crockery sizes.
Start-up and Use:
- Open the water inlet valve.
- Press the ON/OFF button.
- Open the door and load detergent.
- Load racks and close the door.
- Select a wash cycle using the "Wash Cycle Select" button.
- Select any desired washing options.
- Start the cycle with the START/RESET button.
- At the end of the cycle, switch off the appliance and close the water inlet valve.
- Wait a few minutes before unloading to avoid burns.
Detergent Loading:
Use only dishwasher-specific detergent. Powder detergent is recommended for compartments A and B (pre-wash). For tablets, place one in compartment A and a second (if needed) at the bottom of the appliance. Avoid excessive detergent to prevent foam residue.
Washing Options:
- Delayed Start: The start of a cycle can be delayed by 3, 6, 9, or 12 hours using the "Delayed Start" button.
Wash Cycles:
The manual provides a table of programs, including:
- Super Wash: For extremely soiled dishes and pans (not for delicate items).
- Normal: Standard daily wash cycle for normally soiled pans and dishes.
- Eco: Environmentally-friendly cycle with low energy consumption for pans and dishes.
- Rapid & Dry: Economic and fast cycle for lightly soiled dishes.
- Soak: Preliminary wash for dishes awaiting a full load.
- Crystal: Special cycle for delicate items sensitive to high temperatures.
Rinse Aid and Refined Salt:
- Rinse Aid: Facilitates drying and prevents streaks. Fill the dispenser when the optical indicator (H) or the "Low Rinse Aid" light signals empty. Dosage can be adjusted (1-6) with a screwdriver.
- Refined Salt: Removes limescale from water. Fill the dispenser when the green float is not visible or the "Low Salt" indicator light flashes (approximately every 30 cycles). Use the provided funnel for filling. Dosage can be adjusted based on water hardness.
Maintenance Features
Shutting off Water and Electricity:
Turn off the water tap after each wash and unplug the appliance before cleaning or maintenance.
Cleaning the Dishwasher:
- Exterior and Control Panel: Clean with a damp cloth and warm soapy water; avoid solvents or abrasives.
- Interior Tub: Clean with a damp cloth and a little vinegar to remove marks.
- Preventing Unpleasant Odours: Keep the door ajar to prevent moisture buildup. Regularly clean door seals and detergent dispenser compartments with a damp sponge.
Cleaning the Sprayer Arms:
Check and clean the sprayer arms periodically with a non-metallic brush to remove food residues that may block the water holes.
Cleaning the Filters:
Filters remove food residues from the wash water.
- Remove filters by pulling the handle upwards.
- After each wash: Clean semicircular plate A and glass B under running water.
- Once a month: Thoroughly clean the entire filter assembly (semicircular plate A, glass B, and cylindrical filter C) with a small non-metallic brush.
- Reassemble the filter assembly until it clicks into place.
Leaving the Machine Unused for Extended Periods:
Disconnect electricity and water supplies, leave the door ajar, and run an empty wash cycle upon return.